- Python 物联网入门手册
 PDF电子书集合
Python 图像中边缘和轮廓的检测详解
本章介绍以下主题:
图像处理在从灰度/彩色图像中提取和评估感兴趣区域的几乎所有工程和医学应用中起着至关重要的作用。图像处理方法包括预处理、特征提取和分类。预处理用于提高图像质量;这包括自适应阈值、对比度增强、直方图均衡化和边缘检测。特征提取技术用于从图像中提取突出的特征,以便以后用于分类。
本章介绍了建立图像预处理方案的步骤。
本节介绍如何使用 OpenCV Python 处理图像。此外,我们还讨论了如何加载、显示和保存图像。
- 导入计算机视觉软件包-
cv2:
import cv2 - 使用内置的
imread功能读取图像:
image = cv2.imread('image_1.jpg')- 使用内置的
imshow功能显示原始图像:
cv2.imshow("Original", image) - 等待,直到按下任何键:
cv2.waitKey(0) - 使用内置的
imwrite功能保存图像:
cv2.imwrite("Saved Image.jpg", image) - 用于执行 Python 程序
Load_Display_Save.py的命令如下所示:

- 执行
Load_Display_Save.py后得到的结果如下:
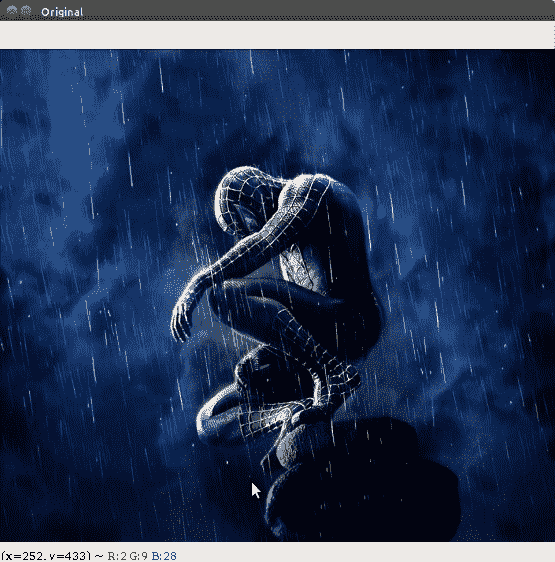
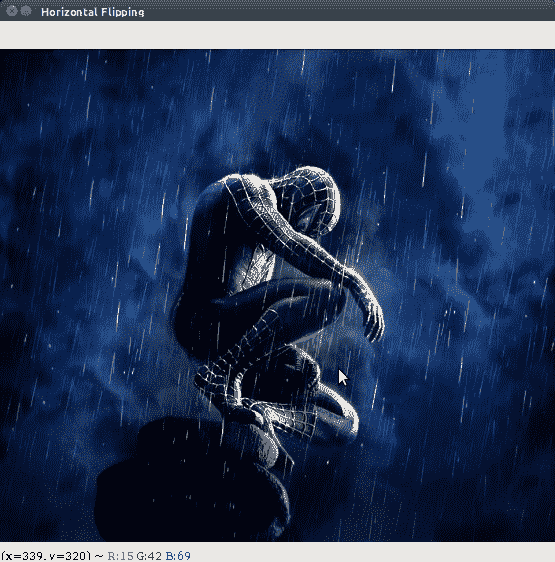
在图像翻转操作中,我们可以水平、垂直、水平和垂直翻转输入图像。
- 导入计算机视觉软件包-
cv2:
import cv2 - 使用内置的
imread功能读取图像:
image = cv2.imread('image_2.jpg')- 使用内置的
imshow功能显示原始图像:
cv2.imshow("Original", image) - 等待,直到按下任何键:
cv2.waitKey(0) - 在测试图像上执行所需的操作:
# cv2.flip is used to flip images
# Horizontal flipping of images using value '1'
flipping = cv2.flip(image, 1) - 显示水平翻转的图像:
# Display horizontally flipped image
cv2.imshow("Horizontal Flipping", flipping) - 等待,直到按下任何键:
cv2.waitKey(0) - 执行输入图像的垂直翻转:
# Vertical flipping of images using value '0'
flipping = cv2.flip(image, 0) - 显示垂直翻转的图像:
cv2.imshow("Vertical Flipping", flipping) - 等待,直到按下任何键:
cv2.waitKey(0) - 显示处理后的图像:
# Horizontal & Vertical flipping of images using value '-1'
flipping = cv2.flip(image, -1)
# Display horizontally & vertically flipped image
cv2.imshow("Horizontal & Vertical Flipping", flipping)
# Wait until any key is pressed
cv2.waitKey(0)- 停止执行并显示结果:
# Close all windows
cv2.destroyAllWindows() - 用于执行
Flipping.pyPython 程序的命令如下所示:

- 执行
Flipping.py后获得的原始图像和水平翻转图像如下所示:
下面是水平翻转的图片:
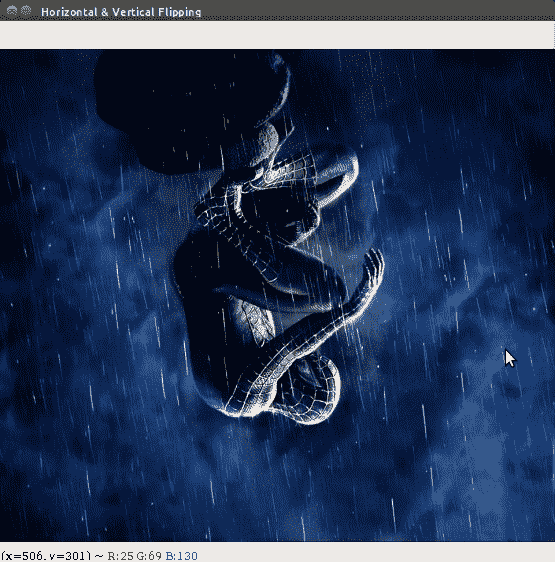
- 执行
Flipping.py后获得的垂直、水平和垂直翻转图像如下所示:
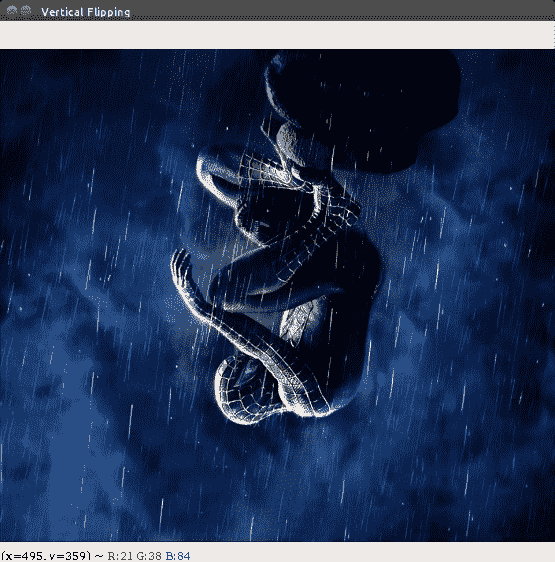
以下是水平和垂直翻转的图片:
图像缩放用于根据需求修改输入图像的尺寸。OpenCV 中通常使用三种类型的缩放操作符,它们是立方、面积和线性插值。
- 创建新的 Python 文件并导入以下包:
# Scaling (Resizing) Images - Cubic, Area, Linear Interpolations
# Interpolation is a method of estimating values between known data points
# Import Computer Vision package - cv2
import cv2
# Import Numerical Python package - numpy as np
import numpy as np - 使用内置的
imread功能读取图像:
image = cv2.imread('image_3.jpg') - 使用内置的
imshow功能显示原始图像:
cv2.imshow("Original", image) - 等待,直到按下任何键:
cv2.waitKey() - 根据操作员的命令调整图像大小:
# cv2.resize(image, output image size, x scale, y scale, interpolation) - 使用三次插值调整图像大小:
# Scaling using cubic interpolation
scaling_cubic = cv2.resize(image, None, fx=.75, fy=.75, interpolation = cv2.INTER_CUBIC) - 显示输出图像:
# Display cubic interpolated image
cv2.imshow('Cubic Interpolated', scaling_cubic) - 等待,直到按下任何键:
cv2.waitKey()- 使用区域插值调整图像大小:
# Scaling using area interpolation
scaling_skewed = cv2.resize(image, (600, 300), interpolation = cv2.INTER_AREA) - 显示输出图像:
# Display area interpolated image
cv2.imshow('Area Interpolated', scaling_skewed) - 等待操作员的指示:
# Wait until any key is pressed
cv2.waitKey() - 使用线性插值调整图像大小:
# Scaling using linear interpolation
scaling_linear = cv2.resize(image, None, fx=0.5, fy=0.5, interpolation = cv2.INTER_LINEAR) - 显示输出图像:
# Display linear interpolated image
cv2.imshow('Linear Interpolated', scaling_linear) - 等待,直到按下任何键:
cv2.waitKey() - 完成图像缩放任务后,终止程序执行:
# Close all windows
cv2.destroyAllWindows() - 用于执行
Scaling.pyPython 程序的命令如下所示:

- 用于缩放的原始图像如下所示:

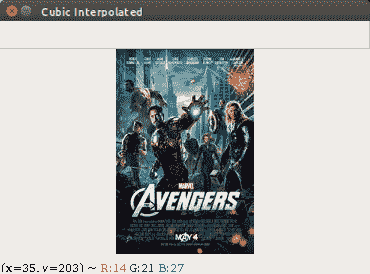
- 执行
Scaling.py文件后得到的线性插值输出如下图所示:

- 执行
Scaling.py文件后得到的面积插值输出如下图所示:

- 执行
Scaling.py文件后得到的三次插值输出如下图所示:
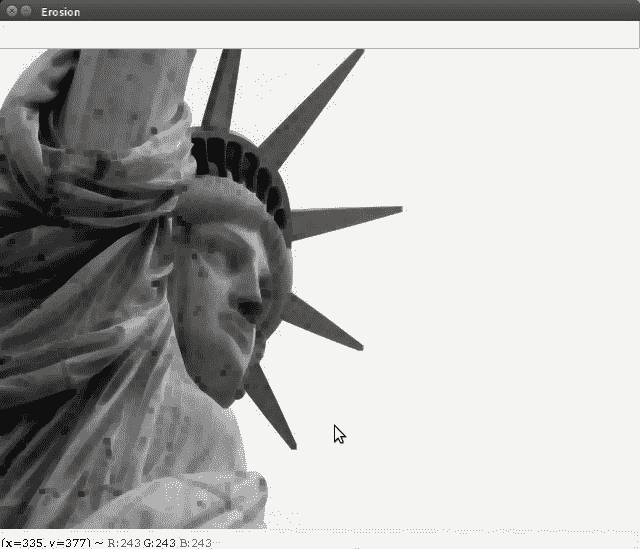
侵蚀和扩张是形态学操作。侵蚀会移除图像中对象边界处的像素,而膨胀会将像素添加到图像中对象的边界。
- 导入计算机视觉软件包–
cv2:
import cv2 - 导入数字 Python 包–
numpy as np:
import numpy as np - 使用内置的
imread功能读取图像:
image = cv2.imread('image_4.jpg')- 使用内置的
imshow功能显示原始图像:
cv2.imshow("Original", image) - 等待,直到按下任何键:
cv2.waitKey(0) - 给定形状和类型,用以下各项填充:
# np.ones(shape, dtype)
# 5 x 5 is the dimension of the kernel, uint8: is an unsigned integer (0 to 255)
kernel = np.ones((5,5), dtype = "uint8") -
cv2.erode是用于侵蚀的内置功能:
# cv2.erode(image, kernel, iterations)
erosion = cv2.erode(image, kernel, iterations = 1) - 使用内置的
imshow功能显示腐蚀后的图像:
cv2.imshow("Erosion", erosion) - 等待,直到按下任何键:
cv2.waitKey(0) -
cv2.dilate是用于扩容的内置功能:
# cv2.dilate(image, kernel, iterations)
dilation = cv2.dilate(image, kernel, iterations = 1) - 使用内置的
imshow功能显示放大后的图像:
cv2.imshow("Dilation", dilation) - 等待,直到按下任何键:
cv2.waitKey(0) - 关闭所有窗口:
cv2.destroyAllWindows()- 用于执行
Erosion_Dilation.py文件的命令如下所示:

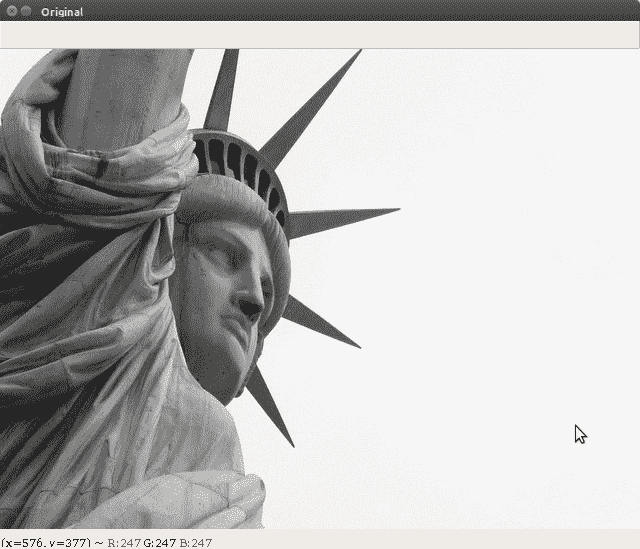
- 用于执行
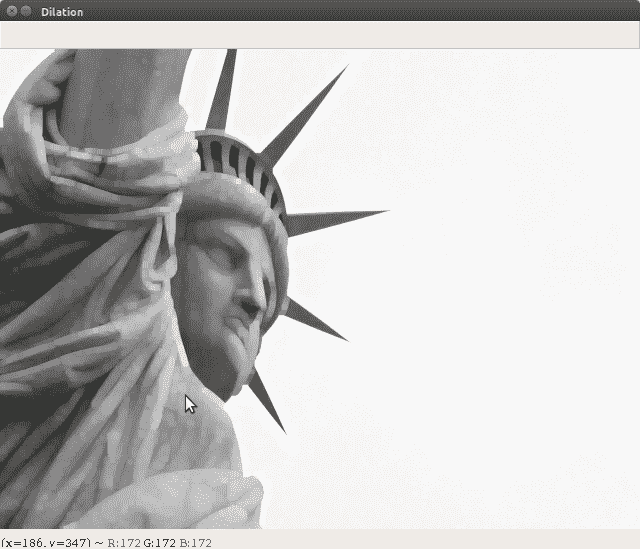
Erosion_Dilation.py文件的输入图像如下所示:
- 执行
Erosion_Dilation.py文件后得到的腐蚀图像如下图所示:
- 执行
Erosion_Dilation.py文件后获得的放大图像如下所示:
分割是将图像分割成不同区域的过程。轮廓是围绕对象边界的直线或曲线。本节将讨论使用轮廓的图像分割。
- 导入计算机视觉软件包-
cv2:
import cv2
# Import Numerical Python package - numpy as np
import numpy as np - 使用内置的
imread功能读取图像:
image = cv2.imread('image_5.jpg') - 使用内置的
imshow功能显示原始图像:
cv2.imshow("Original", image) - 等待,直到按下任何键:
cv2.waitKey(0) - 执行
Canny边缘检测系统:
# cv2.Canny is the built-in function used to detect edges
# cv2.Canny(image, threshold_1, threshold_2)
canny = cv2.Canny(image, 50, 200) - 使用内置的
imshow功能显示检测到的边缘输出图像:
cv2.imshow("Canny Edge Detection", canny) - 等待,直到按下任何键:
cv2.waitKey(0)- 执行轮廓检测系统:
# cv2.findContours is the built-in function to find contours
# cv2.findContours(canny, contour retrieval mode, contour approximation mode)
# contour retrieval mode: cv2.RETR_LIST (retrieves all contours)
# contour approximation mode: cv2.CHAIN_APPROX_NONE (stores all boundary points)
contours, hierarchy = cv2.findContours(canny, cv2.RETR_LIST, cv2.CHAIN_APPROX_NONE) - 在图像上绘制轮廓:
# cv2.drawContours is the built-in function to draw contours
# cv2.drawContours(image, contours, index of contours, color, thickness)
cv2.drawContours(image, contours, -1, (255,0,0), 10)
# index of contours = -1 will draw all the contours - 显示图像的草图轮廓:
# Display contours using imshow built-in function
cv2.imshow("Contours", image) - 等待,直到按下任何键:
cv2.waitKey() - 终止程序并显示结果:
# Close all windows
cv2.destroyAllWindows() - 执行
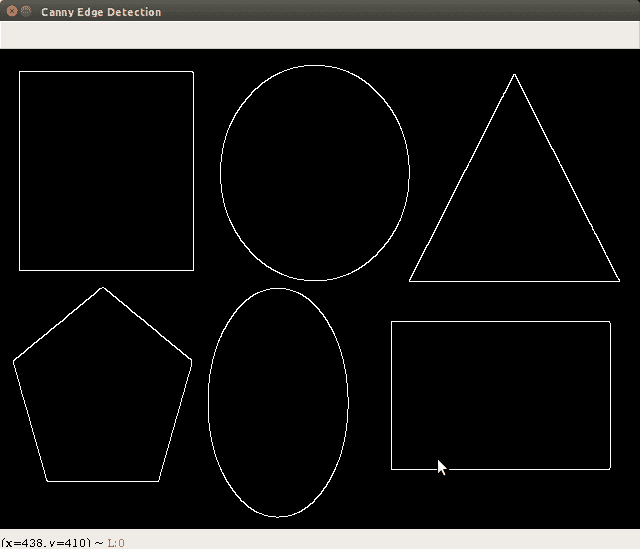
Image_Segmentation.py文件后得到的结果如下:

以下是边缘检测输出:
模糊和锐化是用于增强输入图像的图像处理操作。
- 导入计算机视觉软件包-
cv2:
import cv2
# Import Numerical Python package - numpy as np
import numpy as np - 使用内置的
imread功能读取图像:
image = cv2.imread('image_6.jpg') - 使用内置的
imshow功能显示原始图像:
cv2.imshow("Original", image) - 等待,直到按下任何键:
cv2.waitKey(0) - 使用模糊操作执行像素级操作:
# Blurring images: Averaging, cv2.blur built-in function
# Averaging: Convolving image with normalized box filter
# Convolution: Mathematical operation on 2 functions which produces third function.
# Normalized box filter having size 3 x 3 would be:
# (1/9)  [[1, 1, 1],
#         [1, 1, 1],
#         [1, 1, 1]]
blur = cv2.blur(image,(9,9)) # (9 x 9) filter is used - 显示模糊图像:
cv2.imshow('Blurred', blur) - 等待,直到按下任何键:
cv2.waitKey(0)- 使用锐化操作执行像素级操作:
# Sharpening images: Emphasizes edges in an image
kernel = np.array([[-1,-1,-1],
                   [-1,9,-1],
                   [-1,-1,-1]])
# If we don't normalize to 1, image would be brighter or darker respectively
# cv2.filter2D is the built-in function used for sharpening images
# cv2.filter2D(image, ddepth, kernel)
# ddepth = -1, sharpened images will have same depth as original image
sharpened = cv2.filter2D(image, -1, kernel) - 显示锐化图像:
cv2.imshow('Sharpened', sharpened) - 等待,直到按下任何键:
cv2.waitKey(0) - 终止程序执行:
# Close all windows
cv2.destroyAllWindows() - 用于执行
Blurring_Sharpening.pyPython 程序文件的命令如下所示:

- 用于执行
Blurring_Sharpening.py文件的输入图像如下所示:

- 执行
Blurring_Sharpening.py文件后获得的模糊图像如下所示:

- 执行
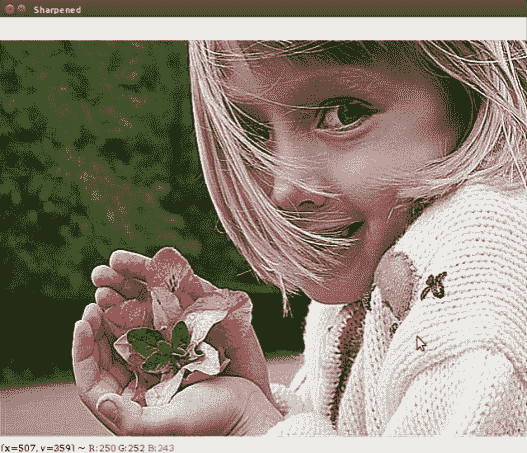
Blurring_Sharpening.py文件后得到的锐化图像如下图所示:
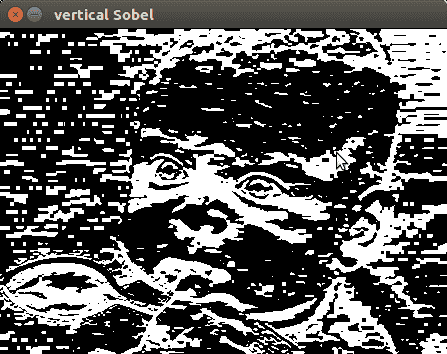
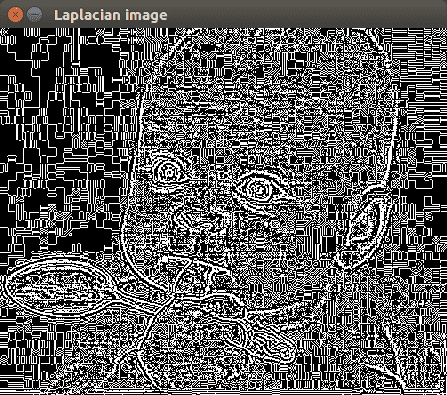
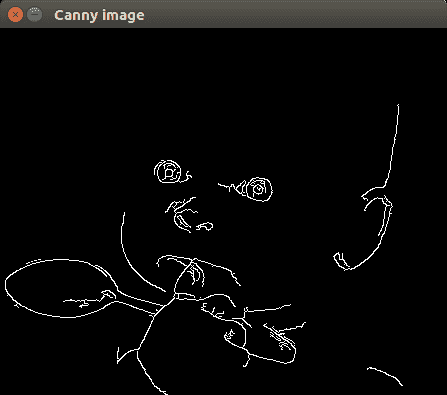
边缘检测用于检测图像中的边界。它提供了有关形状和区域属性的详细信息。这包括周长、长轴尺寸和短轴尺寸。
- 导入必要的软件包:
import sys
import cv2
import numpy as np - 读取输入图像:
in_file = sys.argv[1]
image = cv2.imread(in_file, cv2.IMREAD_GRAYSCALE) - 实施 Sobel 边缘检测方案:
horizontal_sobel = cv2.Sobel(image, cv2.CV_64F, 1, 0, ksize=5)
vertical_sobel = cv2.Sobel(image, cv2.CV_64F, 0, 1, ksize=5)
laplacian_img = cv2.Laplacian(image, cv2.CV_64F)
canny_img = cv2.Canny(image, 30, 200) - 显示输入图像及其相应的输出:
cv2.imshow('Original', image)
cv2.imshow('horizontal Sobel', horizontal_sobel)
cv2.imshow('vertical Sobel', vertical_sobel)
cv2.imshow('Laplacian image', laplacian_img)
cv2.imshow('Canny image', canny_img) - 等待操作员的指示:
cv2.waitKey() - 显示输入图像和相应的结果:
cv2.imshow('Original', image)
cv2.imshow('horizontal Sobel', horizontal_sobel)
cv2.imshow('vertical Sobel', vertical_sobel)
cv2.imshow('Laplacian image', laplacian_img)
cv2.imshow('Canny image', canny_img) - 等待操作员的指示:
cv2.waitKey()- 用于执行
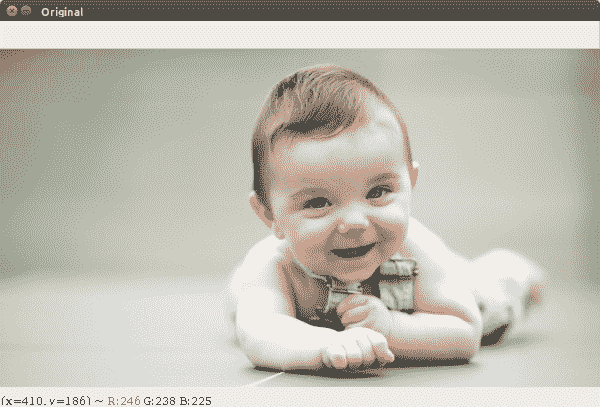
Detecting_edges.pyPython 程序文件的命令以及输入图像(baby.jpg)如下所示:

- 执行
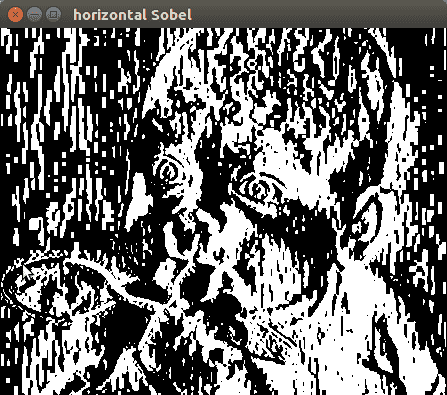
Detecting_edges.py文件后获得的输入图像和水平 Sobel 滤波器输出如下所示:
- 执行
Detecting_edges.py文件后获得的垂直 Sobel 滤波器输出和拉普拉斯图像输出如下所示:
以下是拉普拉斯图像输出:
- 执行
Detecting_edges.py文件后得到的Canny边缘检测输出如下图所示:
读者可以参考以下文档了解什么是边缘检测及其对测试图片的影响:
http://citeseerx.ist.psu.edu/viewdoc/summary?doi=10.1.1.301.927
请参阅以下文件:
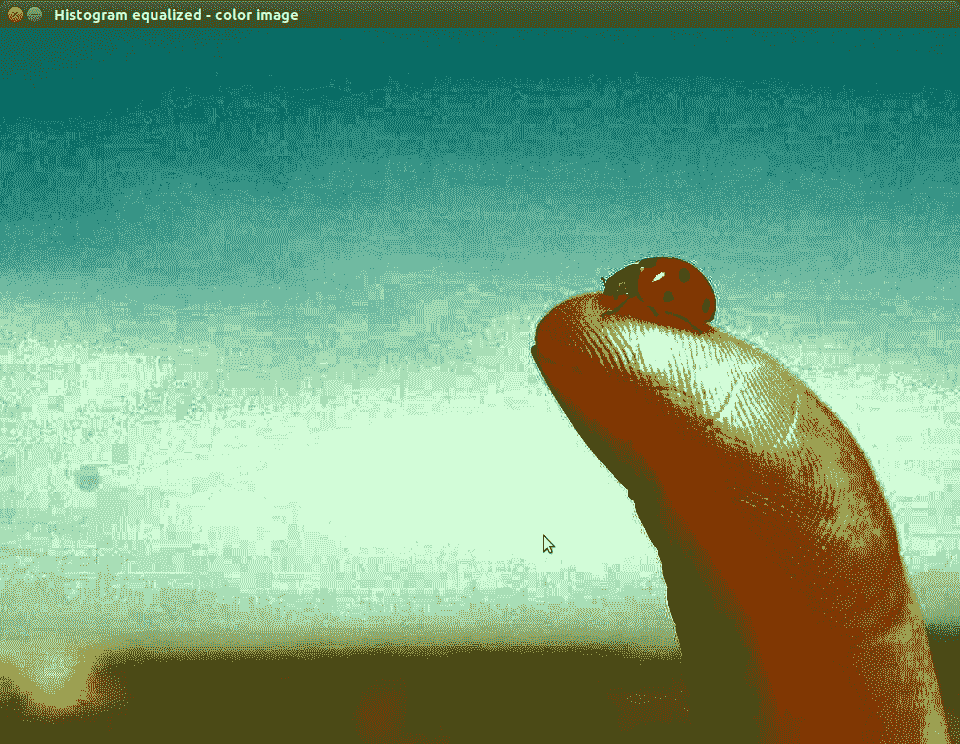
直方图均衡化用于增强图像的可见性和对比度。它通过改变图像强度来执行。这里清楚地描述了这些程序。
- 导入必要的软件包:
import sys
import cv2
import numpy as np - 加载输入图像:
in_file = sys.argv[1]
image = cv2.imread(in_file) - 将 RGB 图像转换为灰度:
image_gray = cv2.cvtColor(image, cv2.COLOR_BGR2GRAY)
cv2.imshow('Input grayscale image', image_gray) - 调整灰度图像的直方图:
image_gray_histoeq = cv2.equalizeHist(image_gray)
cv2.imshow('Histogram equalized - grayscale image', image_gray_histoeq) - 调整 RGB 图像的直方图:
image_yuv = cv2.cvtColor(image, cv2.COLOR_BGR2YUV)
image_yuv[:,:,0] = cv2.equalizeHist(image_yuv[:,:,0])
image_histoeq = cv2.cvtColor(image_yuv, cv2.COLOR_YUV2BGR) - 显示输出图像:
cv2.imshow('Input image', image)
cv2.imshow('Histogram equalized - color image', image_histoeq)
cv2.waitKey()- 用于执行
histogram.pyPython 程序文件的命令以及输入图像(finger.jpg)如下所示:

- 用于执行
histogram.py文件的输入图像如下所示:
- 执行
histogram.py文件后得到的直方图均衡灰度图像如下:

- 执行
histogram.py文件后得到的直方图均衡彩色图像如下图所示:
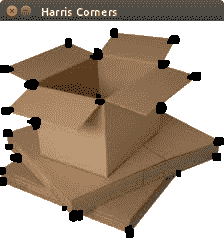
角点是图像中的边界,用于提取推断图像内容的特殊特征。角点检测常用于图像配准、视频跟踪、图像拼接、运动检测、三维建模、全景拼接和目标识别。
- 导入必要的软件包:
import sys
import cv2
import numpy as np - 加载输入图像:
in_file = sys.argv[1]
image = cv2.imread(in_file)
cv2.imshow('Input image', image)
image_gray1 = cv2.cvtColor(image, cv2.COLOR_BGR2GRAY)
image_gray2 = np.float32(image_gray1) - 实施 Harris 角点检测方案:
image_harris1 = cv2.cornerHarris(image_gray2, 7, 5, 0.04) - 放大输入图像并构造角点:
image_harris2 = cv2.dilate(image_harris1, None) - 实现图像阈值化:
image[image_harris2 > 0.01 * image_harris2.max()] = [0, 0, 0] - 显示输入图像:
cv2.imshow('Harris Corners', image) - 等待操作员的指示:
cv2.waitKey() - 用于执行
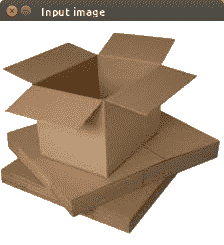
Detecting_corner.pyPython 程序文件的命令以及输入图像(box.jpg)如下所示:

- 用于执行
Detecting_corner.py文件的输入图像如下所示:
- 执行
Detecting_corner.py文件后得到的 Harris 角如下:
要了解输入图像的工作原理,请参阅以下内容:
- 图像角点检测涉及在给定图片中查找边/角点。它可以用于从灰度和 RGB 图像中提取重要的形状特征。请参阅本关于边缘和角点检测的调查文件:
https://pdfs.semanticscholar.org/24dd/6c2c08f5601e140aad5b9170e0c7485f6648.pdf 。