- Python 物联网编程
 PDF电子书集合
Python 设置 Raspberry Pi Web 服务器详解
我们将通过学习如何使用 CherryPy web 服务器框架,开始创建物联网家庭安全仪表板的旅程。本章首先介绍樱桃糖。在使用第 4 章中订阅 Web 服务的CurrentWeather类的修改版本创建 HTML 天气仪表板之前,我们将浏览几个示例。
本章将介绍以下主题:
为了完成本章,读者应该具备 Python 的实用知识。要完成本章中的项目,还需要对 HTML(包括 CSS)有基本的了解。
在本章中,我们将使用 CherryPy 和 Bootstrap 框架构建一个 HTML 天气仪表板。完成项目不需要熟悉这些框架。
这个项目需要几个小时才能完成。
为完成本项目,需要以下各项:
- Raspberry Pi 3 型(2015 型或更新型)
- USB 电源
- 计算机显示器
- USB 键盘
- USB 鼠标
对于我们的项目,我们将使用 CherryPy Python 库(请注意,它是带有“y”的 CherryPy,而不是带有“i”的 CherryPi)。
根据他们的网站,CherryPy 是一个 Pythonic 的、面向对象的 web 框架。CherryPy 使开发人员能够像构建任何面向对象的 Python 程序一样构建 web 应用程序。在真正的 Python 风格中,CherryPy 程序比其他 web 框架的代码更少,开发时间也更短。
使用 CherryPy 的一些公司包括:
- Netflix:Netflix 通过 RESTful API 调用在其基础设施中使用 CherryPy。Netflix 使用的其他 Python 库包括瓶子和 SciPy。
- Hulu:CherryPy 用于 Hulu 的一些项目。
- Indigo Domotics:Indigo Domotics 是一家使用 CherryPy 框架的家庭自动化公司。
我们将使用 Python 的pip3包管理系统来安装 CherryPy。
A package management system is a program that helps install and configure applications. It can also carry out upgrades and uninstalls.
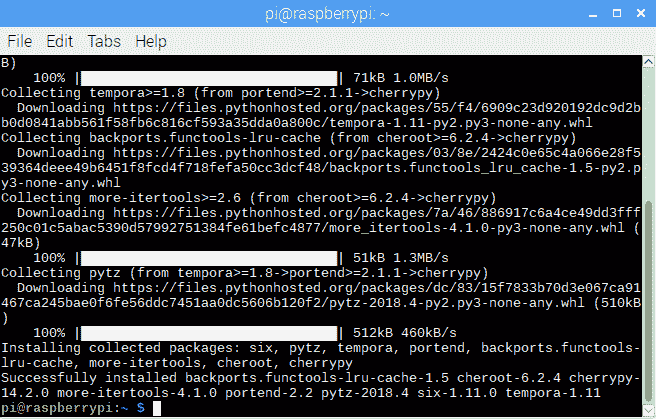
要执行此操作,请打开终端窗口并键入以下内容:
sudo pip3 install cherrypy点击进入。您应该在终端中看到以下内容:
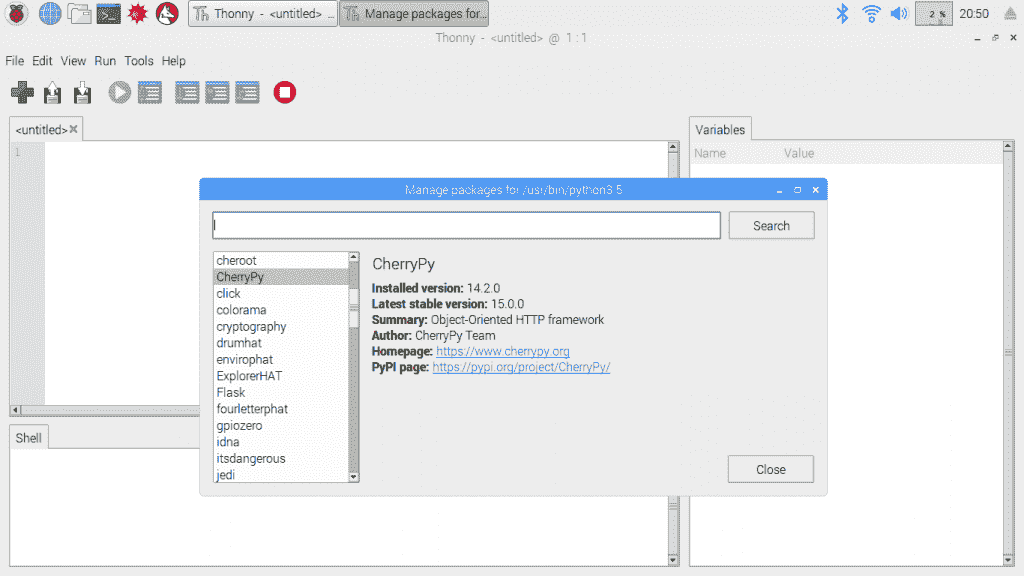
在 Thonny 中,转到工具管理软件包。您应该看到 CherryPy 现在已安装,如下所示:
首先,让我们用 CherryPy 构建最基本的程序。当然,我的意思是,无处不在的Hello World程序,我们将用它来表示Hello Raspberry Pi!。在使用第 4 章中订阅 Web 服务的CurrentWeather类的修改版本构建仪表板以显示天气数据之前,我们将学习几个示例。
要构建Hello Raspberry Pi!网页,请执行以下操作:
-
从应用程序菜单|编程| Thonny Python IDE 打开 Thonny。
-
单击新建图标创建一个新文件。
-
键入以下内容:
import cherrypy

class HelloWorld():

     @cherrypy.expose
     def index(self):
         return "Hello Raspberry Pi!"

cherrypy.quickstart(HelloWorld())
- 确保行
cherrypy.quickstart(HelloWorld())与import和class语句保持一致。 - 将文件另存为
HelloRaspberryPi.py。 - 点击绿色
Run current script按钮运行文件。 - 您应该看到 CherryPy web 服务器正在启动,如 shell 中所示:

- 从输出到 shell,您应该能够观察 CherryPy 运行的 ip 地址和端口,
http://127.0.0.1:8080。您可以将 ip 地址识别为环回地址。CherryPy 使用端口8080。 - 在 Raspberry Pi 上打开 web 浏览器,然后键入上一步中的地址:

恭喜你,你刚刚把你简陋的 Raspberry Pi 变成了一个 web 服务器。
如果你像我一样,你可能不会想到用这么少的代码就能创建一个 web 服务器。CherryPy 主要关注一项任务,即接收 HTTP 请求并将其转换为 Python 方法。
那么它是如何工作的呢?我们的HelloWorld类@cherrypy.expose中的装饰器公开了恰好对应于 web 服务器根的方法索引。当我们使用环回地址(127.0.0.1和 CherryPy 运行的端口(8080加载我们的网页时,index方法被用作页面。在我们的代码中,我们只需返回字符串Hello Raspberry Pi!,然后将其显示为我们的网页。
The loopback address is an IP number used as the software loopback interface of a machine. This number is generally 127.0.0.1. This address is not physically connected to a network and is used often to test the installation of a web server installed on the same machine.
那么,如果我们在 Python 代码中公开另一个方法,会发生什么呢?我们可以在方法之前使用 decorator 轻松地检查这一点。让我们编写一些代码来实现这一点:
-
从应用程序菜单|编程| Thonny Python IDE 打开 Thonny。
-
单击新建图标创建一个新文件。
-
键入以下内容:
import cherrypy

class HelloWorld():

     @cherrypy.expose
     def index(self):
         return "Hello Raspberry Pi!"

     @cherrypy.expose
     def sayHello(self, myFriend=" my friend"):
         return "Hello " + myFriend

cherrypy.quickstart(HelloWorld())- 将文件另存为
SayHello.py。 - 单击中断/重置按钮,然后单击运行当前脚本按钮,停止并启动 CherryPy 服务器。
- 现在,在浏览器的地址栏中键入以下内容,然后按输入:
http://127.0.0.1:8080/sayHello - 您应该看到以下内容:

那么这次我们做了什么不同的事情呢?首先,我们不仅仅访问服务器的根。我们在 URL 中添加了/sayHello。通常,当我们在 web 服务器上这样做时,我们会被定向到一个子文件夹。在本例中,我们使用了我们的HelloWorld类中的方法,称为sayHello()。
如果我们仔细观察sayHello()方法,我们可以看到它采用了一个名为myFriend的参数:
@cherrypy.expose
def sayHello(self, myFriend=" my friend"):
return "Hello " + myFriend我们可以看到,myFriend参数有一个默认值my Friend。因此,当我们运行 CherryPy 并导航到位于http://127.0.0.1:8080/sayHello的 URL 时,将调用sayHello方法并返回"Hello " + my friend字符串。
现在,在地址框中键入以下内容并点击输入:http://127.0.0.1:8080/sayHello?myFriend=Raspberry%20Pi
在这个 URL 中,我们将myFriend的值设置为Raspberry%20Pi(使用%20代替空格)。我们应该得到与第一个示例相同的结果。
正如我们所看到的,将 Python 方法连接到 HTML 输出非常容易。
静态页面曾经在互联网上无处不在。静态页面之间的简单链接构成了当时被视为 web 站点的内容。然而,从那时起,已经发生了很多变化,能够提供一个简单的 HTML 页面仍然是 web 服务器框架的基本要求。
那么,我们该如何处理 CherryPy 呢?其实很简单。我们只需在一个方法中打开一个静态 HTML 页面并返回它。让 CherryPy 通过执行以下操作提供一个静态页面:
- 从应用程序菜单|编程| Thonny Python IDE 打开 Thonny。
- 单击新建图标创建一个新文件。
- 键入以下内容:
<html>
    <body>
        This is a static HTML page.
    </body>
</html>- 将文件另存为
static.html。 - 在 Thonny 中,单击新建图标,在与
static.html相同的目录中创建一个新文件。 - 键入以下内容:
import cherrypy

class StaticPage():

     @cherrypy.expose
     def index(self):
         return open('static.html')

cherrypy.quickstart(StaticPage())- 将文件另存为
StaticPage.py。 - 如果 CherryPy 仍在运行,请单击红色按钮停止运行。
- 运行文件
StaticPage.py启动 CherryPy。 - 您应该看到 CherryPy 正在启动,如 shell 中所示。
- 要查看我们的新静态网页,请在 Raspberry Pi 上打开 web 浏览器,并在地址栏中键入以下内容:
http://127.0.0.1:8080 - 您应该会看到显示的静态页面:
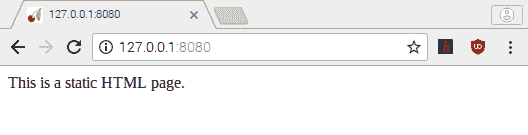
那么我们在这里做了什么?我们更改了index方法,使其返回一个打开的static.html文件,返回行为open ('static.html')。这在我们的浏览器中打开了static.html作为我们的索引(或http://127.0.0.1:8080/index。请注意,尝试在 url(http://127.0.0.1:8080/static.html中键入页面名称static.html将不起作用。CherryPy 根据方法名称提供内容。在本例中,方法名为 index,这是默认值。
现在是时候补充我们从前面章节学到的东西了。让我们从第四章*订阅 Web 服务*es重新审视CurrentWeather类,我们将其更名为WeatherData,因为这个名字更适合这个项目,并将其稍作修改。
-
从应用程序菜单|编程| Thonny Python IDE 打开 Thonny
-
单击新建图标创建一个新文件
-
键入以下内容:
from weather import Weather, Unit
import time

class WeatherData:

    temperature = 0
    weather_conditions = ''
    wind_speed = 0
    city = ''

    def __init__(self, city):
        self.city = city
        weather = Weather(unit = Unit.CELSIUS)
        lookup = weather.lookup_by_location(self.city)
        self.temperature = lookup.condition.temp
        self.weather_conditions = lookup.condition.text
        self.wind_speed = lookup.wind.speed

    def getTemperature(self):
        return self.temperature + " C"

    def getWeatherConditions(self):
        return self.weather_conditions

    def getWindSpeed(self):
        return self.wind_speed + " kph"

    def getCity(self):
        return self.city

    def getTime(self):
        return time.ctime()

if __name__ == "__main__":

    current_weather = WeatherData('London')
    print(current_weather.getTemperature())
    print(current_weather.getWeatherConditions())
print(current_weather.getTime())-
将文件另存为
WeatherData.py -
运行代码
-
您应该可以在下面的外壳中看到英国伦敦的天气:
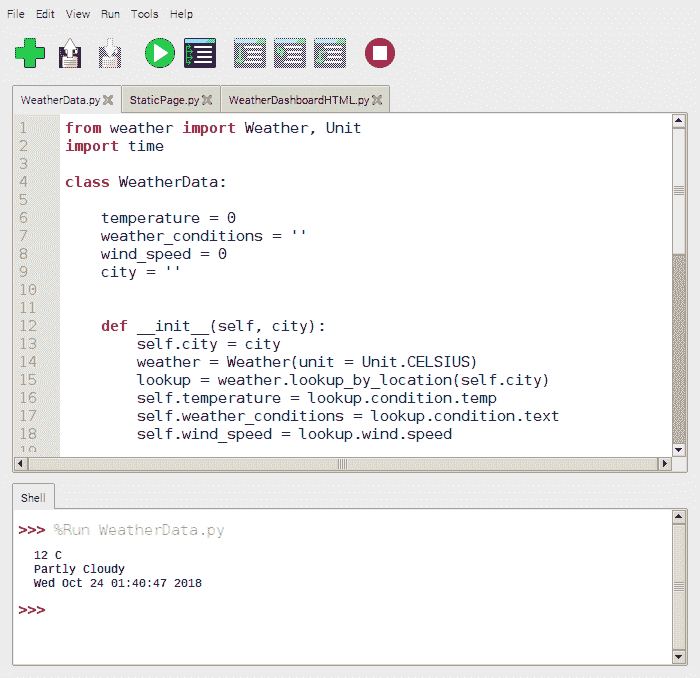
让我们看一下代码。基本上WeatherData.py与第四章中的CurrentWeather.py完全相同*订阅网络服务*es,但有一个额外的方法称为getTime:
def getTime(self):
    return time.ctime()
我们使用此方法返回调用 weather web 服务以在网页中使用的时间。
现在我们将使用 CherryPy 和引导框架来创建我们的仪表板。要执行此操作,请执行以下操作:
- 从应用程序菜单|编程| Thonny Python IDE 打开 Thonny
- 单击新建图标创建一个新文件
- 键入以下内容(请特别注意引号):
import cherrypy
from WeatherData import WeatherData

class WeatherDashboardHTML:

    def __init__(self, currentWeather):
        self.currentWeather = currentWeather

    @cherrypy.expose
    def index(self):
        return """
               <!DOCTYPE html>
                <html lang="en">

                <head>
                    <title>Weather Dashboard</title>
                    <meta charset="utf-8">
                    <meta name="viewport" content="width=device-width, initial-scale=1">
                    <link rel="stylesheet" href="https://maxcdn.bootstrapcdn.com/bootstrap/4.1.0/css/bootstrap.min.css">
                    <script src="https://ajax.googleapis.com/ajax/libs/jquery/3.3.1/jquery.min.js"></script>
                    <script src="https://cdnjs.cloudflare.com/ajax/libs/popper.js/1.14.0/umd/popper.min.js"></script>
                    <script src="https://maxcdn.bootstrapcdn.com/bootstrap/4.1.0/js/bootstrap.min.js"></script>
                    <style>
                        .element-box {
                            border-radius: 10px;
                            border: 2px solid #C8C8C8;
                            padding: 20px;
                        }

                        .card {
                            width: 600px;
                        }

                        .col {
                            margin: 10px;
                        }
                    </style>
                </head>

                <body>
                    <div class="container">
                        <br/>
                        <div class="card">
                            <div class="card-header">
                                <h3>Weather Conditions for """ + self.currentWeather.getCity() + """
                                </h3></div>
                             <div class="card-body">
                                <div class="row">
                                    <div class="col element-box">
                                        <h5>Temperature</h5>
                                        <p>""" + self.currentWeather.getTemperature() + """</p>
                                    </div>
                                    <div class="col element-box">
                                        <h5>Conditions</h5>
                                        <p>""" + self.currentWeather.getWeatherConditions() + """</p>
                                    </div>
                                    <div class="col element-box">
                                        <h5>Wind Speed</h5>
                                        <p>""" + self.currentWeather.getWindSpeed() + """</p>
                                    </div>
                                </div>
                            </div>
                            <div class="card-footer"><p>""" + self.currentWeather.getTime() + """</p></div>
                        </div>
                    </div>
                </body>

                </html>
               """

if __name__=="__main__":
    currentWeather = WeatherData('Paris')
cherrypy.quickstart(WeatherDashboardHTML(currentWeather))- 将文件另存为
WeatherDashboardHTML.py
这可能看起来像是一大堆代码,事实确实如此。不过,如果我们把它分解一下,就不会那么复杂了。基本上,我们使用 CherryPy 返回一个 HTML 字符串,该字符串将通过index方法在 URL 的根目录中提供。
在此之前,我们通过传入一个WeatherData对象来实例化WeatherDashboardHTML类。我们给这个WeatherData对象命名为currentWeather,如init(类构造函数)方法所示:
def __init__(self, currentWeather):
         self.currentWeather = currentWeather
CherryPy 通过打印一个 HTML 字符串来提供index方法,该字符串中散布着来自currentWeather对象的参数。我们在 HTML 代码中使用引导组件库。我们通过合并标准引导样板代码来添加它:
<link rel="stylesheet"href="https://maxcdn.bootstrapcdn.com
        /bootstrap/4.1.0/css/bootstrap.min.css">

<script src="https://ajax.googleapis.com/ajax/libs/jquery/3.3.1/jquery.min.js"></script>
<script src="https://cdnjs.cloudflare.com/ajax/libs/popper.js/1.14.0/umd/popper.min.js"></script>
<script src="https://maxcdn.bootstrapcdn.com/bootstrap/4.1.0/js/bootstrap.min.js"></script>
我们使用 Bootstrapcard组件作为内容容器。card允许我们创建页眉、正文和页脚:
<div class="card">
    <div class="card-header">
        .
        .
.card组件的标题部分以城市名称为特征。我们使用currentWeather对象中的getCity方法获取城市名称:
<div class="card-header">
    <h3>Weather Conditions for """ + self.currentWeather.getCity() + """</h3>
</div>在card组件的主体部分,我们创建了一个包含三列的行。每列包含一个标题(<h5>,以及从我们的WeatherData对象(称为currentWeather)中提取的数据。您可以看到标题Temperature,其中温度值从currentWeather方法getTemperature中提取:
<div class="card-body">
    <div class="row">
        <div class="col element-box">
            <h5>Temperature</h5>
            <p>""" + self.currentWeather.getTemperature() + """</p>
        .
        .
.对于页脚,我们只返回currentWeather对象的实例化时间。我们将把这段时间作为从我们的程序中检查天气信息的时间。
<div class="card-footer">
    <p>""" + self.currentWeather.getTime() + """</p>
</div>顶部的样式部分允许我们定制仪表板的外观。我们创建了一个名为element-box的 CSS 类,以便在天气参数周围创建一个银色(#C8C8C8圆角框。我们还将卡(以及仪表板)的宽度限制为600px。最后,我们在立柱周围留有10px的边距,以便圆形框不会相互接触:
<style>
    .element-box {
        border-radius: 10px;
        border: 2px solid #C8C8C8;
        padding: 20px;
    }

    .card {
        width: 600px;
    }

    .col {
        margin: 10px;
    }

</style>我们底部的main方法将WeatherData类实例化为对象,称为currentWeather。在我们的示例中,我们使用的是来自Paris城市的数据。然后我们的代码将currentWeather对象传递给cherrypy.quickstart()方法,如下所示:
if __name__=="__main__":
     currentWeather = WeatherData('Paris')
cherrypy.quickstart(WeatherDashboardHTML(currentWeather))在WeatherDashboardHTML.py文件上停止并启动 CherryPy 服务器。如果代码中没有任何错误,则应看到类似以下内容:

在本章中,我们使用 CherryPy HTTP 框架将 Raspberry Pi 转换为 web 服务器。CherryPy 具有极简主义的体系结构,允许开发人员在很短的时间内建立一个支持 web 的 Python 程序。
本章首先在 Raspberry Pi 上安装 CherryPy。在几个简单的例子之后,我们通过修改和利用我们在第 4 章、订阅 web 服务中编写的 web 服务代码,构建了一个 HTML 天气仪表板。
在接下来的章节中,我们将利用本章中获得的知识构建物联网家庭安全仪表板。
- 对还是错?是樱桃皮,不是樱桃皮。
- 对还是错?CherryPy 由 Netflix 使用。
- 我们如何告诉 CherryPy 我们想要公开一个方法?
- 对还是错?CherryPy 需要许多行样板代码。
- 为什么我们要将
CurrentWeather类重命名为WeatherData? - 对还是错?CherryPy 使用的默认端口为
8888。 - 为什么我们要在
colCSS 类中添加边距? - 我们使用
WeatherData类中的哪种方法获取当前天气状况的图像 URL? - 我们使用哪个引导组件作为内容容器?
- 对还是错?在我们的例子中,伦敦阳光明媚,天气炎热。
在本章中,我们只触及了 CherryPy 和 Bootstrap 框架的表面。进一步阅读请访问 CherryPy 网站,网址为www.CherryPy.org,以及 Bootstrap 网站https://getbootstrap.com 。建议这样做是为了提高开发人员对这些强大框架的了解。