- 入门教程
- Join 运算符
- Set 运算符
- Generations 运算符
- LINQ Objects
- LINQ SQL
 《LinQ入门教程》
LINQ - SQL

LINQ to SQL是.NET Framework 3.5版的组件。它提供了运行时基础设施来将关系数据作为对象进行管理。
它允许无涯教程使用LINQ查询从SQL数据库访问和获取数据。它允许使用LINQ查询对SQL等表执行SELECT、INSERT、UPDATE和DELETE操作。
在LINQ to SQL中,关系数据库的数据模型被映射到一个对象模型,在执行转换成SQL的LINQ对象模型以从数据库中获取所需的数据时,LINQ to SQL会将SQL结果转换为LINQ对象模型。
以下是LINQ to SQL体系结构的图示。
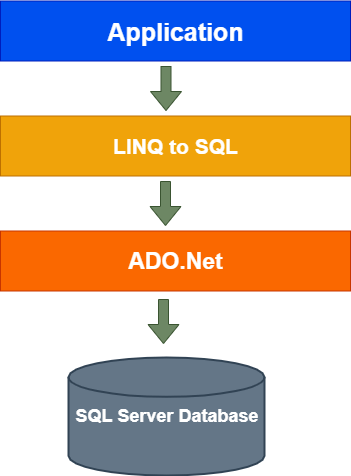
通过使用LINQ to SQL,无涯教程可以执行多个操作,如INSERT、DELETE和UPDATE。当将其与ADO.NET进行比较时,可以用最少的代码获取数据。
LINQ to SQL的创建及其在Web应用中的应用
这里以如何在ASP.NET Web应用程序中创建和使用LINQ to SQL(dbml文件)为例。
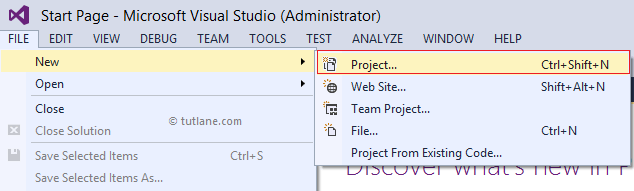
首先,创建一个新的应用程序。对于该打开的Visual Studio->请转到FILE->New ->Project...。
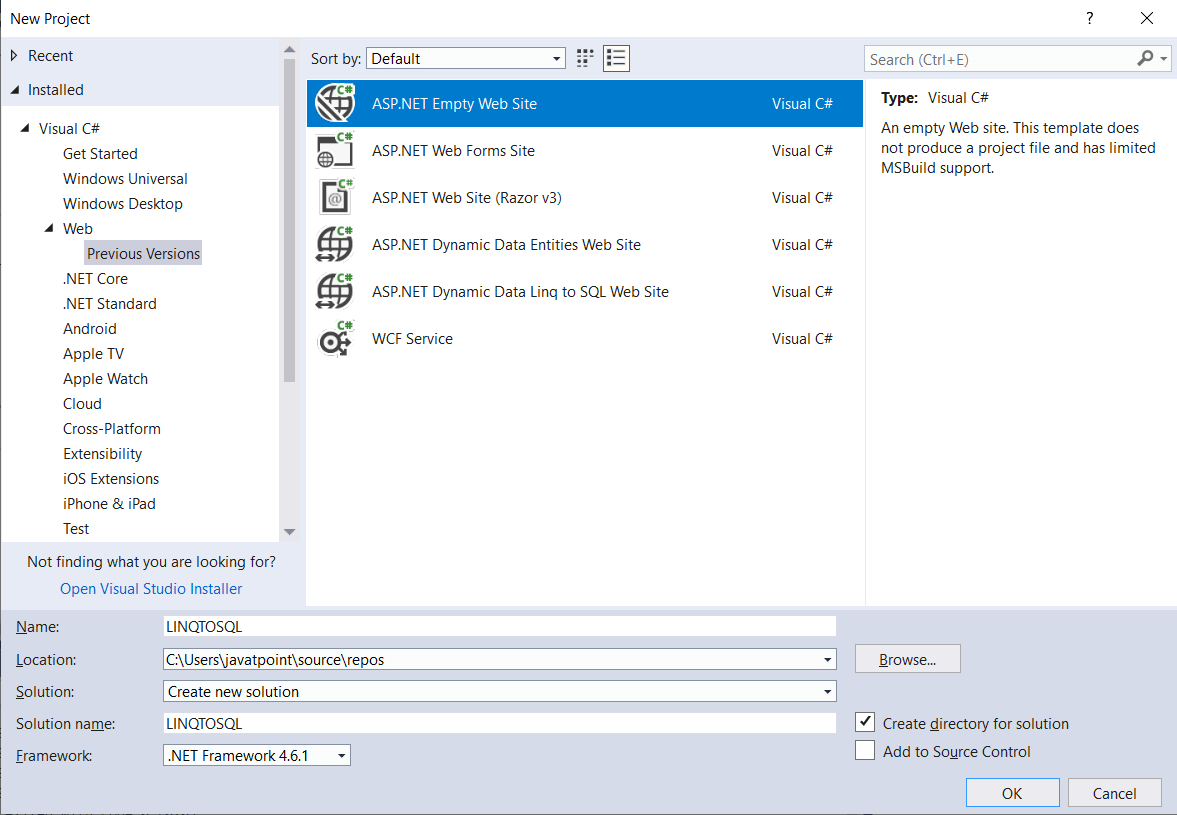
现在我们选择“Asp.Net Empty Web Application,”并将项目名称命名为“LINQTOSQL”,然后单击“OK”,如下图所示。
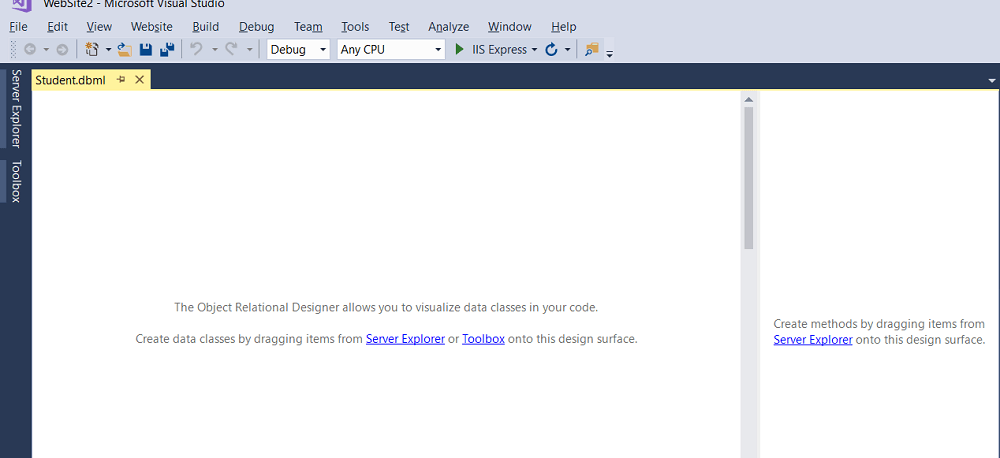
现在项目创建完成。在我们的应用程序中使用 LINQ to SQL,我们需要创建一个“DBML”文件。 DBML 文件将包含源代码,这将允许我们编写 LINQ 查询以从 SQL 数据库中获取数据。
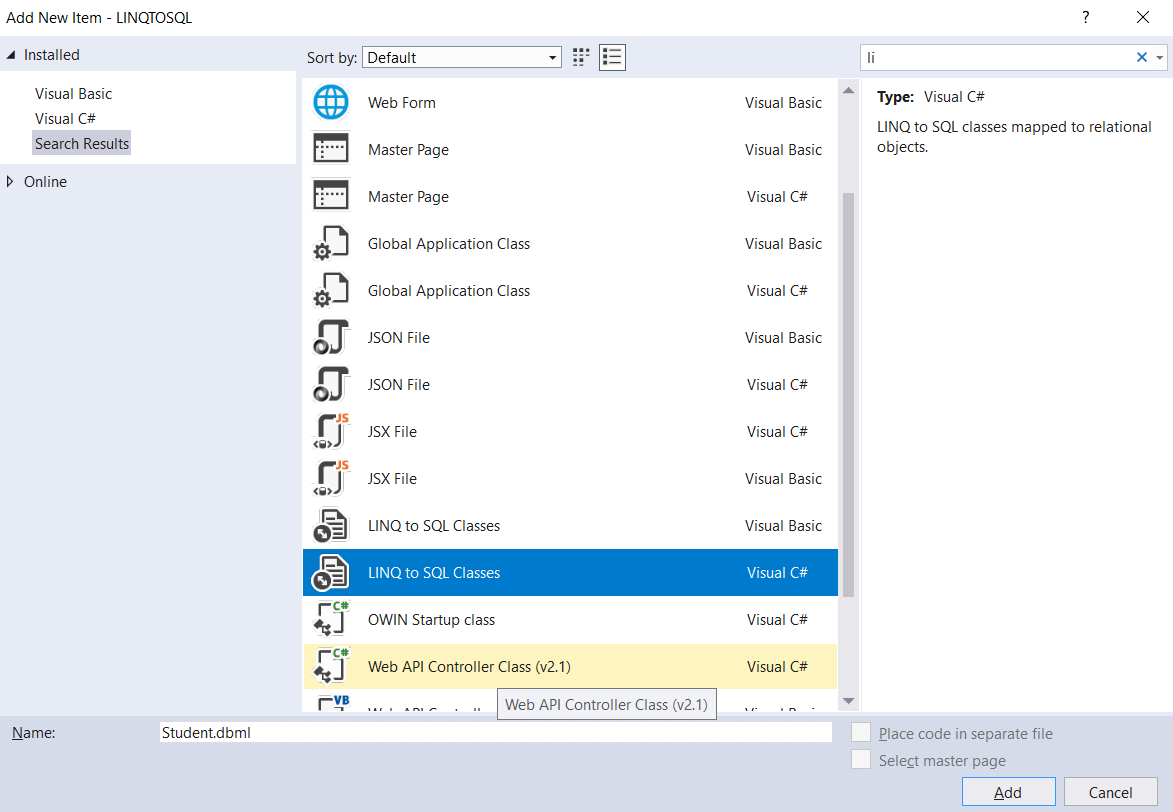
要创建 DBML 文件,右键单击project-> go to Add-> Select New Item-> Select template LINQ to SQL 并将名称命名为“Student”,如下所示。
将LINQ添加到SQL dbml文件后,窗口打开,如下图所示:
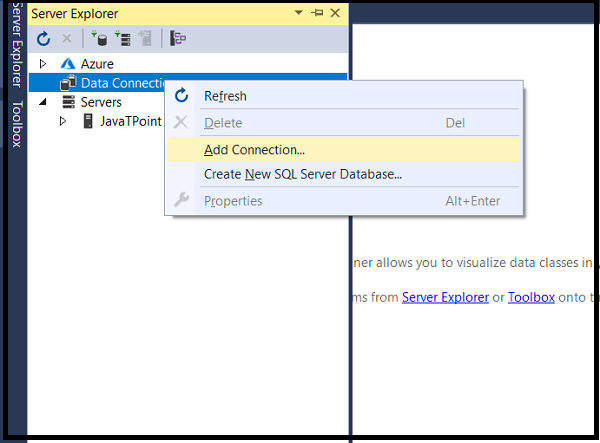
在这里观察,在左边的部分有两个部分。在这里,可以添加或创建表作为对象,在右侧,无涯教程可以添加获取数据所需的存储过程。
现在打开服务器资源管理器(Server Explorer),右键单击数据连接,然后选择添加连接,如下所示。
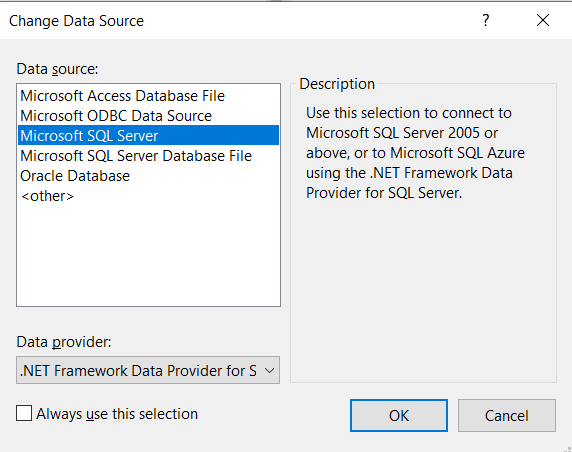
选择添加连接后,将打开一个新的弹出窗口,我们需要选择数据源。在这里,我们将连接到现有的数据库。这就是我们选择“Microsoft SQL Server”并点击继续的原因,如下图:
现在输入要连接的数据库服务器详细信息,如下图所示:
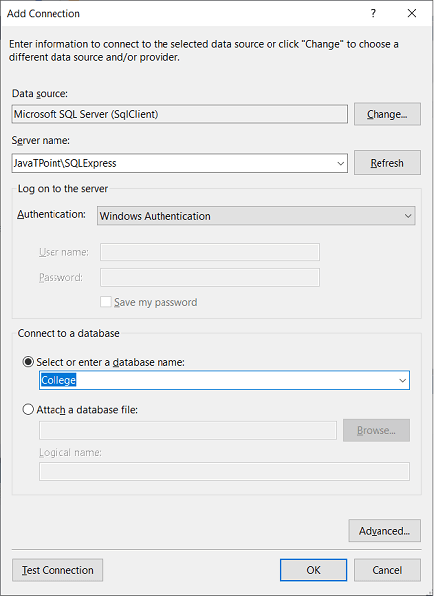
输入连接数据库的所有详细信息后,单击"确定"按钮。现在添加数据库后,将使用以下脚本创建新表StudentData。
Create Database College
Use College
Create table StudentData
(
	RollNumber int primary key,
	StudentName varchar(50),
	FatherName varchar(50),
	MotherName varchar(50)

)
Insert into StudentData(RollNumber,StudentName,FatherName,MotherName) values(101,'Akshay','Rakesh Tyagi','Samlesh Tyagi')
Insert into StudentData(RollNumber,StudentName,FatherName,MotherName) values(102,'Vaishali','Ashok Tyagi','Munesh Tyagi')
Insert into StudentData(RollNumber,StudentName,FatherName,MotherName) values(103,'Arpita','Arvind Rai','Anni Rai')
Select *from StudentData
在如下所示的数据库中创建StudentData表后:
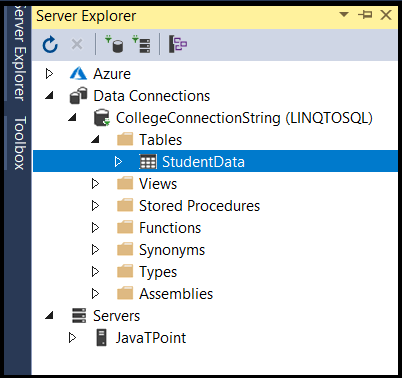
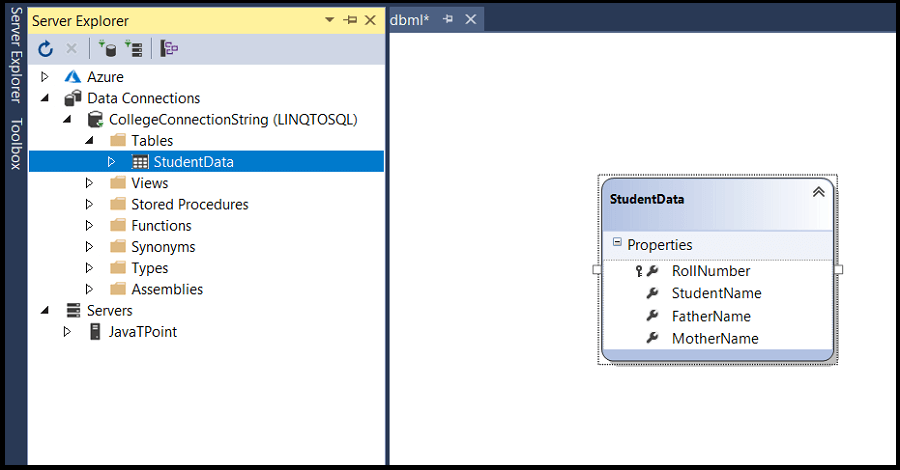
现在,无涯教程将拖放Student.dbml文件中的表。
现在将了解如何使用LINQ to SQL在应用程序中获取StudentData。为此,无涯教程将右键单击application-> select Add-> New Item-> Select Web Form,将名称指定为Default.aspx,然后单击确定按钮。
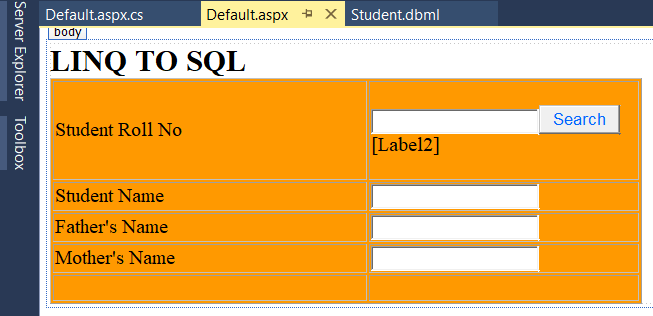
现在,无涯教程将打开Default.aspx页面,并编写如下所示的代码。
Default.aspx
<%@ Page Language="C#" AutoEventWireup="true" CodeFile="Default.aspx.cs" Inherits="_Default" %>

<!DOCTYPE html>

<html xmlns="http://www.w3.org/1999/xhtml">
<head runat="server">
    <title></title>
    <style type="text/css">
        .auto-style1 {
            width: 50%;
            background-color: #FF9900;
        }
        .auto-style2 {
            width: 310px;
        }
        .auto-style3 {
            width: 310px;
            height: 26px;
        }
        .auto-style4 {
            height: 26px;
        }
        .auto-style5 {
            width: 310px;
            height: 97px;
        }
        .auto-style6 {
            height: 97px;
        }
    </style>
</head>
<body>
    <form id="form1" runat="server">
        <asp:Label ID="Label1" runat="server" Font-Bold="True" Font-Size="Larger" Text="LINQ TO SQL"></asp:Label>
        <div>
            <table border="1" class="auto-style1">
                <tr>
                    <td class="auto-style5">Student Roll No</td>
                    <td class="auto-style6">
                        <asp:TextBox ID="TextBox1" runat="server"></asp:TextBox>
                        <asp:Button ID="Button1" runat="server" ForeColor="#0066FF" OnClick="Button1_Click" Text="Search" />
                        <br />
                        <asp:Label ID="Label2" runat="server"></asp:Label>
                    </td>
                </tr>
                <tr>
                    <td class="auto-style2">Student Name</td>
                    <td>
                        <asp:TextBox ID="TextBox2" runat="server"></asp:TextBox>
                    </td>
                </tr>
                <tr>
                    <td class="auto-style3">Father's Name</td>
                    <td class="auto-style4">
                        <asp:TextBox ID="TextBox3" runat="server"></asp:TextBox>
                    </td>
                </tr>
                <tr>
                    <td class="auto-style2">Mother's Name</td>
                    <td>
                        <asp:TextBox ID="TextBox4" runat="server"></asp:TextBox>
                    </td>
                </tr>
                <tr>
                    <td class="auto-style2">?</td>
                    <td> </td>
                </tr>
            </table>
        </div>
    </form>
</body>
</html>
这是应用程序的设计阶段。
这里无涯教程将编写从收集的数据库中搜索学生信息的代码。为了实现上述设计的功能,将在Default.Aspx.cs页面中编写代码。
Default.Aspx.cs
using System;
using System.Collections.Generic;
using System.Linq;
using System.Web;
using System.Web.UI;
using System.Web.UI.WebControls;

public partial class _Default : System.Web.UI.Page
{
protected void Button1_Click(object sender, EventArgs e)
    {
        StudentDataContext sd = new StudentDataContext();
        StudentData student = (from s in sd.StudentDatas where s.RollNumber.ToString() == TextBox1.Text select s).FirstOrDefault();
        if(student==null)
        {
            Label2.Text = "No Record Found";
        }
        else
        {
            Label2.Text = "Record Found successfully";
            TextBox2.Text = student.StudentName;
            TextBox3.Text = student.FatherName;
            TextBox4.Text = student.MotherName;
        }
    }
}
现在将运行代码并看到如下所示的输出。以下是LINQ to SQL示例的结果。
输出

祝学习愉快!(内容编辑有误?请选中要编辑内容 -> 右键 -> 修改 -> 提交!)