- Go Web 开发秘籍
 PDF电子书集合
Go 使用模板、静态文件和 HTML 表单详解
在本章中,我们将介绍以下配方:
通常,我们希望创建 HTML 表单,以便以指定的格式从客户端获取信息,将文件或文件夹上载到服务器,并生成通用 HTML 模板,而不是重复相同的静态文本。有了本章所涵盖概念的知识,我们将能够在 Go 中高效地实现所有这些功能。
在本章中,我们将从创建基本模板开始,然后继续从文件系统中提供静态文件,例如.js、.css和images,并最终创建、读取和验证 HTML 表单,并将文件上载到服务器。
模板允许我们为动态内容定义占位符,这些占位符可以在运行时由模板引擎替换为值。然后可以将它们转换为 HTML 文件并发送到客户端。使用 Go 的html/template包在 Go 中创建模板相当容易,我们将在本食谱中介绍它。
在这个配方中,我们将创建一个带有两个占位符的first-template.html,这些占位符的值将在运行时由模板引擎注入。执行以下步骤:
- 通过执行以下 Unix 命令在
templates目录中创建first-template.html:
$ mkdir templates && cd templates && touch first-template.html- 将以下内容复制到
first-template.html:
<html>
  <head>
    <meta charset="utf-8">
    <title>First Template</title>
    <link rel="stylesheet" href="/static/stylesheets/main.css">
  </head>
  <body>
    <h1>Hello {{.Name}}!</h1>
    Your Id is {{.Id}}
  </body>
</html>前面的模板有两个占位符{{.Name}}和{{.Id}},它们的值将在运行时被模板引擎替换或注入。
- 创建
first-template.go,我们将在其中填充占位符的值,生成一个 HTML 作为输出,并将其写入客户端,如下所示:
import
(
  "fmt"
  "html/template"
  "log"
  "net/http"
)
const
(
  CONN_HOST = "localhost"
  CONN_PORT = "8080"
)
type Person struct
{
  Id   string
  Name string
}
func renderTemplate(w http.ResponseWriter, r *http.Request)
{
  person := Person{Id: "1", Name: "Foo"}
  parsedTemplate, _ := template.ParseFiles("templates/
  first-template.html")
  err := parsedTemplate.Execute(w, person)
  if err != nil
  {
    log.Printf("Error occurred while executing the template
    or writing its output : ", err)
    return
  }
}
func main()
{
  http.HandleFunc("/", renderTemplate)
  err := http.ListenAndServe(CONN_HOST+":"+CONN_PORT, nil)
  if err != nil
  {
    log.Fatal("error starting http server : ", err)
    return
  }
}
一切就绪后,目录结构应如下所示:

- 使用以下命令运行程序:
$ go run first-template.go一旦我们运行程序,HTTP 服务器将在端口8080上开始本地侦听。
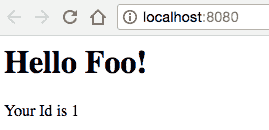
浏览http://localhost:8080将向我们展示 Hello Foo!由模板引擎提供服务,如以下屏幕截图所示:
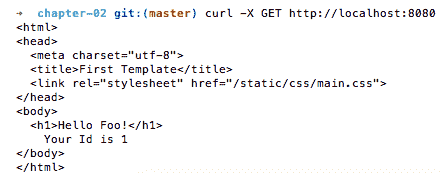
从命令行执行curl -X GET http://localhost:8080如下:
$ curl -X GET http://localhost:8080这将导致服务器做出以下响应:
让我们了解一下我们编写的围棋程序:
-
type Person struct { Id string Name string }:这里我们定义了一个具有Id和Name字段的person结构类型。
字段名称在类型定义中应以大写字母开头;否则,它将导致错误,并且不会在模板中被替换。
接下来,我们定义了一个renderTemplate()处理程序,它可以做很多事情。
-
person := Person{Id: "1", Name: "Foo"}:这里我们正在初始化一个person结构类型,其中Id为1,而Name为Foo。 -
parsedTemplate, _ := template.ParseFiles("templates/first-template.html"):这里我们调用html/template包的ParseFiles,该包创建一个新模板,并解析我们作为输入传递的文件名,该文件名位于模板目录中的first-template.html ,。生成的模板将具有输入文件的名称和内容。 -
err := parsedTemplate.Execute(w, person):我们在解析模板上调用Execute处理程序,将person数据注入模板,生成 HTML 输出,并将其写入 HTTP 响应流。 -
if err != nil {log.Printf("Error occurred while executing the template or writing its output : ", err) return }:这里我们检查执行模板或将其输出写入响应流时是否有问题。如果有,则记录错误并以状态代码 1 退出。
在设计 web 应用时,最好的做法是从文件系统或任何内容交付网络(CDN)提供静态资源,如.js、.css和images,如 Akamai 或 Amazon CloudFront,而不是从 web 服务器提供。这是因为所有这些类型的文件都是静态的,不需要处理;那么,我们为什么要在服务器上增加额外的负载呢?此外,它有助于提高应用的性能,因为对静态文件的所有请求都将从外部源提供,从而减少服务器上的负载。
Go 的net/http包足以通过FileServer提供来自文件系统的静态资源,我们将在本配方中介绍。
由于我们已经在前面的配方中创建了一个模板,我们将扩展它以提供来自static/css目录的静态.css文件。
在这个配方中,我们将创建一个文件服务器,它将为来自文件系统的静态资源提供服务。执行以下步骤:
- 在
static/css目录中创建main.css,如下所示:
$ mkdir static && cd static && mkdir css && cd css && touch main.css- 将以下内容复制到
main.css:
body {color: #00008B}- 创建
serve-static-files.go,我们将在其中创建FileServer,它将为文件系统上存在的static/css目录中的资源提供/static的所有 URL 模式,如下所示:
package main
import
(
  "fmt"
  "html/template"
  "log"
  "net/http"
)
const
(
  CONN_HOST = "localhost"
  CONN_PORT = "8080"
)
type Person struct
{
  Name string
  Age string
}
func renderTemplate(w http.ResponseWriter, r *http.Request)
{
  person := Person{Id: "1", Name: "Foo"}
  parsedTemplate, _ := template.ParseFiles("templates/
  first-template.html")
  err := parsedTemplate.Execute(w, person)
  if err != nil
  {
    log.Printf("Error occurred while executing the template
    or writing its output : ", err)
    return
  }
}
func main()
{
  fileServer := http.FileServer(http.Dir("static"))
  http.Handle("/static/", http.StripPrefix("/static/", fileServer))
  http.HandleFunc("/", renderTemplate)
  err := http.ListenAndServe(CONN_HOST+":"+CONN_PORT, nil)
  if err != nil
  {
    log.Fatal("error starting http server : ", err)
    return
  }
}- 更新
first-template.html(在我们之前的配方中创建)以包括static/css目录中的main.css:
<html>
  <head>
    <meta charset="utf-8">
    <title>First Template</title>
    <link rel="stylesheet" href="/static/css/main.css">
  </head>
  <body>
    <h1>Hello {{.Name}}!</h1>
    Your Id is {{.Id}}
  </body>
</html>
一切就绪后,目录结构应如下所示:

- 使用以下命令运行程序:
$ go run serve-static-files.go一旦我们运行程序,HTTP 服务器将在端口8080上开始本地侦听。浏览http://localhost:8080将向我们显示与上一个配方相同的输出,但这次文本颜色已从默认的黑色更改为蓝色,如下图所示:
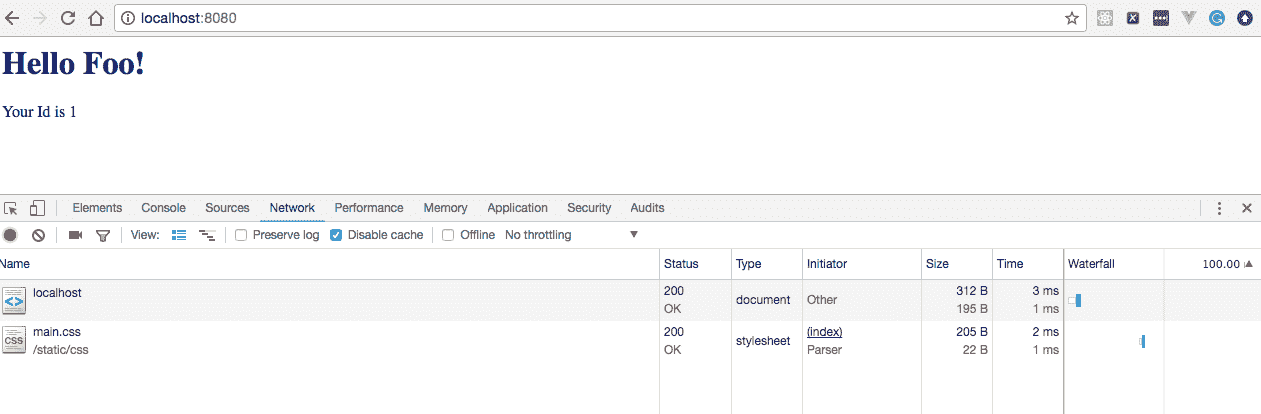
如果我们查看 Chrome DevTools 的网络选项卡,我们可以看到main.css,它是从文件系统上的static/css目录加载的。
让我们了解一下我们在main()方法中引入的变化,作为本配方的一部分:
-
fileServer := http.FileServer(http.Dir("static")):在这里,我们使用net/http包的FileServer处理程序创建了一个文件服务器,它为来自文件系统上static目录的 HTTP 请求提供服务。 -
http.Handle("/static/", http.StripPrefix("/static/", fileServer)):这里,我们使用net/http包的HandleFunc将http.StripPrefix("/static/", fileServer)处理程序注册为/staticURL 模式,这意味着无论何时我们使用/static模式访问 HTTP URL,都会执行http.StripPrefix("/static/", fileServer)并将(http.ResponseWriter, *http.Request)作为参数传递给它。 -
http.StripPrefix("/static/", fileServer):返回一个处理程序,该处理程序通过从请求 URL 的路径中删除/static来服务 HTTP 请求,并调用文件服务器。StripPrefix通过 HTTP 404 回复,处理对不以前缀开头的路径的请求。
在前面的配方中,我们通过 Go 的 HTTP 文件服务器提供static资源。在本食谱中,我们将了解如何通过 Gorilla Mux 路由器提供服务,这也是创建 HTTP 路由器的最常用方法之一。
由于我们已经创建了一个模板,该模板从我们之前配方中文件系统上的static/css目录提供main.css服务,因此我们将只更新它以使用 Gorilla Mux 路由器。
- 使用
go get命令安装github.com/gorilla/mux包,如下所示:
$ go get github.com/gorilla/mux- 创建
serve-static-files-gorilla-mux.go,在这里我们将创建一个 Gorilla Mux 路由器,而不是 HTTPFileServer,如下所示:
package main
import
(
  "html/template"
  "log"
  "net/http"
  "github.com/gorilla/mux"
)
const
(
  CONN_HOST = "localhost"
  CONN_PORT = "8080"
)
type Person struct
{
  Id string
  Name string
}
func renderTemplate(w http.ResponseWriter, r *http.Request)
{
  person := Person{Id: "1", Name: "Foo"}
  parsedTemplate, _ := template.ParseFiles("templates/
  first-template.html")
  err := parsedTemplate.Execute(w, person)
  if err != nil
  {
    log.Printf("Error occurred while executing the template
    or writing its output : ", err)
    return
  }
}
func main()
{
  router := mux.NewRouter()
  router.HandleFunc("/", renderTemplate).Methods("GET")
  router.PathPrefix("/").Handler(http.StripPrefix("/static",
  http.FileServer(http.Dir("static/"))))
  err := http.ListenAndServe(CONN_HOST+":"+CONN_PORT, router)
  if err != nil
  {
    log.Fatal("error starting http server : ", err)
    return
  }
}- 使用以下命令运行程序:
$ go run serve-static-files-gorilla-mux.go一旦我们运行程序,HTTP 服务器将在端口8080上开始本地侦听。
浏览http://localhost:8080将向我们显示我们在上一个配方中看到的相同输出,如以下屏幕截图所示:

让我们了解一下我们在main()方法中引入的变化,作为本配方的一部分:
-
router :=mux.NewRouter():这里我们实例化了gorilla/mux路由器调用 mux 路由器的NewRouter()处理程序。 -
router.HandleFunc("/",renderTemplate).Methods("GET"):这里我们向renderTemplate处理程序注册了/URL 模式。这意味着renderTemplate将对 URL 模式为/的每个请求执行。 -
router.PathPrefix("/").Handler(http.StripPrefix("/static", http.FileServer(http.Dir("static/")))):这里我们将/注册为一个新的路由,并设置一旦调用就要执行的处理程序。 -
http.StripPrefix("/static", http.FileServer(http.Dir("static/"))):返回一个处理程序,该处理程序通过从请求 URL 的路径中删除/static并调用文件服务器来服务 HTTP 请求。StripPrefix通过 HTTP 404 回复,处理对不以前缀开头的路径的请求。
每当我们想要从客户机收集数据并将其发送到服务器进行处理时,实现 HTML 表单是最佳选择。我们将在本食谱中介绍这一点。
在这个配方中,我们将创建一个简单的 HTML 表单,它有两个输入字段和一个提交表单的按钮。执行以下步骤:
- 在
templates目录中创建login-form.html,如下所示:
$ mkdir templates && cd templates && touch login-form.html- 将以下内容复制到
login-form.html:
<html>
  <head>
    <title>First Form</title>
  </head>
  <body>
    <h1>Login</h1>
    <form method="post" action="/login">
      <label for="username">Username</label>
      <input type="text" id="username" name="username">
      <label for="password">Password</label>
      <input type="password" id="password" name="password">
      <button type="submit">Login</button>
    </form>
  </body>
</html>前面的模板有两个文本框-username和password-以及一个登录按钮。
单击登录按钮,客户端将对 HTML 表单中定义的操作进行POST调用,在我们的例子中是/login。
- 创建
html-form.go,我们将解析表单模板并将其写入 HTTP 响应流,如下所示:
package main
import
(
  "html/template"
  "log"
  "net/http"
)
const
(
  CONN_HOST = "localhost"
  CONN_PORT = "8080"
)
func login(w http.ResponseWriter, r *http.Request)
{
  parsedTemplate, _ := template.ParseFiles("templates/
  login-form.html")
  parsedTemplate.Execute(w, nil)
}
func main()
{
  http.HandleFunc("/", login)
  err := http.ListenAndServe(CONN_HOST+":"+CONN_PORT, nil)
  if err != nil
  {
    log.Fatal("error starting http server : ", err)
    return
  }
}
一切就绪后,目录结构应如下所示:

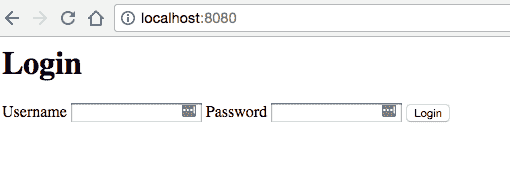
- 使用以下命令运行程序:
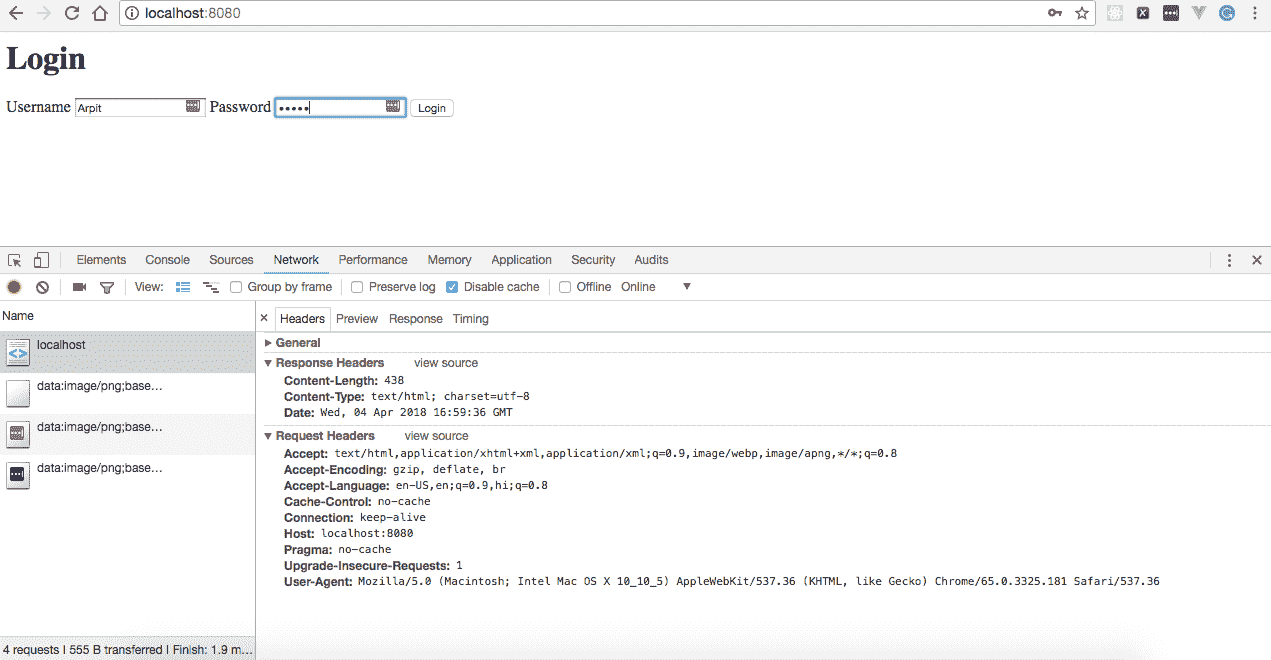
$ go run html-form.go一旦我们运行程序,HTTP 服务器将在端口8080上开始本地侦听。浏览http://localhost:8080会显示一个 HTML 表单,如下图所示:

让我们了解一下我们编写的程序:
-
func login(w http.ResponseWriter, r *http.Request) { parsedTemplate, _ := template.ParseFiles("templates/login-form.html") parsedTemplate.Execute(w, nil) }:这是一个 Go 函数,接受ResponseWriter和Request作为输入参数,解析login-form.html,并返回一个新模板。 -
http.HandleFunc("/", login):这里我们使用net/http包的HandleFunc注册一个/URL 模式的登录函数,这意味着我们每次访问 HTTP URL 时都会执行登录函数,其中/模式通过ResponseWriter和Request作为参数。 -
err := http.ListenAndServe(CONN_HOST+":"+CONN_PORT, nil):这里我们调用http.ListenAndServe为 HTTP 请求提供服务,这些请求在单独的 Goroutine 中处理每个传入连接。ListenAndServe接受两个参数:服务器地址和处理程序,其中服务器地址为localhost:8080,处理程序为nil -
if err != nil { log.Fatal("error starting http server : ", err) return}:在这里我们检查启动服务器是否有问题。如果有,则记录错误并使用状态代码1退出。
提交 HTML 表单后,我们必须读取服务器端的客户机数据以采取适当的操作。我们将在本食谱中介绍这一点。
因为我们已经在前面的配方中创建了一个 HTML 表单,所以我们将扩展配方以读取其字段值。
- 使用
go get命令安装github.com/gorilla/schema包,如下所示:
$ go get github.com/gorilla/schema- 创建
html-form-read.go,使用github.com/gorilla/schema包解码后,我们将读取一个 HTML 表单字段,并将 Hello 后跟用户名写入 HTTP 响应流,如下所示:
package main
import
(
  "fmt"
  "html/template"
  "log"
  "net/http"
  "github.com/gorilla/schema"
)
const
(
  CONN_HOST = "localhost"
  CONN_PORT = "8080"
)
type User struct
{
  Username string
  Password string
}
func readForm(r *http.Request) *User
{
  r.ParseForm()
  user := new(User)
  decoder := schema.NewDecoder()
  decodeErr := decoder.Decode(user, r.PostForm)
  if decodeErr != nil
  {
    log.Printf("error mapping parsed form data to struct : ",
    decodeErr)
  }
  return user
}
func login(w http.ResponseWriter, r *http.Request)
{
  if r.Method == "GET"
  {
    parsedTemplate, _ := template.ParseFiles("templates/
    login-form.html")
    parsedTemplate.Execute(w, nil)
  }
  else
  {
    user := readForm(r)
    fmt.Fprintf(w, "Hello "+user.Username+"!")
  }
}
func main()
{
  http.HandleFunc("/", login)
  err := http.ListenAndServe(CONN_HOST+":"+CONN_PORT, nil)
  if err != nil
  {
    log.Fatal("error starting http server : ", err)
    return
  }
}- 使用以下命令运行程序:
$ go run html-form-read.go一旦我们运行程序,HTTP 服务器将在端口8080上开始本地侦听。浏览http://localhost:8080会显示一个 HTML 表单,如下图所示:
输入用户名和密码并单击登录按钮后,我们将看到 Hello 后面跟着用户名作为服务器的响应,如以下屏幕截图所示:
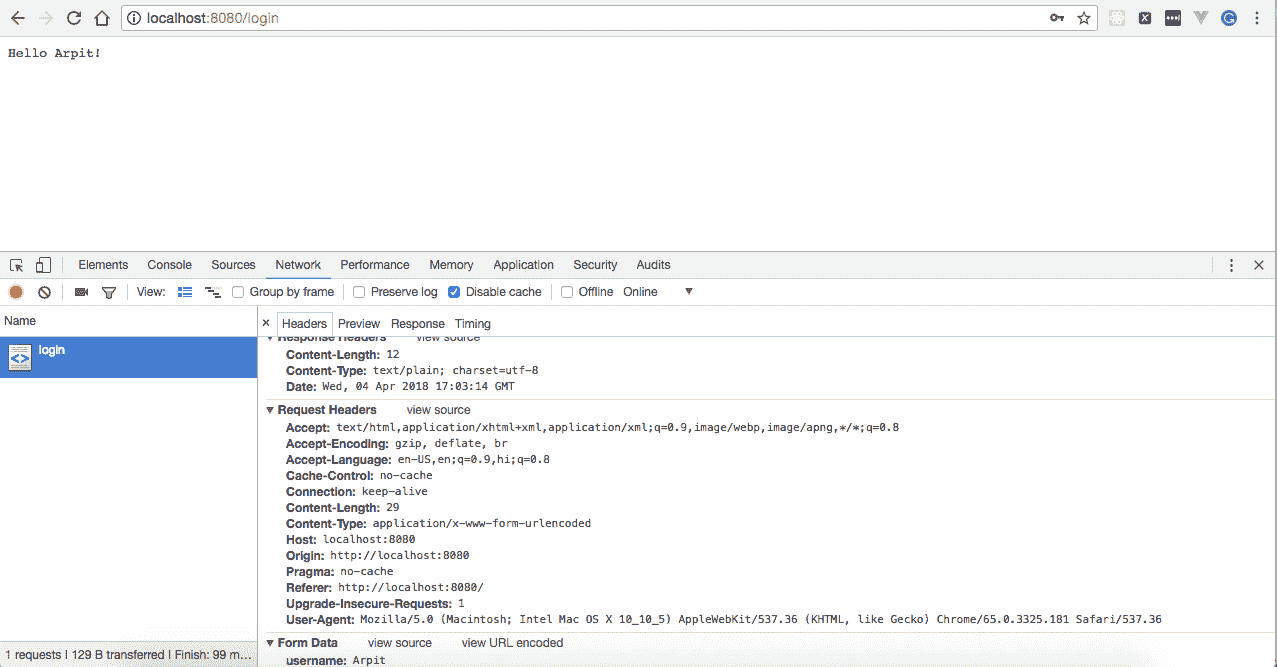
让我们了解一下作为本配方一部分引入的更改:
- 使用
import ( "fmt" "html/template" "log" "net/http" "github.com/gorilla/schema"),我们导入了两个额外的包——fmt和github.com/gorilla/schema——这有助于将structs与Form值进行转换。 - 接下来,我们定义了
User struct类型,它有Username和Password字段,如下所示:
type User struct
{
  Username string
  Password string
}- 然后我们定义了
readForm处理程序,它以HTTP Request为输入参数,返回User,如下所示:
func readForm(r *http.Request) *User {
 r.ParseForm()
 user := new(User)
 decoder := schema.NewDecoder()
 decodeErr := decoder.Decode(user, r.PostForm)
 if decodeErr != nil {
 log.Printf("error mapping parsed form data to struct : ", decodeErr)
 }
 return user
 }
让我们详细了解这个 Go 函数:
-
r.ParseForm():这里我们将请求主体解析为一个表单,并将结果放入r.PostForm和r.Form中。 -
user := new(User):这里我们创建一个新的User struct类型。 -
decoder := schema.NewDecoder():我们正在创建一个解码器,我们将使用它向用户struct填充Form值。 -
decodeErr := decoder.Decode(user, r.PostForm):这里我们将解析后的表单数据从POST主体参数解码给用户struct
r.PostForm is only available after ParseForm is called.
-
if decodeErr != nil { log.Printf("error mapping parsed form data to struct : ", decodeErr) }:这里我们检查表单数据到结构的映射是否有问题,如果有,则记录。
然后定义了一个login处理程序,检查调用该处理程序的 HTTP 请求是否为GET请求,然后从 templates 目录解析login-form.html并写入 HTTP 响应流;否则调用readForm处理程序,如下所示:
func login(w http.ResponseWriter, r *http.Request)
{
  if r.Method == "GET"
  {
    parsedTemplate, _ := template.ParseFiles("templates/
    login-form.html")
    parsedTemplate.Execute(w, nil)
  }
  else
  {
    user := readForm(r)
    fmt.Fprintf(w, "Hello "+user.Username+"!")
  }
}
大多数情况下,我们必须在处理客户的输入之前对其进行验证,这可以通过 Go 中的外部包数来实现,例如gopkg.in/go-playground/validator.v9、gopkg.in/validator.v2、github.com/asaskevich/govalidator。
在这个配方中,我们将使用最著名和最常用的验证器github.com/asaskevich/govalidator,来验证我们的 HTML 表单。
由于我们已经在前面的配方中创建并读取了一个 HTML 表单,所以我们将对其进行扩展以验证其字段值。
- 使用
go get命令安装github.com/asaskevich/govalidator和github.com/gorilla/schema包,如下所示:
$ go get github.com/asaskevich/govalidator
$ go get github.com/gorilla/schema- 创建
html-form-validation.go,在这里我们将读取一个 HTML 表单,使用github.com/gorilla/schema对其进行解码,并使用github.com/asaskevich/govalidator根据User struct中定义的标记对其每个字段进行验证,如下所示:
package main
import
(
  "fmt"
  "html/template"
  "log"
  "net/http"
  "github.com/asaskevich/govalidator"
  "github.com/gorilla/schema"
)
const
(
  CONN_HOST = "localhost"
  CONN_PORT = "8080"
  USERNAME_ERROR_MESSAGE = "Please enter a valid Username"
  PASSWORD_ERROR_MESSAGE = "Please enter a valid Password"
  GENERIC_ERROR_MESSAGE = "Validation Error"
)
type User struct
{
  Username string `valid:"alpha,required"`
  Password string `valid:"alpha,required"`
}
func readForm(r *http.Request) *User
{
  r.ParseForm()
  user := new(User)
  decoder := schema.NewDecoder()
  decodeErr := decoder.Decode(user, r.PostForm)
  if decodeErr != nil
  {
    log.Printf("error mapping parsed form data to struct : ",
    decodeErr)
  }
  return user
}
func validateUser(w http.ResponseWriter, r *http.Request, user *User) (bool, string)
{
  valid, validationError := govalidator.ValidateStruct(user)
  if !valid
  {
    usernameError := govalidator.ErrorByField(validationError,
    "Username")
    passwordError := govalidator.ErrorByField(validationError,
    "Password")
    if usernameError != ""
    {
      log.Printf("username validation error : ", usernameError)
      return valid, USERNAME_ERROR_MESSAGE
    }
    if passwordError != ""
    {
      log.Printf("password validation error : ", passwordError)
      return valid, PASSWORD_ERROR_MESSAGE
    }
  }
  return valid, GENERIC_ERROR_MESSAGE
}
func login(w http.ResponseWriter, r *http.Request)
{
  if r.Method == "GET"
  {
    parsedTemplate, _ := template.ParseFiles("templates/
    login-form.html")
    parsedTemplate.Execute(w, nil)
  }
  else
  {
    user := readForm(r)
    valid, validationErrorMessage := validateUser(w, r, user)
    if !valid
    {
      fmt.Fprintf(w, validationErrorMessage)
      return
    }
    fmt.Fprintf(w, "Hello "+user.Username+"!")
  }
}
func main()
{
  http.HandleFunc("/", login)
  err := http.ListenAndServe(CONN_HOST+":"+CONN_PORT, nil)
  if err != nil
  {
    log.Fatal("error starting http server : ", err)
    return
  }
}- 使用以下命令运行程序:
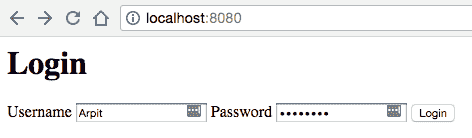
$ go run html-form-validation.go一旦我们运行程序,HTTP 服务器将在端口8080上开始本地侦听。浏览http://localhost:8080会显示一个 HTML 表单,如下图所示:
然后提交包含有效值的表单:
它将在浏览器屏幕上显示 Hello,后跟用户名,如以下屏幕截图所示:

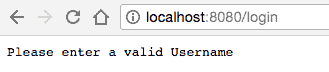
在任何字段中提交值为非 alpha 的表单都会显示错误消息。例如,提交用户名值为1234的表单:
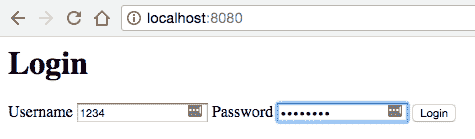
它将在浏览器上向我们显示一条错误消息,如以下屏幕截图所示:
此外,我们可以从命令行提交 HTML 表单,如下所示:
$ curl --data "username=Foo&password=password" http://localhost:8080/这将为我们提供与浏览器中相同的输出:

让我们了解一下我们在这个配方中引入的变化:
-
使用
import ("fmt", "html/template", "log", "net/http" "github.com/asaskevich/govalidator" "github.com/gorilla/schema" ),我们导入了一个额外的包——github.com/asaskevich/govalidator,它帮助我们验证结构。 -
接下来,我们更新了
User struct类型以包含一个字符串文字标记,其中key为valid,而value为alpha, required,如下所示:
type User struct
{
  Username string `valid:"alpha,required"`
  Password string
  valid:"alpha,required"
}- 接下来,我们定义了一个
validateUser处理程序,该处理程序以ResponseWriter、Request和User作为输入,并返回一个bool和string,分别是结构的有效状态和验证错误消息。在这个处理程序中,我们验证了从govalidator调用ValidateStruct处理程序的结构标记。如果验证字段时出错,那么我们从govalidator获取调用ErrorByField处理程序的错误,并将结果与验证错误消息一起返回。 - 接下来,我们更新了
login处理程序,以调用validateUser传递(w http.ResponseWriter, r *http.Request, user *User)作为输入参数,并检查是否存在任何验证错误。如果有错误,那么我们将错误消息写入 HTTP 响应流并返回它。
任何 web 应用中最常见的场景之一是将文件或文件夹上载到服务器。例如,如果我们正在开发一个工作门户,那么我们可能必须提供一个选项,申请人可以上传他们的个人资料/简历,或者,比方说,我们必须开发一个电子商务网站,其中客户可以使用文件批量上传订单
使用 Go 的内置软件包实现在 Go 中上传文件的功能非常简单,我们将在本食谱中介绍。
在这个配方中,我们将创建一个 HTML 表单,其字段类型为file,用户可以通过表单提交选择一个或多个文件上传到服务器。执行以下步骤:
- 在
templates目录中创建upload-file.html,如下所示:
$ mkdir templates && cd templates && touch upload-file.html- 将以下内容复制到
upload-file.html:
<html>
  <head>
    <meta charset="utf-8">
    <title>File Upload</title>
  </head>
  <body>
    <form action="/upload" method="post" enctype="multipart/
    form-data">
      <label for="file">File:</label>
      <input type="file" name="file" id="file">
      <input type="submit" name="submit" value="Submit">
    </form>
  </body>
</html>在前面的模板中,我们定义了一个类型为file的字段和一个Submit按钮。
单击 Submit 按钮,客户机对构成请求主体的数据进行编码,并对表单操作进行POST调用,在我们的例子中是/upload
- 创建
upload-file.go,在这里我们将定义处理程序来呈现文件上传模板,从请求中获取文件,处理它,并将响应写入 HTTP 响应流,如下所示:
package main
import
(
  "fmt"
  "html/template"
  "io"
  "log"
  "net/http"
  "os"
)
const
(
  CONN_HOST = "localhost"
  CONN_PORT = "8080"
)
func fileHandler(w http.ResponseWriter, r *http.Request)
{
  file, header, err := r.FormFile("file")
  if err != nil
  {
    log.Printf("error getting a file for the provided form key : ",
    err)
    return
  }
  defer file.Close()
  out, pathError := os.Create("/tmp/uploadedFile")
  if pathError != nil
  {
    log.Printf("error creating a file for writing : ", pathError)
    return
  }
  defer out.Close()
  _, copyFileError := io.Copy(out, file)
  if copyFileError != nil
  {
    log.Printf("error occurred while file copy : ", copyFileError)
  }
  fmt.Fprintf(w, "File uploaded successfully : "+header.Filename)
}
func index(w http.ResponseWriter, r *http.Request)
{
  parsedTemplate, _ := template.ParseFiles("templates/
  upload-file.html")
  parsedTemplate.Execute(w, nil)
}
func main()
{
  http.HandleFunc("/", index)
  http.HandleFunc("/upload", fileHandler)
  err := http.ListenAndServe(CONN_HOST+":"+CONN_PORT, nil)
  if err != nil
  {
    log.Fatal("error starting http server : ", err)
    return
  }
}
一切就绪后,目录结构应如下所示:

- 使用以下命令运行程序:
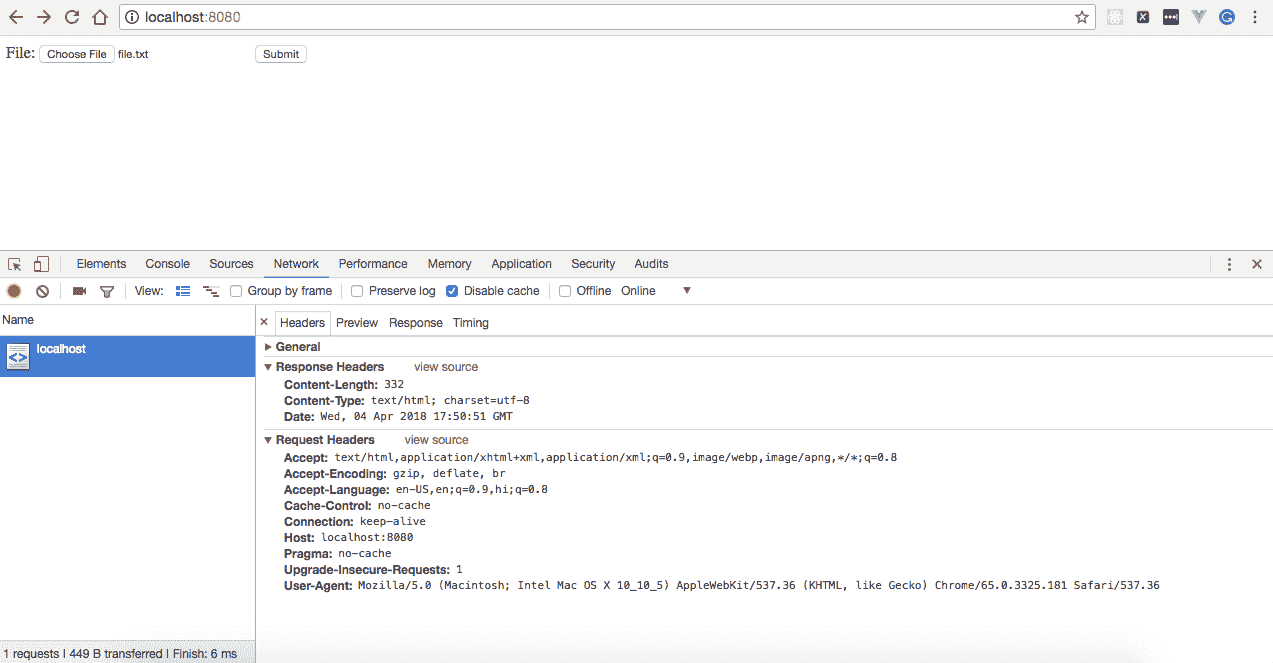
$ go run upload-file.go一旦我们运行程序,HTTP 服务器将在端口8080上开始本地侦听。浏览http://localhost:8080会显示文件上传表单,如下图所示:
选择文件后按 Submit 按钮将在服务器上创建一个名为uploadedFile的文件,该文件位于/tmp目录中。通过执行以下命令可以看到这一点:

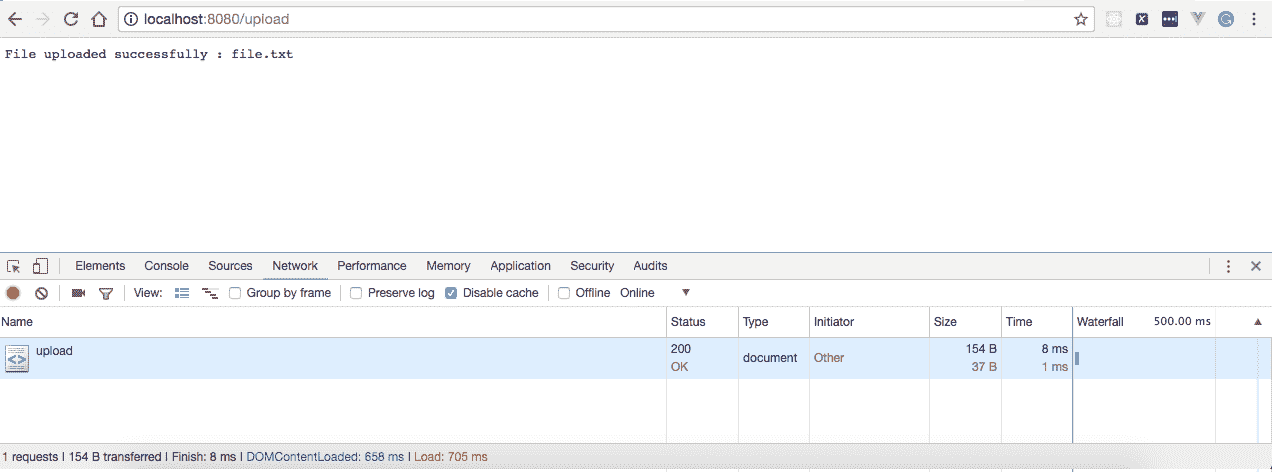
此外,成功上载将在浏览器上显示消息,如以下屏幕截图所示:
让我们了解一下我们编写的围棋程序:
我们定义了fileHandler()处理程序,它从请求中获取文件,读取其内容,并最终将其写入服务器上的文件。由于这个处理程序做了很多事情,让我们详细讨论一下:
-
file, header, err := r.FormFile("file"):这里我们调用 HTTP 请求上的FormFile处理程序来获取所提供表单密钥的文件。 -
if err != nil { log.Printf("error getting a file for the provided form key : ", err) return }:这里我们检查从请求中获取文件时是否有问题。如果有,则记录错误并使用状态代码1退出。 -
defer file.Close():defer语句在我们从函数返回后关闭file。 -
out, pathError := os.Create("/tmp/uploadedFile"):我们在/tmp目录中创建一个名为uploadedFile的文件,模式为666,这意味着客户端可以读写,但不能执行该文件。 -
if pathError != nil { log.Printf("error creating a file for writing : ", pathError) return }:我们在这里检查在服务器上创建文件是否有问题。如果有,则记录错误并使用状态代码1退出。 -
_, copyFileError := io.Copy(out, file):这里我们将收到的文件中的内容复制到/tmp目录中创建的文件中。 -
fmt.Fprintf(w, "File uploaded successfully : "+header.Filename):这里我们将一条消息和一个文件名一起写入 HTTP 响应流。