- 入门教程
 《Angular7入门教程》
Angular7 - 服务(Services)
")
我们可能遇到一种情况,需要在页面上的任何地方共用一些代码,它可用于需要在组件之间共享的数据连接。
要创建服务,我们需要使用以下命令行-
ng g service myservice
C:\projectA7\angular7-app>ng g service myservice
CREATE src/app/myservice.service.spec.ts (348 bytes)
CREATE src/app/myservice.service.ts (138 bytes)
在app文件夹中创建的文件如下-
以下是创建的文件,这些文件显示在底部– myservice.service.specs.ts和myservice.service.ts。
myservice.service.ts
import { Injectable } from '@angular/core';
@Injectable({
   providedIn: 'root'
})
export class MyserviceService {
   constructor() { }
}
在这里,可注入模块是从@angular/core导入,它包含@Injectable方法和一个名为MyserviceService的类。
在创建新服务之前,我们需要将在主父 app.module.ts 中创建的服务包括在内。
import { BrowserModule } from '@angular/platform-browser';
import { NgModule } from '@angular/core';
import { AppRoutingModule , RoutingComponent} from './app-routing.module';
import { AppComponent } from './app.component';
import { NewCmpComponent } from './new-cmp/new-cmp.component';
import { ChangeTextDirective } from './change-text.directive';
import { SqrtPipe } from './app.sqrt';
import { MyserviceService } from './myservice.service';

@NgModule({
   declarations: [
      SqrtPipe,
      AppComponent,
      NewCmpComponent,
      ChangeTextDirective,
      RoutingComponent
   ],
   imports: [
      BrowserModule,
      AppRoutingModule
   ],
   providers: [MyserviceService],
   bootstrap: [AppComponent]
})
export class AppModule { }
在服务类中,我们将创建一个显示 date 函数,我们可以在主父组件app.component.ts和上一章中创建的新组件new-cmp.component.ts中使用相同的函数。
import { Injectable } from '@angular/core';
@Injectable({
   providedIn: 'root'
})
export class MyserviceService {
   constructor() { }
   showTodayDate() {
      let ndate=new Date();
      return ndate;
   }
}
在上面的服务文件中,我们创建了一个函数 showTodayDate ,现在,我们将返回创建的Date(),让我们看看如何在组件类中访问此函数。
app.component.ts
import { Component } from '@angular/core';
import { MyserviceService } from './myservice.service';
@Component({ selector: 'app-root',
   templateUrl: './app.component.html',
   styleUrls: ['./app.component.css']
})
export class AppComponent {
   title='Angular 7 Project!';
   todaydate;
   constructor(private myservice: MyserviceService) {}
   ngOnInit() {
      this.todaydate=this.myservice.showTodayDate();
   }
}
默认情况下,在创建的任何组件中都会调用ngOnInit函数。如上所示,从服务中获取日期。
我们将在.html文件中显示日期,如下所示-
链接:https://www.learnfk.comhttps://www.learnfk.com/angular7/angular7-services.html
来源:LearnFk无涯教程网
app.component.html
{{todaydate}}
<app-new-cmp></app-new-cmp>
现在让我们看看如何在创建的新组件中使用服务。
new-cmp.component.ts
import { Component, OnInit } from '@angular/core';
import { MyserviceService } from './../myservice.service';

@Component({
   selector: 'app-new-cmp',
   templateUrl: './new-cmp.component.html',
   styleUrls: ['./new-cmp.component.css']
})
export class NewCmpComponent implements OnInit {
   newcomponent="Entered in new component created";
   todaydate;
   constructor(private myservice: MyserviceService) { }
   ngOnInit() {
      this.todaydate=this.myservice.showTodayDate();
   }
}
在我们创建的新组件中,我们需要首先导入所需的服务,并访问该服务的方法和属性。 todaydate在组件html中显示如下:
new-cmp.component.html
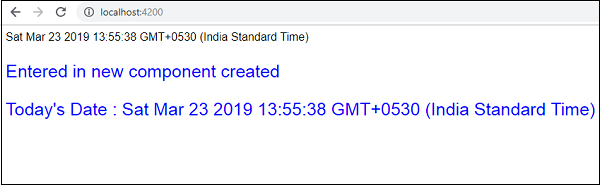
<p>
   {{newcomponent}}
</p>
<p>
   Today's Date : {{todaydate}}
</p>
新组件的selector在app.component.html文件中使用。上面的html文件中的内容将在浏览器中显示,如下所示-
如果您在任何组件中更改服务的属性,则其他组件也将更改。现在让我们看看它是如何工作的。
在myservice.service.ts中,我们创建了一个属性,并在其他父组件和新组件中使用了该属性。
import { Injectable } from '@angular/core';
@Injectable({
   providedIn: 'root'
})
export class MyserviceService {
   serviceproperty="Service Created";
   constructor() { }
   showTodayDate() {
      let ndate=new Date();
      return ndate;
   }
}
现在让我们在其他组件中使用serviceproperty变量。 在app.component.ts中,我们按以下方式访问变量-
import { Component } from '@angular/core';
import { MyserviceService } from './myservice.service';
@Component({
   selector: 'app-root',
   templateUrl: './app.component.html',
   styleUrls: ['./app.component.css']
})
export class AppComponent {
   title='Angular 7 Project!';
   todaydate;
   componentproperty;
   constructor(private myservice: MyserviceService) {}
   ngOnInit() {
      this.todaydate=this.myservice.showTodayDate();
      console.log(this.myservice.serviceproperty);
      this.myservice.serviceproperty="component created";
      //value is changed. this.componentproperty=
      this.myservice.serviceproperty;
   }
}
现在,我们将获取变量并在console.log上工作。在下一行中,我们将变量的值更改为" component created"。我们将在new-cmp.component.ts中执行相同的操作。
import { Component, OnInit } from '@angular/core';
import { MyserviceService } from './../myservice.service';
@Component({
   selector: 'app-new-cmp',
   templateUrl: './new-cmp.component.html',
   styleUrls: ['./new-cmp.component.css']
})
export class NewCmpComponent implements OnInit {
   todaydate;
   newcomponentproperty;
   newcomponent="Entered in newcomponent";
   constructor(private myservice: MyserviceService) {}
   ngOnInit() {
      this.todaydate=this.myservice.showTodayDate();
      this.newcomponentproperty=
      this.myservice.serviceproperty;
   }
}
在上述组件中,我们没有做任何更改,而是直接将属性分配给组件属性。
现在,当您在浏览器中执行它时,服务属性将被更改,因为它的值在app.component.ts中已更改,并且对new-cmp.component.ts也将显示该属性。
还要在控制台中检查该值,然后再进行更改。
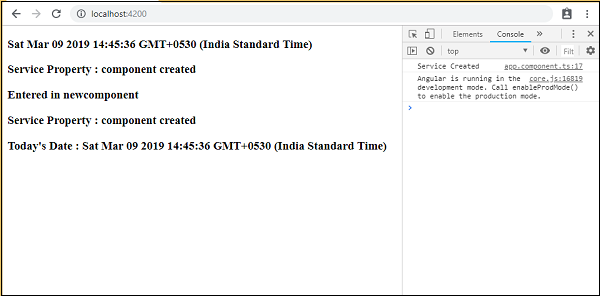
这是app.component.html和new-cmp.component.html文件-
app.component.html
<h3>{{todaydate}}>/h3>
<h3> Service Property : {{componentproperty}} </h3>
<app-new-cmp></app-new-cmp>
new-cmp.component.html
<h3>{{newcomponent}} </h3>
<h3> Service Property : {{newcomponentproperty}} </h3>
<h3> Today's Date : {{todaydate}} </h3>
祝学习愉快!(内容编辑有误?请选中要编辑内容 -> 右键 -> 修改 -> 提交!)