项目地址
https://gitee.com/Kindear/lucy-chat
介绍
lucy-chat是接入OpenAI-ChatGPT大模型人工智能的Java解决方案,大模型人工智能的发展是不可阻挡的趋势,我们环境无法创造工具,但是也要更好的使用工具,该包简化了接入流程,可以非常方便的引入并使用ChatGPT相关功能。
接入方式
lucy-chat提供了两种形式接入服务,完成集成或者独立部署后可以访问[部署地址]/doc.html调用相关接口。
1. Jar引入
准备
在引入任何 Lucy系列依赖之前,需要完成jitpack镜像仓库的配置。
<repositories>
        <repository>
            <id>jitpack.io</id>
            <url>https://www.jitpack.io</url>
        </repository>
</repositories>
引入
根据版本号引入
当前默认1.0.0-r4
		<dependency>
			<groupId>com.gitee.kindear</groupId>
			<artifactId>lucy-chat</artifactId>
			<version>${version}</version>
		</dependency>
启动类
启用 knife4j 文档,需要在启动类上配置 @EnableKnife4j
@EnableKnife4j
@SpringBootApplication
public class DemoApplication {

    public static void main(String[] args) {

        SpringApplication.run(LucyAdminApplication.class, args);
    }

}
使用 lucy-chat需要配置如下文件信息
spring.application.name=lucy-chat
# 运行端口
server.port=8080
# swagger 匹配
spring.mvc.pathmatch.matching-strategy=ant_path_matcher

# chat-gpt api-key
# 申请地址 https://platform.openai.com/account/api-keys
openai.chat.key=

# chat-gpt proxy host
# 配置代理地址 请参阅 https://www.v2ex.com/t/921689
openai.chat.host=

# 连接池最大连接数
forest.max-connections=1000
# 连接超时时间,单位为毫秒
forest.connect-timeout=30000
# 数据读取超时时间,单位为毫秒
forest.read-timeout=30000
2. 独立服务
- 从开源地址下载项目
git clone https://gitee.com/Kindear/lucy-chat
- 修改
POM文件中打包方式,即恢复<build>相关注释掉的内容
<build>
        <plugins>
            <plugin>
                <groupId>org.apache.maven.plugins</groupId>
                <artifactId>maven-compiler-plugin</artifactId>
                <version>3.8.1</version>
                <configuration>
                    <source>1.8</source>
                    <target>1.8</target>
                    <encoding>UTF-8</encoding>
                </configuration>

            </plugin>
            <plugin>
                <groupId>org.springframework.boot</groupId>
                <artifactId>spring-boot-maven-plugin</artifactId>
                <version>${spring-boot.version}</version>
                <executions>
                    <execution>
                        <goals>
                            <goal>repackage</goal>
                        </goals>
                    </execution>
                </executions>
            </plugin>
        </plugins>
    </build>
- 修改相关配置文件, 参考上文的配置文件相关内容,项目中提供的
key为私人key,随时会被替换。 - 打包项目并部署
效果
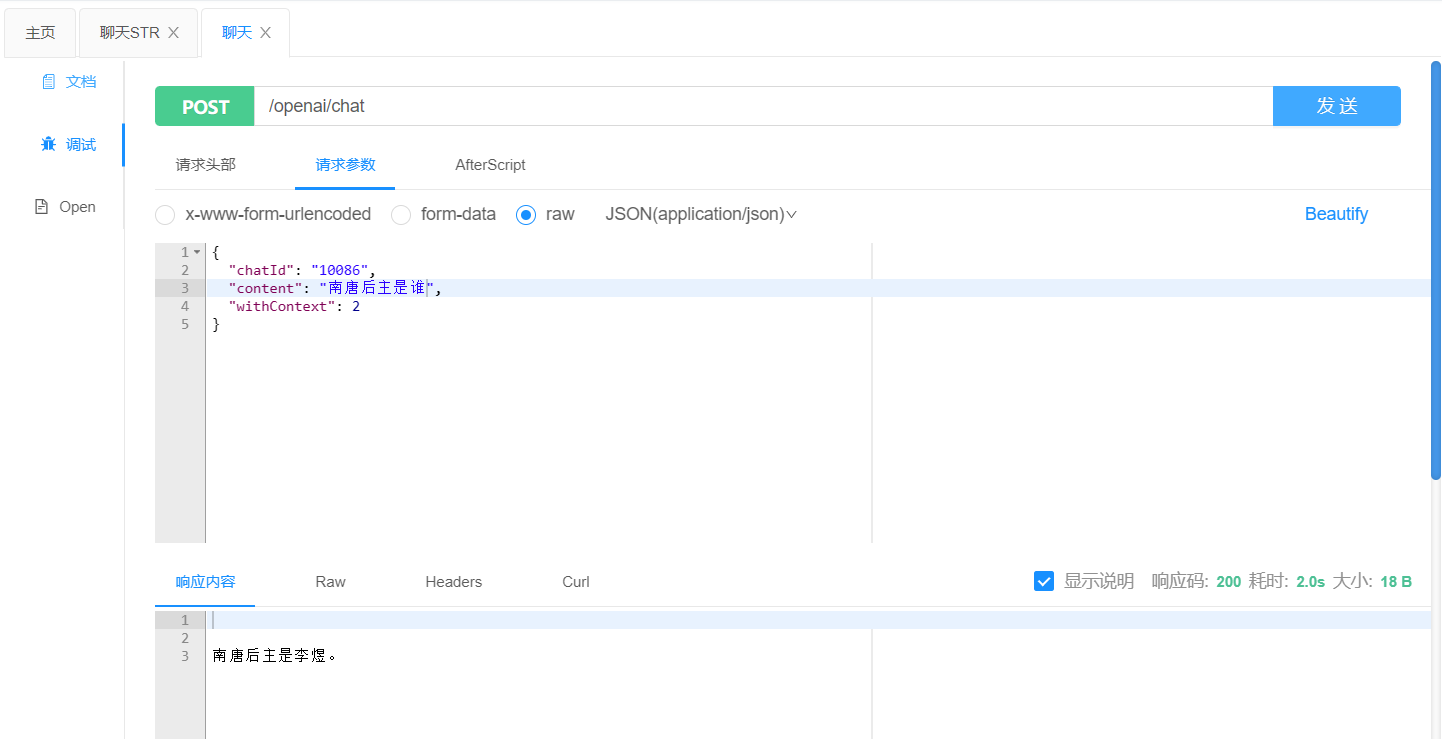
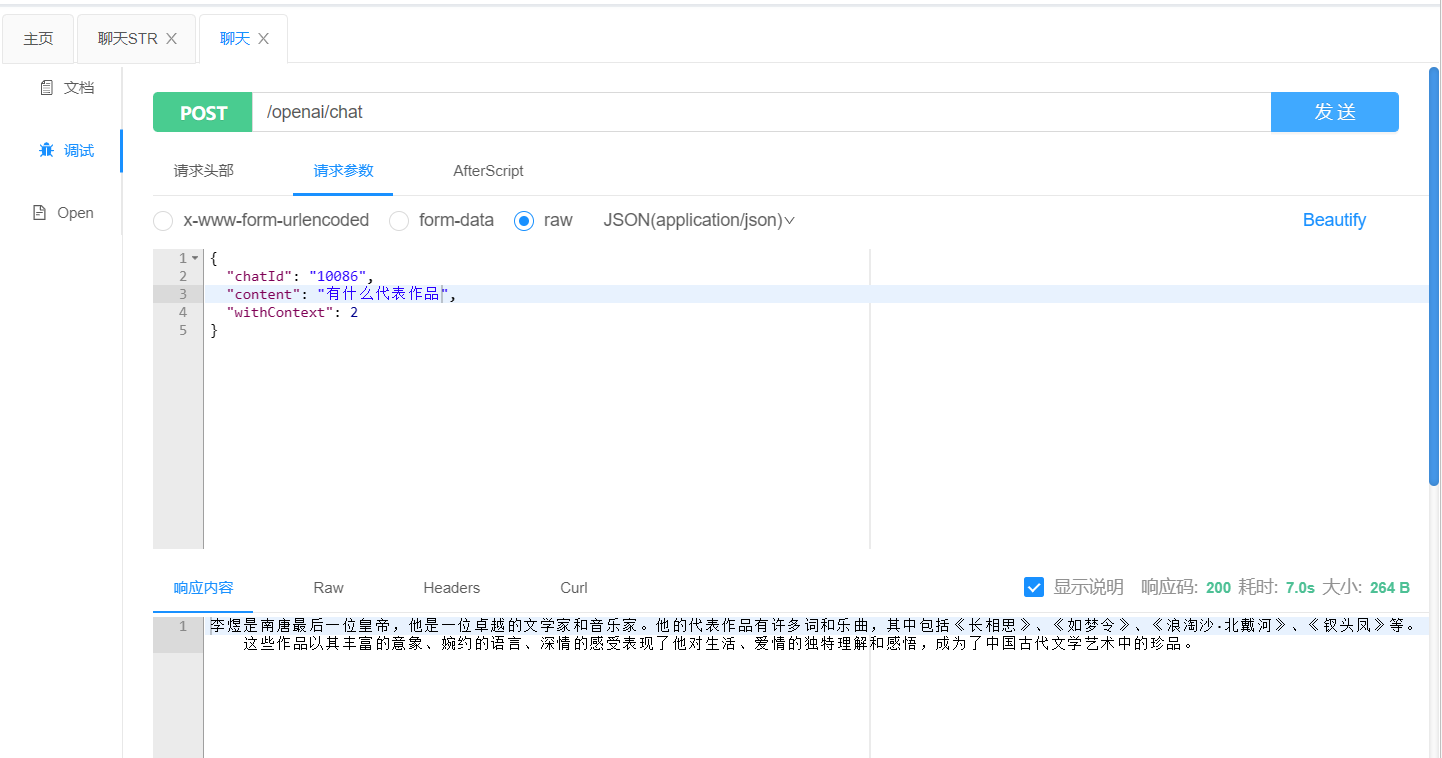
1. 对话
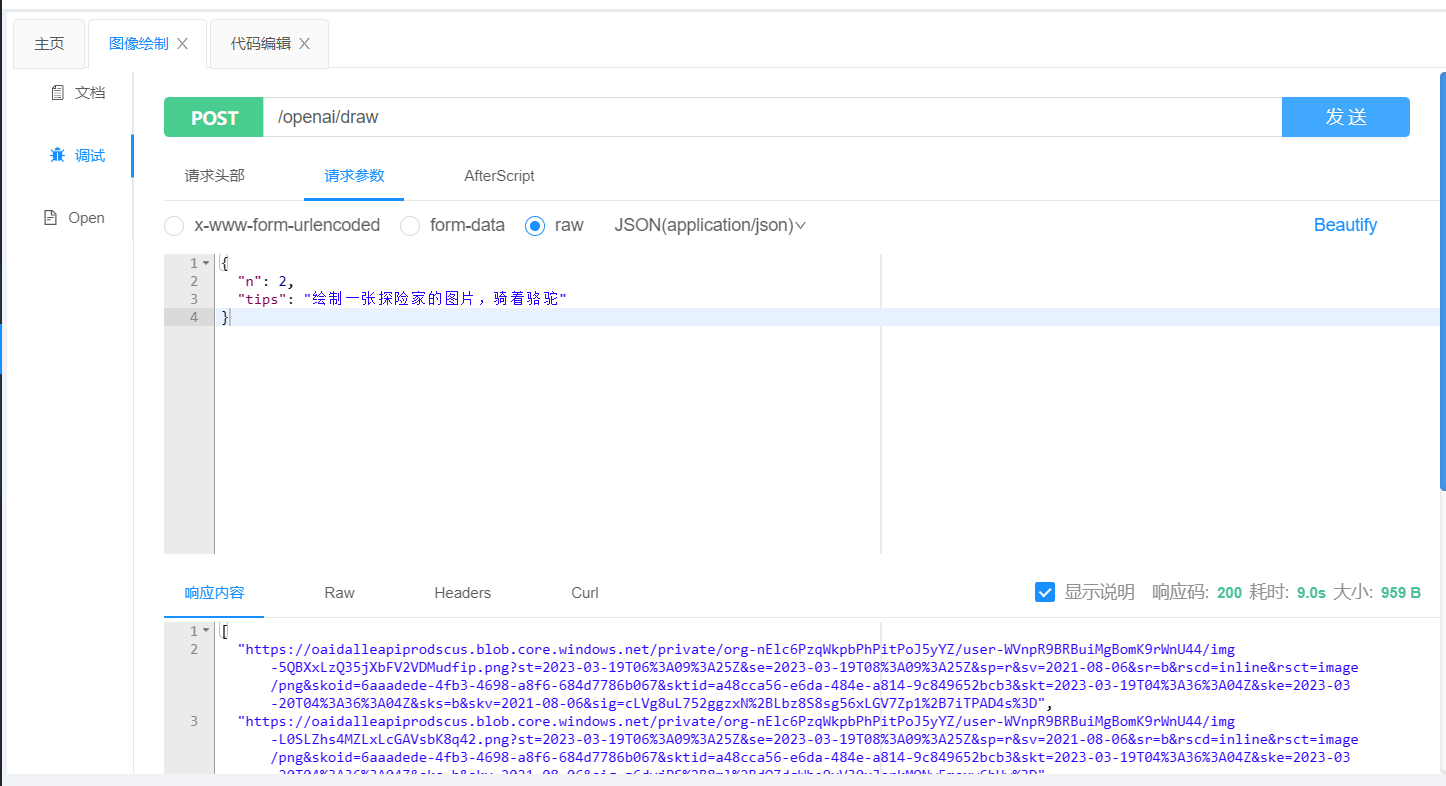
2. 图像绘制
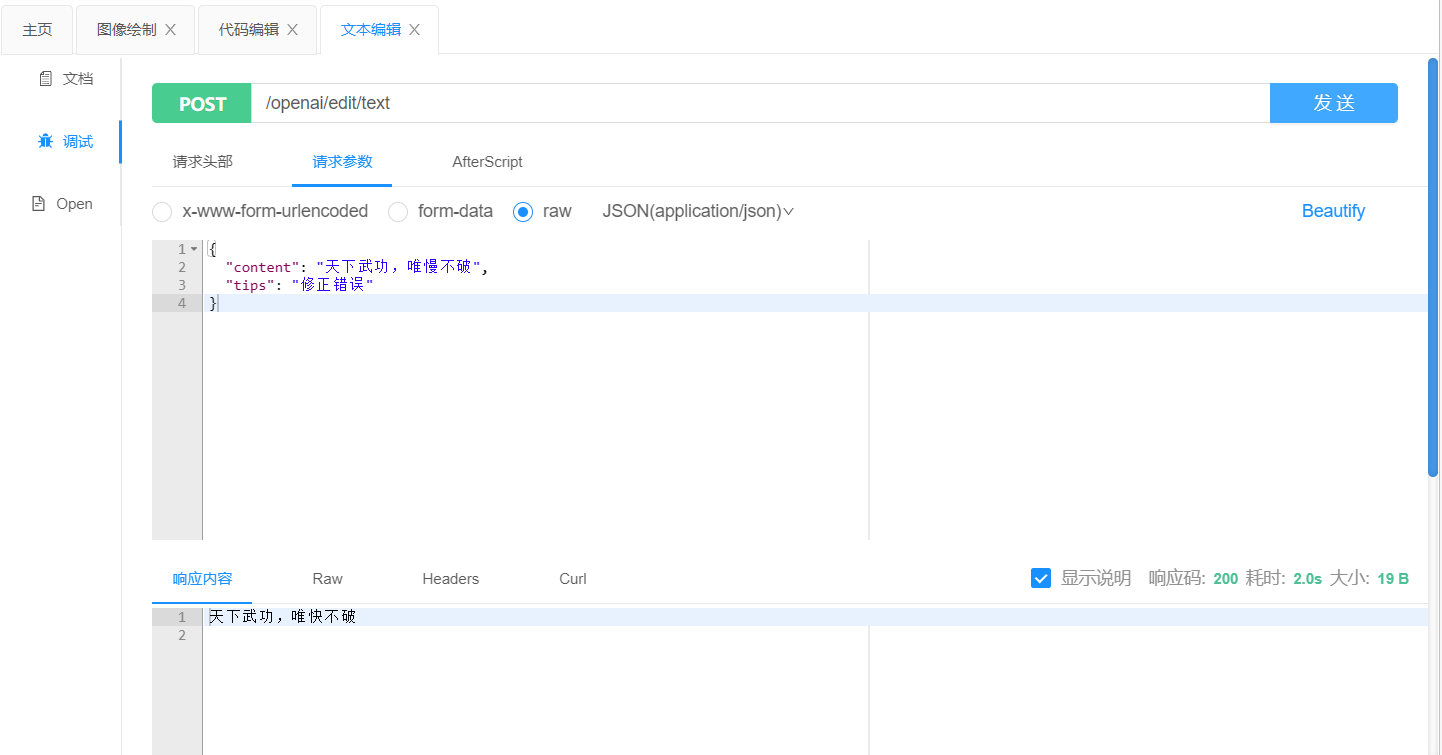
3. 文本编辑