- Python Web 渗透测试
- Python Web 渗透秘籍
- Python 高效渗透测试
 PDF电子书集合
Python 应用指纹详解
web 应用程序安全评估过程中的一个重要步骤是指纹识别。作为一名安全研究员/pentester,我们必须精通指纹识别,指纹识别提供了大量有关底层技术的信息,如软件或框架版本、web 服务器信息、操作系统等。这有助于我们发现影响应用程序和服务器的所有已知漏洞。
在本章中,我们将介绍以下主题:
尽管有些网站提供 API,但大多数网站主要是为人眼设计的,只提供为人类格式化的 HTML 页面。如果我们想要一个程序从这样一个网站获取一些数据,我们必须解析标记以获得我们需要的信息。网页抓取是一种使用计算机程序分析网页并获取所需数据的方法。
使用 Python 模块从站点获取内容的方法有很多:
- 使用
urllib/urllib2创建获取网页的 HTTP 请求,并使用BeautifulSoup解析 HTML - 要解析整个网站,我们可以使用 Scrapy(http://scrapy.org ),这有助于创建网络蜘蛛
- 使用请求模块获取数据,使用 lxml 解析数据
urllib/urllib2 模块
Urllib 是一个高级模块,允许我们编写不同服务的脚本,如 HTTP、HTTPS 和 FTP。
urllib/urllib2 的有用方法
Urllib/urllib2 提供了可用于从 URL 获取资源的方法,包括打开网页、编码参数、操作和创建标题等。我们可以使用以下一些有用的方法:
- 使用
urlopen()打开网页。当我们将 URL 传递给urlopen()方法时,它将返回一个对象,我们可以使用read()属性以字符串格式从该对象获取数据,如下所示:
        import urllib

        url = urllib.urlopen("http://packtpub.com/")

        data = url.read()

        print data
- 下一种方法是参数编码:
urlencode()。它将字段字典作为输入,并创建 URL 编码的参数字符串:
        import urllib

        fields = {
          'name' : 'Sean',
          'email' : 'Sean@example.com'
        }

        parms = urllib.urlencode(fields)
        print parms
- 另一种方法是使用参数发送请求,例如,使用 GET 请求:URL 是通过附加 URL 编码的参数来编制的:
        import urllib
        fields = {
          'name' : 'Sean',
          'email' : 'Sean@example.com'
        }
        parms = urllib.urlencode(fields)
        u = urllib.urlopen("http://example.com/login?"+parms)
        data = u.read()

        print data
- 使用 POST 请求方法,URL 编码的参数分别传递给方法
urlopen():
        import urllib
        fields = {
          'name' : 'Sean',
          'email' : 'Sean@example.com'
        }
        parms = urllib.urlencode(fields)
        u = urllib.urlopen("http://example.com/login", parms)
        data = u.read()
        print data
- 如果我们使用响应头,那么可以使用
info()方法检索 HTTP 响应头,该方法将返回类似字典的对象:
        u = urllib.urlopen("http://packtpub.com", parms)
        response_headers = u.info()
        print response_headers
- 输出如下所示:
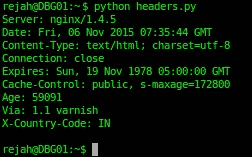
- 我们也可以使用
keys()获取所有响应头键:
>>> print response_headers.keys()
['via', 'x-country-code', 'age', 'expires', 'server',
        'connection', 'cache-control', 'date', 'content-type']
- 我们可以按如下方式访问每个条目:
>>>print response_headers['server']
nginx/1.4.5
注
Urllib 不支持 cookie 和身份验证。而且,它只支持 GET 和 POST 请求。Urllib2 构建于 urllib 之上,具有更多的功能。
-
我们可以通过编码方式获取状态码:
u = urllib.urlopen("http://packtpub.com", parms) response_code = u.code print response_code -
我们可以使用
urllib2修改请求头,如下所示:
        headers = {
         'User-Agent' : 'Mozilla/5.0 (X11; Ubuntu; Linux x86_64;
        rv:41.0) Gecko/20100101 Firefox/41.0'
        }
        request = urllib2.Request("http://packtpub.com/",
         headers=headers)
        url = urllib2.urlopen(request)
        response = url.read()
- Cookie 可按如下方式使用:
        fields = {
        'name' : 'sean',
        'password' : 'password!',
        'login' : 'LogIn'
        }

        # Here we creates a custom opener with cookies enabled
        opener = urllib2.build_opener(
        urllib2.HTTPCookieProcessor()
        )

        # creates request
        request = urllib2.Request(
          "http://example.com/login",
          urllib.urlencode(fields))

        # Login request sending
        url = opener.open(request)
        response = url.read()

        # Now we can access the private pages with the cookie
        # got from the above login request
        url = opener.open("http://example.com/dashboard")
        response = url.read()
请求模块
我们也可以使用 requests 模块来代替urllib/urllib2,这是一个更好的选择,因为它支持完全 REST API,并且只需将字典作为参数,而不编码任何参数:
import requests
response = requests.get("http://packtpub.com", parms)

# Response
print response.status_code # Response Code
print response.headers # Response Headers
print response.content # Response Content

# Request
print response.request.headers # Headers we sent
使用 BeautifulSoup 解析 HTML
前面的模块仅对获取文件有用。如果我们想解析通过urlopen获取的 HTML,我们必须使用BeautifulSoup模块。BeautifulSoup从urlopen中提取原始 HTML 和 XML 文件,并从中提取数据。要运行解析器,我们必须创建一个解析器对象并向其提供一些数据。它将扫描数据并触发各种处理程序方法。Beauty Soup 4 适用于 Python 2.6+和 Python 3。
以下是一些简单的例子:
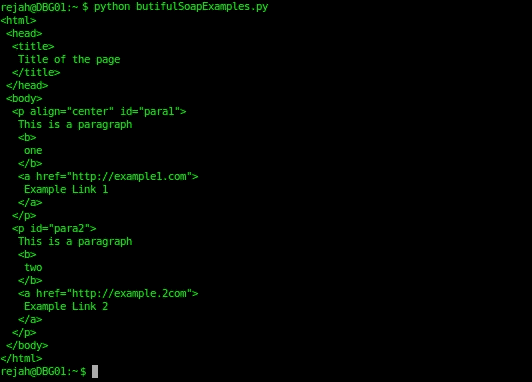
- 要美化 HTML,请使用以下代码:
         from bs4 import BeautifulSoup

         parse = BeautifulSoup('<html><head><title>Title of the
         page</title></head><body><p id="para1"
         align="center">This is a paragraph<b>one</b><a
         href="http://example1.com">Example Link 1</a> </p><p
         id="para2">This is a paragraph<b>two</b><a
         href="http://example2.com">Example Link 2</a></p></body>
         </html>')

         print parse.prettify()
- 输出结果如下:
- 使用
BeautifulSoup在 HTML 中导航的一些示例方法如下:
parse.contents[0].name
>>> u'html'
parse.contents[0].contents[0].name
>>> u'head'
head = soup.contents[0].contents[0]
head.parent.name
>>> u'html'
head.next
>>> <title>Page title</title>
head.nextSibling.name
>>> u'body'
head.nextSibling.contents[0]
>>> <p id="para1" align="center">This is a
        paragraph<b>one</b><a href="http://example1.com">Example
        Link 1</a> </p>
head.nextSibling.contents[0].nextSibling
>>> <p id="para2">This is a paragraph<b>two</b><a
        href="http://example2.com">Example Link 2</a></p>
- 在 HTML 中搜索标记和属性的一些方法如下:
parse.find_all('a')
>>> [<a href="http://example1.com">Example Link 1</a>, <a
        href="http://example2.com">Example Link 2</a>]
parse.find(id="para2")
>>> <p id="para2">This is a paragraph<b>two</b><a
        href="http://example2.com">Example Link 2</a></p>
下载页面上的所有图像
现在,我们可以编写一个脚本来下载页面上的所有图像,并将其保存到特定位置:
# Importing required modules
import requests
from bs4 import BeautifulSoup
import urlparse #urlparse is renamed to urllib.parse in Python

# Get the page with the requests
response = requests.get('http://www.freeimages.co.uk/galleries/food/breakfast/index.htm')

# Parse the page with BeautifulSoup
parse = BeautifulSoup(response.text)

# Get all image tags
image_tags = parse.find_all('img')

# Get urls to the images
images = [ url.get('src') for url in image_tags]
# If no images found in the page

if not images:
    sys.exit("Found No Images")
# Convert relative urls to absolute urls if any
images = [urlparse.urljoin(response.url, url) for url in images]
print 'Found %s images' % len(images)

# Download images to downloaded folder
for url in images:
    r = requests.get(url)
    f = open('downloaded/%s' % url.split('/')[-1], 'w')
    f.write(r.content)
    f.close()
    print 'Downloaded %s' % url
另一个强大、快速、灵活的解析器是 lxml 附带的 HTML 解析器。由于 lxml 是一个为解析 XML 和 HTML 文档而编写的扩展库,因此它可以在处理过程中处理混乱的标记。
让我们从一个例子开始。
在这里,我们将使用 requests 模块检索网页并用 lxml 解析它:
#Importing modules
from lxml import html
import requests

response = requests.get('http://packtpub.com/')
tree = html.fromstring(response.content)
现在,整个 HTML 以一个漂亮的树结构保存到tree,我们可以通过两种不同的方式进行检查:XPath 或 CSS Select。XPath 用于在元素和属性之间导航,以查找结构化文档(如 HTML 或 XML)中的信息。
我们可以使用任何 page inspect 工具(如 Firebug 或 Chrome developer 工具)获取元素的 XPath:
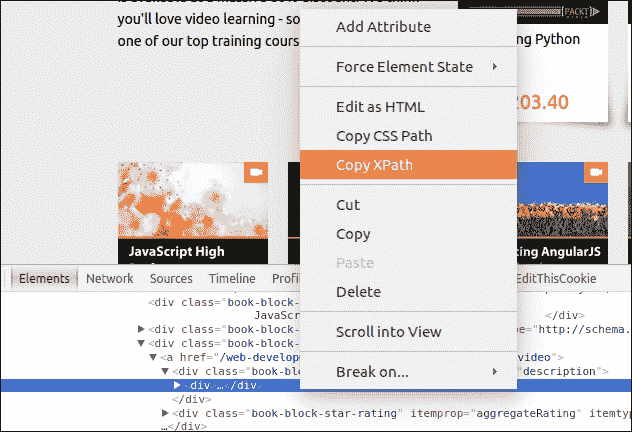
如果我们想从列表中获得书名和价格,请在源代码中找到以下部分。
<div class="book-block-title" itemprop="name">Book 1</div>
由此,我们可以创建 Xpath,如下所示:
#Create the list of Books:

books = tree.xpath('//div[@class="book-block-title"]/text()')
然后,我们可以使用以下代码打印列表:
print books
注
在了解有关 lxml 的更多信息 http://lxml.de 。
Scrapy
Scrapy 是一个用于 web 抓取和 web 爬行的开源框架。这可以用来解析整个网站。作为一个框架,这有助于为特定需求构建 spider。除了 Scrapy 之外,我们还可以使用 mechanize 编写脚本来填写和提交表单。
我们可以利用 Scrapy 的命令行界面为新的爬行脚本创建基本样板。Scrapy 可与pip一起安装。
要创建新的 spider,我们必须在安装 Scrapy 后在终端中运行以下命令:
$ scrapy startproject testSpider
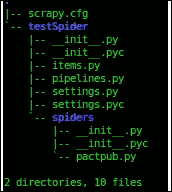
这将在当前工作目录testSpider中生成一个项目文件夹。这也将为我们的 spider 在文件夹中创建一个基本结构和文件:
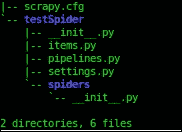
Scrapy 有 CLI 命令来创建爬行器。要创建爬行器,我们必须输入由startproject命令生成的文件夹:
$ cd testSpider
然后我们必须输入 generate spider 命令:
$ scrapy genspider pactpub pactpub.com
这将生成另一个名为spiders的文件夹,并在该文件夹内创建所需的文件。然后,文件夹结构将如下所示:
现在打开items.py文件,在名为TestspiderItem的子类中定义一个新项:
from scrapy.item import Item, Field
class TestspiderItem(Item):
    # define the fields for your item here:
    book = Field()
大多数爬行逻辑是由spider文件夹中pactpub类中的 Scrapy 给出的,因此我们可以扩展它来编写我们的spider。为此,我们必须编辑 spider 文件夹中的pactpub.py文件。
在pactpub.py文件中,我们首先导入所需的模块:
from scrapy.spiders import Spider
from scrapy.selector import Selector
from pprint import pprint
from testSpider.items import TestspiderItem
然后,我们必须扩展 Scrapy 的 spider 类来定义我们的pactpubSpider类。在这里,我们可以定义用于爬网的域和初始 URL:
# Extend  Spider Class
class PactpubSpider(Spider):
    name = "pactpub"
    allowed_domains = ["pactpub.com"]
    start_urls = (
        'https://www.pactpub.com/all',
    )
之后,我们必须定义 parse 方法,它将创建我们在items.py文件中定义的TestspiderItem()实例,并将其分配给 items 变量。
然后我们可以添加要提取的项,这可以通过 XPATH 或 CSS 样式选择器来完成。
这里,我们使用 XPATH 选择器:
    # Define parse
    def parse(self, response):
        res = Selector(response)
        items = []
        for sel in res.xpath('//div[@class="book-block"]'):
            item = TestspiderItem()
            item['book'] = sel.xpath('//div[@class="book-block-title"]/text()').extract()
            items.append(item)
        return items
现在我们已经准备好运行spider。我们可以使用以下命令运行它:
$ scrapy crawl pactpub --output results.json
这将从我们定义的 URL 开始,爬网的 URL 将被传递到testspiderItems并为每个项目创建一个新实例。
电子邮件收集
使用前面讨论的 Python 模块,我们可以从 web 上收集电子邮件和其他信息。
要从网站获取电子邮件 ID,我们可能需要编写定制的抓取脚本。
这里,我们讨论一种使用 Python 从网页中提取电子邮件的常用方法。
让我们看一个例子。这里我们使用的是BeautifulSoup和请求模块:
# Importing Modules
from bs4 import BeautifulSoup
import requests
import requests.exceptions
import urlparse
from collections import deque
import re
接下来,我们将提供要爬网的 URL 列表:
# List of urls to be crawled
urls = deque(['https://www.packtpub.com/'])
接下来,我们将处理后的 URL 存储在一个集合中,以避免对其进行两次处理:
# URLs that we have already crawled
scraped_urls = set()
收集的电子邮件也存储在一个集合中:
# Crawled emails
emails = set()
当我们开始抓取时,我们将从队列中获取一个 URL 并对其进行处理,然后将其添加到已处理的 URL 中。此外,我们将执行此操作,直到队列为空:
# Scrape urls one by one queue is empty
while len(urls):
    # move next url from the queue to the set of Scraped urls
    url = urls.popleft()
    scrapped_urls.add(url)
通过urlparse模块,我们将获得基本 URL。这将用于将相对链接转换为绝对链接:
    # Get  base url
    parts = urlparse.urlsplit(url)
    base_url = "{0.scheme}://{0.netloc}".format(parts)
    path = url[:url.rfind('/')+1] if '/' in parts.path else url
URL 的内容将可从 try catch 获得。如果出现错误,它将转到下一个 URL:
    # get url's content
    print("Scraping %s" % url)
    try:
        response = requests.get(url)
    except (requests.exceptions.MissingSchema, requests.exceptions.ConnectionError):
        # ignore  errors
        continue
在响应中,我们将搜索电子邮件并将找到的电子邮件添加到电子邮件集中:
    # Search e-mail addresses and add them into the output set
    new_emails = set(re.findall(r"[a-z0-9\.\-+_]+@[a-z0-9\.\-+_]+\.[a-z]+", response.text, re.I))
    emails.update(new_emails)
抓取页面后,我们将获得指向其他页面的所有链接,并更新 URL 队列:
    # find and process all the anchors
    for anchor in soup.find_all("a"):
        # extract link url
        link = anchor.attrs["href"] if "href" in anchor.attrs else ''
        # resolve relative links
        if link.startswith('/'):
            link = base_url + link
        elif not link.startswith('http'):
            link = path + link
        # add the new url to the queue

        if not link in urls and not link in scraped_urls:
            urls.append(link)
pentesting 中的一个常见过程是识别主机使用的操作系统。通常,这涉及诸如 hping 或 Nmap 之类的工具,在大多数情况下,这些工具在获取此类信息时非常积极,可能会在目标主机上生成警报。操作系统指纹主要分为两类:主动操作系统指纹和被动操作系统指纹。
主动指纹识别是将数据包发送到远程主机并分析相应响应的方法。在被动指纹识别中,它分析来自主机的数据包,因此不向主机发送任何流量,并充当嗅探器。在被动指纹识别中,它嗅探 TCP/IP 端口,从而避免被检测或被防火墙阻止。被动指纹识别通过分析 IP 头数据包中的初始生存时间(TTL),以及 TCP 会话的第一个数据包中的 TCP 窗口大小来确定目标操作系统。TCP 会话的第一个数据包通常是 SYN(同步)或 SYN/ACK(同步和确认)数据包。
以下是一些操作系统的正常数据包规范:
被动操作系统指纹识别不如主动方法准确,但它有助于渗透测试仪避免检测。
指纹识别系统中另一个有趣的字段是初始序列号(不是)。在 TCP 中,会话的成员通过使用 ISN 跟踪看到的数据以及下一步要发送的数据。在建立连接时,每个成员将选择一个 ISN,并通过在该号码上添加一个对以下数据包进行编号。
Scrapy 可用于分析 ISN 增量,以发现易受攻击的系统。为此,我们将通过在循环中发送多个 SYN 数据包来收集来自目标的响应。
使用sudo权限启动交互式 Python 解释器并导入 Scrapy:
>>> from scrapy.all import *
>>> ans,unans=srloop(IP(dst="192.168.1.123")/TCP(dport=80,flags="S"))
在收集了一些响应后,我们可以打印数据进行分析:
>>> temp = 0
>>> for s,r in ans:
...     temp = r[TCP].seq - temp
...     print str(r[TCP].seq) + "\t+" + str(temp)
这将打印出用于分析的 ISN 值。
如果我们安装了 Nmap,我们可以将 Nmap 的主动指纹数据库与 Scapy 一起使用,如下所示:;确保我们已配置 Nmapconf.nmap_base的指纹数据库:
>>> from scapy.all import *
>>> from scapy.modules.nmap import *
>>> conf.nmap_base ="/usr/share/nmap/nmap-os-db"
>>> nmap_fp("192.168.1.123")
此外,如果我们的系统上安装了p0f,我们可以使用p0f来猜测 Scapy 的操作系统:
>>> from scapy.all import *
>>> from scapy.modules.pof import *
>>> conf.p0f_base ="/etc/p0f/p0f.fp"
>>> conf.p0fa_base ="/etc/p0f/p0fa.fp"
>>> conf.p0fr_base ="/etc/p0f/p0fr.fp"
>>> conf.p0fo_base ="/etc/p0f/p0fo.fp"
>>> sniff(prn=prnp0f)
我们可以从网上发布的图片中找到很多信息。对于我们用智能手机或照相机拍摄的每一张照片,它都会记录日期、时间、快门速度、光圈设置、ISO 设置、是否使用闪光灯、焦距等等。这与照片一起存储,称为EXIF数据。复制图像时,EXIF 数据也会被复制,作为图像的一部分。这会引起隐私问题。例如,使用支持 GPS 的手机拍摄的照片,可以显示拍摄的位置和时间,以及设备的唯一 ID 号:
import os,sys

from PIL import Image

from PIL.ExifTags import TAGS

for (i,j) in Image.open('image.jpg')._getexif().iteritems():

        print '%s = %s' % (TAGS.get(i), j)
首先我们导入了模块PIL镜像和PIL TAGS。PIL是 Python 中的一个图像处理模块。它支持多种文件格式,并具有强大的图像处理能力。然后我们遍历结果并打印值。
还有许多其他模块支持 EXIF 数据提取,如ExifRead。
Web 应用程序指纹识别是安全评估中信息收集阶段的主要部分。它有助于我们准确识别应用程序并查明已知漏洞。这还允许我们根据信息定制有效负载或利用技术。最简单的方法是在浏览器中打开站点,查看其源代码中的特定关键字。类似地,使用 Python,我们可以下载页面,然后运行一些基本的正则表达式,这可以为您提供结果。
如本章所述,我们可以使用urllib/requests模块结合 BeautifulSoup 或 lxml 下载网站。
在本章中,我们讨论了下载和解析网站的可能方法。使用本章讨论的基本方法,我们可以构建自己的扫描仪和 web 刮板。
在下一章中,我们将讨论更多使用 Python 的攻击脚本技术。