- PHP7 模块化编程
 PDF电子书集合
PHP 核心模块构建详解
到目前为止,我们已经熟悉了 PHP7 的最新变化、设计模式、设计原则和流行的 PHP 框架。我们还对 Symfony 进行了更详细的研究,作为我们未来的选择框架。我们现在终于到了可以开始构建模块化应用程序的地步。使用 Symfony 构建模块化应用程序是通过 bundles 机制完成的。从术语上讲,从现在开始,我们将考虑捆绑和模块是相同的事情。
在本章中,我们将介绍与核心模块相关的以下主题:
回顾第 4 章、模块化网店 App的需求规范,以及中给出的线框,我们可以概括出模块将具备的一些需求。核心模块将用于设置通用的、应用程序范围的功能,如下所示:
- 为项目的网站包括基础 CSS
- 建立一个主页
- 构建其他静态页面
- 建立一个联系我们的页面
- 设置一个基本防火墙,管理员用户可以在这里管理以后从其他模块自动生成的所有 CRUD
核心模块本身并不依赖于我们将作为本书一部分编写的其他模块,也不依赖于标准 Symfony 安装之外的任何其他第三方模块。
我们首先创建一个全新的 Symfony 项目,运行以下控制台命令:
symfony new shop
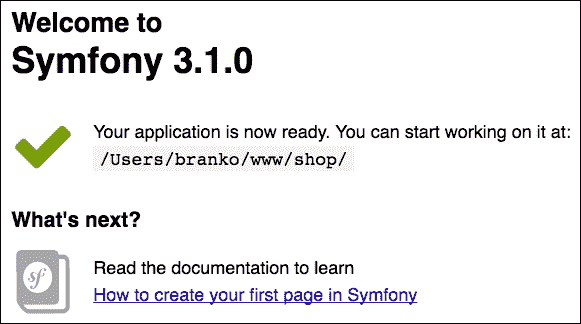
这将创建一个新的shop目录,其中包含在浏览器中运行应用程序所需的所有文件。在这些文件和目录中有src/AppBundle目录,它实际上是我们的核心模块。在浏览器中运行应用程序之前,我们需要将新创建的shop目录映射到主机名,比如shop.app,这样我们就可以通过http://shop.appURL 在浏览器中访问它。完成后,如果我们打开http://shop.app,我们会看到欢迎使用 Symfony 3.1.0屏幕,如下所示:
虽然我们现在还不需要数据库,但我们稍后将开发的其他模块将采用数据库连接,因此从一开始就设置它是值得的。我们通过使用适当的数据库连接参数配置app/config/parameters.yml来实现。
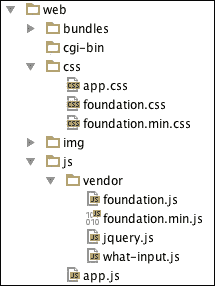
然后,我们从 AutoT4 网站下载 AutoT3E.基金会网站。http://foundation.zurb.com/sites.html 。下载完成后,我们需要将其解包,并通过/js和/css目录复制到Symfony /web目录中,如下图所示:
注
值得注意的是,这是一个简化的基础设施,我们正在使用我们的模块,在这里我们只使用 CSS 和 JavaScript 文件而不设置任何与 SAS 相关的东西。
使用基础 java T1,CSS 和 JavaScript 文件,我们编辑如下的文件:
<!doctype html>
<html class="no-js"lang="en">
  <head>
    <meta charset="utf-8"/>
    <meta http-equiv="x-ua-compatible" content="ie=edge">
    <meta name="viewport" content="width=device-width, initial-scale=1.0"/>
    <title>{% block title %}Welcome!{% endblock %}</title>
    <link rel="stylesheet"href="{{ asset('css/foundation.css') }}"/>
    {% block stylesheets%}{% endblock %}
  </head>
  <body>
    <!-- START BODY -->
    <!-- TOP-MENU -->
    <!-- SYSTEM-WIDE-MESSAGES -->
    <!-- PER-PAGE-BODY -->
    <!-- FOOTER -->
    <!-- START BODY -->
    <script src="{{ asset('js/vendor/jquery.js') }}"></script>
    <script src="{{ asset('js/vendor/what-input.js') }}"></script>
    <script src="{{ asset('js/vendor/foundation.js') }}"></script>
    <script>
      $(document).foundation();
    </script>
    {% block javascripts%}{% endblock %}
  </body>
</html>
在这里,我们将设置整个头部和身体前端区域,并加载所有必要的 CSS 和 JavaScript。Twigsasset标签帮助我们构建 URL 路径,我们只需传递 URL 路径本身,它就会为我们构建一个完整的 URL。关于页面的实际正文,这里有几件事要考虑。我们将如何构建类别、客户和结账菜单?在这一点上,我们没有这些模块中的任何一个,我们也不想让它们成为我们核心模块的必备模块。那么,我们如何解决目前还不存在的会计问题呢?
对于类别、客户和结帐菜单,我们可以为每个菜单项定义全局细枝变量,然后这些变量将用于呈现菜单。这些变量将通过适当的服务进行归档。由于核心包不知道未来的目录、客户和签出模块,我们将首先创建一些虚拟服务,并将它们与全局细枝变量挂钩。稍后,当我们开发 catalog、customer 和 checkout 模块时,这些模块将覆盖适当的服务,从而为 into 菜单提供正确的值。
这种方法可能不适合理想的模块化应用程序的概念,但它将满足我们的需要,因为我们没有硬编码任何依赖项。
我们首先在app/config/config.yml文件中添加以下条目:
twig:
# ...
globals:
category_menu: '@category_menu'
customer_menu: '@customer_menu'
checkout_menu: '@checkout_menu'
products_bestsellers: '@bestsellers'
products_onsale: '@onsale'category_menu_items、customer_menu_items、checkout_menu_items、products_bestsellers和products_onsale变量成为全局细枝变量,我们可以在任何细枝模板中使用,如下例所示:
<ul>
  {% for category in category_menu.getItems() %}
  <li>{{ category.name }}</li>
  {% endfor %}
</ul>
Twig 全局变量config中的@字符用于表示服务名称的开头。这是为我们的 Twig 变量提供值对象的服务。接下来,我们继续创建实际的category_menu、customer_menu、checkout_menu、bestsellers和onsale服务,修改app/config/services.yml如下:
services:
category_menu:
  class: AppBundle\Service\Menu\Category
customer_menu:
  class: AppBundle\Service\Menu\Customer
checkout_menu:
  class: AppBundle\Service\Menu\Checkout
bestsellers:
  class: AppBundle\Service\Menu\BestSellers
onsale:
class: AppBundle\Service\Menu\OnSale此外,我们在src/AppBundle/Service/Menu/目录下创建每个列出的服务类。我们从具有以下内容的src/AppBundle/Service/Menu/Bestsellers.php文件开始:
namespace AppBundle\Service\Menu;

class BestSellers {
  public function getItems() {
    // Note, this can be arranged as per some "Product"interface, so to know what dummy data to return
    return array(
      ay('path' =>'iphone', 'name' =>'iPhone', 'img' =>'//github/php/mod/img/missing-image.png', 'price' => 49.99, 'add_to_cart_url' =>'#'),
      array('path' =>'lg', 'name' =>'LG', 'img' =>
        '//github/php/mod/img/missing-image.png', 'price' => 19.99, 'add_to_cart_url' =>'#'),
      array('path' =>'samsung', 'name' =>'Samsung', 'img'=>'//github/php/mod/img/missing-image.png', 'price' => 29.99, 'add_to_cart_url' =>'#'),
      array('path' =>'lumia', 'name' =>'Lumia', 'img' =>'//github/php/mod/img/missing-image.png', 'price' => 19.99, 'add_to_cart_url' =>'#'),
      array('path' =>'edge', 'name' =>'Edge', 'img' =>'//github/php/mod/img/missing-image.png', 'price' => 39.99, 'add_to_cart_url' =>'#'),
    );
  }
}然后添加src/AppBundle/Service/Menu/Category.php文件,内容如下:
class Category {
  public function getItems() {
    return array(
      array('path' =>'women', 'label' =>'Women'),
      array('path' =>'men', 'label' =>'Men'),
      array('path' =>'sport', 'label' =>'Sport'),
    );
  }
}接下来,我们添加了这个src/AppBundle/Service/Menu/Checkout.php文件,其内容如下所示:
class Checkout
{
  public function getItems()
  {
     // Initial dummy menu
     return array(
       array('path' =>'cart', 'label' =>'Cart (3)'),
       array('path' =>'checkout', 'label' =>'Checkout'),
    );
  }
}完成后,我们将继续向src/AppBundle/Service/Menu/Customer.php文件添加以下内容:
class Customer
{
  public function getItems()
  {
    // Initial dummy menu
    return array(
      array('path' =>'account', 'label' =>'John Doe'),
      array('path' =>'logout', 'label' =>'Logout'),
    );
  }
}然后我们添加具有以下内容的src/AppBundle/Service/Menu/OnSale.php文件:
class OnSale
{
  public function getItems()
  {
    // Note, this can be arranged as per some "Product" interface, so to know what dummy data to return
    return array(
      array('path' =>'iphone', 'name' =>'iPhone', 'img' =>'//github/php/mod/img/missing-image.png', 'price' => 19.99, 'add_to_cart_url' =>'#'),
      array('path' =>'lg', 'name' =>'LG', 'img' =>'//github/php/mod/img/missing-image.png', 'price'      => 29.99, 'add_to_cart_url' =>'#'),
      array('path' =>'samsung', 'name' =>'Samsung', 'img'=>'//github/php/mod/img/missing-image.png', 'price' => 39.99, 'add_to_cart_url' =>'#'),
      array('path' =>'lumia', 'name' =>'Lumia', 'img' =>'//github/php/mod/img/missing-image.png', 'price' => 49.99, 'add_to_cart_url' =>'#'),
      array('path' =>'edge', 'name' =>'Edge', 'img' =>'//github/php/mod/img/missing-image.png', 'price' => 69.99, 'add_to_cart_url' =>'#'),
    ;
  }
}
我们现在已经定义了五个全局细枝变量,它们将用于构建我们的应用程序菜单。即使变量现在连接到一个只返回一个虚拟数组的虚拟服务,我们已经有效地将菜单项解耦到其他即将构建的模块中。当我们稍后开始构建我们的类别、客户和结账模块时,我们只需编写一个服务覆盖,并用真正的项目正确地填充菜单项数组。这将是理想的情况。
注
理想情况下,我们希望我们的服务按照某个接口返回数据,以确保任何人通过接口重写或扩展数据。由于我们试图将应用程序保持在最低限度,因此我们将继续使用简单的数组。
我们现在可以返回到我们的app/Resources/views/base.html.twig文件,用以下代码替换前面代码中的<!-- TOP-MENU -->:
<div class="title-bar" data-responsive-toggle="appMenu" data-hide-for="medium">
  <button class="menu-icon" type="button" data-toggle></button>
  <div class="title-bar-title">Menu</div>
</div>

<div class="top-bar" id="appMenu">
  <div class="top-bar-left">
    {# category_menu is global twig var filled from service, and later overriden by another module service #}
    <ul class="menu">
      <li><a href="{{ path('homepage') }}">HOME</a></li>
        {% block category_menu %}
        {% for link in category_menu.getItems() %}
      <li><a href="{{ link.path }}">{{ link.label }}</li></a>
      {% endfor %}
      {% endblock %}
    </ul>
  </div>
  <div class="top-bar-right">
    <ul class="menu">
      {# customer_menu is global twig var filled from service, and later overriden by another module service #}
      {% block customer_menu %}
      {% for link in customer_menu.getItems() %}
      <li><a href="{{ link.path }}">{{ link.label }}</li></a>
      {% endfor %}
      {% endblock %}
      {# checkout_menu is global twig var filled from service, and later overriden by another module service #}
      {% block checkout_menu %}
      {% for link in checkout_menu.getItems() %}
      <li><a href="{{ link.path }}">{{ link.label }}</li></a>
      {% endfor %}
      {% endblock %}
    </ul>
  </div>
</div>
然后我们可以将替换为以下内容:
<div class="row column">
  {% for flash_message in app.session.flashBag.get('alert') %}
  <div class="alert callout">
    {{ flash_message }}
  </div>
  {% endfor %}
  {% for flash_message in app.session.flashBag.get('warning') %}
  <div class="warning callout">
    {{ flash_message }}
  </div>
  {% endfor %}
  {% for flash_message in app.session.flashBag.get('success') %}
  <div class="success callout">
    {{ flash_message }}
  </div>
  {% endfor %}
</div>我们将<!-- PER-PAGE-BODY -->替换为以下内容:
<div class="row column">
  {% block body %}{% endblock %}
</div>我们将<!-- FOOTER -->替换为以下内容:
<div class="row column">
  <ul class="menu">
    <li><a href="{{ path('about') }}">About Us</a></li>
    <li><a href="{{ path('customer_service') }}">Customer Service</a></li>
    <li><a href="{{ path('privacy_cookie') }}">Privacy and Cookie Policy</a></li>
    <li><a href="{{ path('orders_returns') }}">Orders and Returns</a></li>
    <li><a href="{{ path('contact') }}">Contact Us</a></li>
  </ul>
</div>现在我们可以继续编辑src/AppBundle/Controller/DefaultController.php文件并添加以下代码:
/**
 * @Route("/", name="homepage")
 */
public function indexAction(Request $request)
{
  return $this->render('AppBundle:default:index.html.twig');
}

/**
 * @Route("/about", name="about")
 */
public function aboutAction()
{
  return $this->render('AppBundle:default:about.html.twig');
}

/**
 * @Route("/customer-service", name="customer_service")
 */
public function customerServiceAction()
{
  return $this->render('AppBundle:default:customer-service.html.twig');
}

/**
 * @Route("/orders-and-returns", name="orders_returns")
 */
public function ordersAndReturnsAction()
{
  return $this->render('AppBundle:default:orders-returns.html.twig');
}

/**
 * @Route("/privacy-and-cookie-policy", name="privacy_cookie")
 */
public function privacyAndCookiePolicyAction()
{
  return $this->render('AppBundle:default:privacy-cookie.html.twig');
}驻留在src/AppBundle/Resources/views/default目录中的所有使用过的模板文件(about.html.twig、customer-service.html.twig、orders-returns.html.twig、privacy-cookie.html.twig)可以类似地定义如下:
{% extends 'base.html.twig' %}

{% block body %}
<div class="row">
  <h1>About Us</h1>
</div>
<div class="row">
  <p>Loremipsum dolor sit amet, consecteturadipiscingelit...</p>
</div>
{% endblock %}在这里,我们只是用row类将标题和内容包装到div元素中,只是给它一些结构。结果应与此处显示的页面相似:

联系我们页面需要不同的方法,因为它将包含一个表单。为了构建表单,我们使用 Symfony 的Form组件,在src/AppBundle/Controller/DefaultController.php文件中添加以下内容:
/**
 * @Route("/contact", name="contact")
 */
public function contactAction(Request $request) {

  // Build a form, with validation rules in place
  $form = $this->createFormBuilder()
  ->add('name', TextType::class, array(
    'constraints' => new NotBlank()
  ))
  ->add('email', EmailType::class, array(
    'constraints' => new Email()
  ))
  ->add('message', TextareaType::class, array(
    'constraints' => new Length(array('min' => 3))
  ))
   ->add('save', SubmitType::class, array(
    'label' =>'Reach Out!',
    'attr' => array('class' =>'button'),
  ))
  ->getForm();

  // Check if this is a POST type request and if so, handle form
  if ($request->isMethod('POST')) {
    $form->handleRequest($request);

    if ($form->isSubmitted() && $form->isValid()) {
      $this->addFlash(
        'success',
        'Your form has been submitted. Thank you.'
      );

      // todo: Send an email out...

      return $this->redirect($this->generateUrl('contact'));
    }
  }

  // Render "contact us" page
  return $this->render('AppBundle:default:contact.html.twig', array(
    'form' => $form->createView()
  ));
}
在这里,我们首先通过 FormBuilder 构建表单。add方法接受字段定义和字段约束,验证可以基于这些约束。然后,我们为 HTTPPOST 方法添加了一个检查,在这种情况下,我们向表单提供请求参数并对其运行验证。
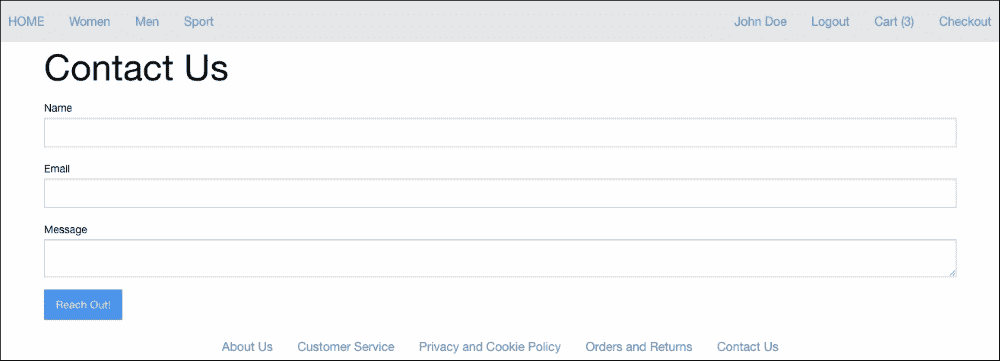
有了contactAction方法,我们仍然需要一个模板文件来实际呈现表单。我们通过添加包含以下内容的src/AppBundle/Resources/views/default/contact.html.twig文件来实现:
{% extends 'base.html.twig' %}

{% block body %}

<div class="row">
  <h1>Contact Us</h1>
</div>

<div class="row">
  {{ form_start(form) }}
  {{ form_widget(form) }}
  {{ form_end(form) }}
</div>
{% endblock %}
基于这几个标记,Twig 为我们处理表单渲染。生成的浏览器输出是一个页面,如下所示:
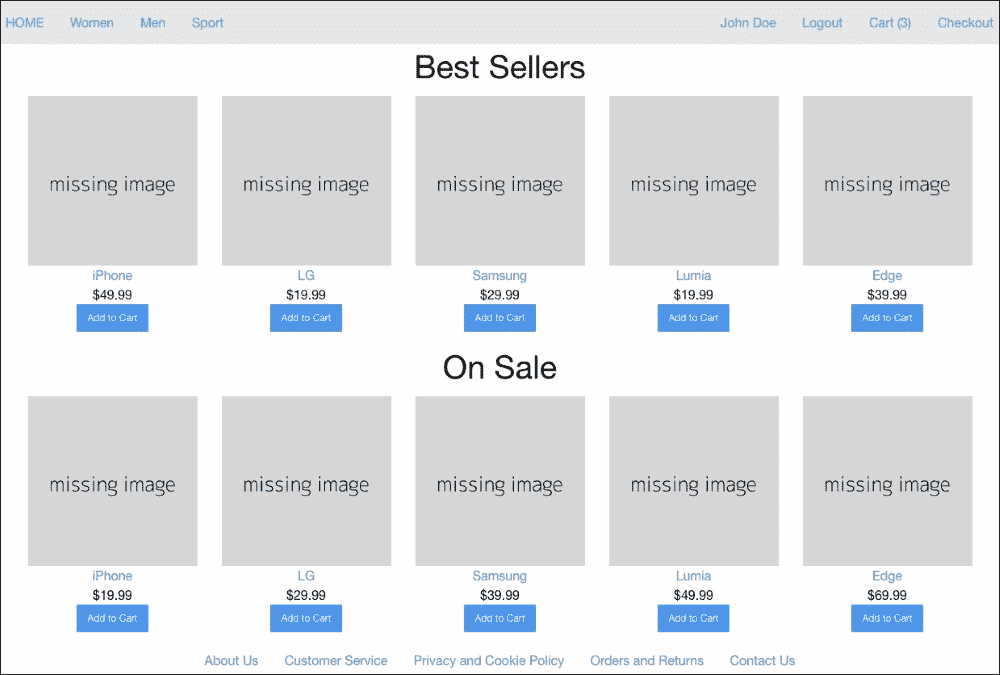
我们几乎已经准备好了所有的页面。不过,我们的主页缺少一件事,那就是正文部分。与其他静态内容的页面不同,这个页面实际上是动态的,因为它列出了畅销书和正在销售的产品。这些数据预计将来自其他模块,目前还不可用。然而,这并不意味着我们不能为它们准备虚拟占位符。让我们继续编辑app/Resources/views/default/index.html.twig文件,如下所示:
{% extends 'base.html.twig' %}
{% block body %}
<!--products_bestsellers -->
<!--products_onsale -->
{% endblock %}
现在我们需要将替换为以下内容:
{% if products_bestsellers %}
<h2 class="text-center">Best Sellers</h2>
<div class="row products_bestsellers text-center small-up-1 medium-up-3 large-up-5" data-equalizer data-equalize-by- row="true">
  {% for product in products_bestsellers.getItems() %}
  <div class="column product">
    <img src="{{ asset(product.img) }}" alt="missing image"/>
    <a href="{{ product.path }}">{{ product.name }}</a>
    <div>${{ product.price }}</div>
    <div><a class="small button"href="{{ product.add_to_cart_url }}">Add to Cart</a></div>
  </div>
  {% endfor %}
</div>
{% endif %}现在我们需要将<!-- products_onsale -->替换为以下内容:
{% if products_onsale %}
<h2 class="text-center">On Sale</h2>
<div class="row products_onsale text-center small-up-1 medium-up-3 large-up-5" data-equalizer data-equalize-by-row="true">
  {% for product in products_onsale.getItems() %}
  <div class="column product">
    <img src="{{ asset(product.img) }}" alt="missing image"/>
    <a href="{{ product.path }}">{{ product.name }}</a>
  <div>${{ product.price }}</div>
  <div><a class="small button"href="{{ product.add_to_cart_url }}">Add to Cart</a></div>
  </div>
  {% endfor %}
</div>
{% endif %}
提示
http://dummyimage.com 使我们能够为我们的应用程序创建占位符图像。
此时我们应该看到如下所示的主页:
配置应用程序范围的安全性
作为应用程序范围安全性的一部分,我们试图实现的是设置一些基本保护,以防未来的客户或任何其他用户能够访问和使用未来自动生成的 CRUD 控制器。我们通过修改app/config/security.yml文件来实现。security.yml文件有几个组件需要处理:防火墙、访问控制、提供者和编码器。如果我们观察到前一个测试应用程序中自动生成的 CRUD,很明显我们需要保护以下内容不被客户访问:
GET|POST /newGET|POST /{id}/editDELETE /{id}
换句话说,URL 中包含/new和/edit的所有内容,以及DELETE方法的所有内容,都需要对客户进行保护。考虑到这一点,我们将使用 Symfony 安全功能创建一个角色为ROLE_ADMIN的内存用户。然后,我们将创建一个只允许ROLE_ADMIN访问我们刚才提到的资源的访问控制列表,以及一个防火墙,当我们试图访问这些资源时,它会触发 HTTP 基本身份验证登录表单。
使用内存提供程序意味着在我们的security.yml文件中对用户进行硬编码。对于我们的应用程序,我们将针对管理员类型的用户执行此操作。但是,实际密码不需要硬编码。假设我们将使用1L6lllW9zXg0作为密码,让我们跳转到控制台并键入以下命令:
php bin/console security:encode-password
这将产生如下输出。
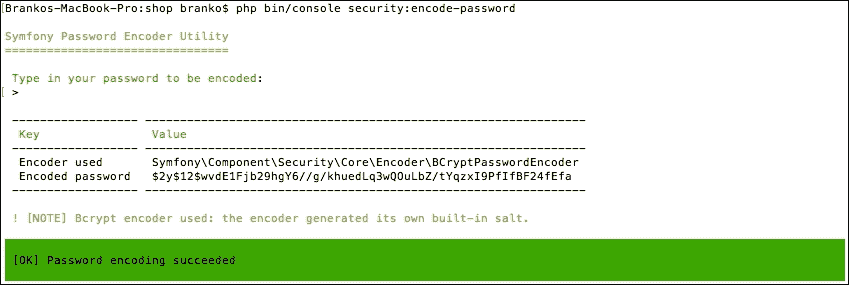
我们现在可以通过添加内存提供程序来编辑security.yml,并将生成的编码密码复制粘贴到其中,如下所示:
security:
    providers:
        in_memory:
            memory:
                users:
                    john:
                        password: $2y$12$DFozWehwPkp14sVXr7.IbusW8ugvmZs9dQMExlggtyEa/TxZUStnO
roles: 'ROLE_ADMIN'这里我们定义了一个角色为ROLE_ADMIN的用户john,其密码为编码的1L6lllW9zXg0。
一旦我们有了提供者,我们就可以继续向security.yml文件添加编码器。否则 Symfony 将不知道如何使用分配给john用户的当前密码:
security:
    encoders:
        Symfony\Component\Security\Core\User\User:
            algorithm: bcrypt
            cost: 12
然后我们添加防火墙,如下所示:
security:
    firewalls:
        guard_new_edit:
            pattern: /(new)|(edit)
            methods: [GET, POST]
            anonymous: ~
            http_basic: ~
       guard_delete:
           pattern: /
           methods: [DELETE]
           anonymous: ~
http_basic: ~guard_new_edit和guard_delete名称是我们两个应用程序防火墙的免费名称。guard_new_edit防火墙将拦截对 URL 中包含/new或/edit字符串的任何路由的所有 GET 和 POST 请求。guard_delete防火墙将拦截任何 URL 上的任何 HTTPDELETE方法。一旦这些防火墙启动,它们将显示 HTTP 基本身份验证表单,并且仅在用户登录时才允许访问。
然后我们添加访问控制列表,如下所示:
security:
    access_control:
      # protect any possible auto-generated CRUD actions from everyone's access
      - { path: /new, roles: ROLE_ADMIN }
      - { path: /edit, roles: ROLE_ADMIN }
- { path: /, roles: ROLE_ADMIN, methods: [DELETE] }有了这些条目后,尝试使用access_control下定义的任何模式访问任何 URL 的用户将显示浏览器登录,如下所示:
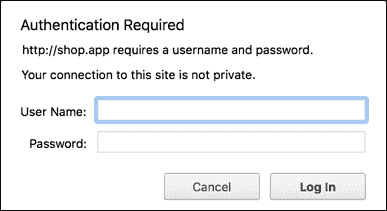
唯一可以登录的用户是密码为1L6lllW9zXg0的john。一旦通过身份验证,用户就可以访问所有 CRUD 链接。对于我们的简单应用程序来说,这应该足够了。
我们当前的模块除了控制器类和虚拟服务类之外没有其他特定类。因此,在这里我们不必为单元测试而烦恼。
在我们开始编写我们的功能测试之前,我们需要通过将我们的 bundleTests目录添加到testsuite路径来编辑phpunit.xml.dist文件,如下所示:
<testsuites>
  <testsuite name="Project Test Suite">
    <-- ... other elements ... -->
      <directory>src/AppBundle/Tests</directory>
    <-- ... other elements ... -->
  </testsuite>
</testsuites>我们的功能测试将只覆盖一个控制器,因为我们没有其他控制器。我们首先创建一个src/AppBundle/Tests/Controller/DefaultControllerTest.php文件,内容如下:
namespace AppBundle\Tests\Controller;

use Symfony\Bundle\FrameworkBundle\Test\WebTestCase;

class DefaultControllerTest extends WebTestCase
{
//…
}
下一步是测试我们的每个控制器动作。至少我们应该测试页面内容是否正确输出。
提示
要在我们的 IDE 中自动完成,我们可以从官方网站下载PHPUnitphar文件 https://phpunit.de 。下载后,我们可以简单地将其添加到项目的根目录中,这样 IDE,比如PHPStorm就可以将其选中。这使得跟踪所有那些$this->assert方法调用及其参数变得很容易。
我们首先要测试的是我们的主页。我们通过在DefaultControllerTest类的主体中添加以下内容来实现。
public function testHomepage()
{
  // @var \Symfony\Bundle\FrameworkBundle\Client
  $client = static::createClient();
  /** @var \Symfony\Component\DomCrawler\Crawler */
  $crawler = $client->request('GET', '/');

  // Check if homepage loads OK
  $this->assertEquals(200, $client->getResponse()->getStatusCode());

  // Check if top bar left menu is present
  $this->assertNotEmpty($crawler->filter('.top-bar-left li')->count());

  // Check if top bar right menu is present
  $this->assertNotEmpty($crawler->filter('.top-bar-right li')->count());

  // Check if footer is present
  $this->assertNotEmpty($crawler->filter('.footer li')->children()->count());
}
在这里,我们同时检查几件事情。我们正在检查页面加载是否正常,以及 HTTP 200 状态。然后我们抓取左右菜单清点他们的项目,看看他们是否有。如果所有单项检查均通过,testHomepage测试被视为已通过。
我们通过在DefaultControllerTest类中添加以下内容来进一步测试所有静态页面:
public function testStaticPages()
{
  // @var \Symfony\Bundle\FrameworkBundle\Client
  $client = static::createClient();
  /** @var \Symfony\Component\DomCrawler\Crawler */

  // Test About Us page
  $crawler = $client->request('GET', '/about');
  $this->assertEquals(200, $client->getResponse()->getStatusCode());
  $this->assertContains('About Us', $crawler->filter('h1')->text());

  // Test Customer Service page
  $crawler = $client->request('GET', '/customer-service');
  $this->assertEquals(200, $client->getResponse()->getStatusCode());
  $this->assertContains('Customer Service', $crawler->filter('h1')->text());

  // Test Privacy and Cookie Policy page
  $crawler = $client->request('GET', '/privacy-and-cookie-policy');
  $this->assertEquals(200, $client->getResponse()->getStatusCode());
  $this->assertContains('Privacy and Cookie Policy', $crawler->filter('h1')->text());

  // Test Orders and Returns page
  $crawler = $client->request('GET', '/orders-and-returns');
  $this->assertEquals(200, $client->getResponse()->getStatusCode());
  $this->assertContains('Orders and Returns', $crawler->filter('h1')->text());

  // Test Contact Us page
  $crawler = $client->request('GET', '/contact');
  $this->assertEquals(200, $client->getResponse()->getStatusCode());
  $this->assertContains('Contact Us', $crawler->filter('h1')->text());
}在这里,我们为所有页面运行相同的assertEquals和assertContains函数。我们只是试图确认每个页面都加载了 HTTP 200,并且页面标题返回了正确的值,也就是说,h1元素。
最后,我们通过在DefaultControllerTest类中添加以下内容来处理表单提交测试:
public function testContactFormSubmit()
{
  // @var \Symfony\Bundle\FrameworkBundle\Client
  $client = static::createClient();
  /** @var \Symfony\Component\DomCrawler\Crawler */
  $crawler = $client->request('GET', '/contact');

  // Find a button labeled as "Reach Out!"
  $form = $crawler->selectButton('Reach Out!')->form();

  // Note this does not validate form, it merely tests against submission and response page
  $crawler = $client->submit($form);
  $this->assertEquals(200, $client->getResponse()->getStatusCode());
}在这里,我们通过伸出手来抓住表单元素!提交按钮。获取表单后,我们会在客户端上触发submit方法,将实例从元素传递给它。值得注意的是,这里没有测试实际的表单验证。即使如此,提交的表单仍应导致 HTTP 200 状态。
这些测试是决定性的。如果我们愿意,我们可以将它们编写得更加健壮,因为我们可以测试许多元素。
在本章中,我们用 Symfony 术语构建了第一个模块或包。模块本身并不是真正松散耦合的,因为它依赖于app目录中的一些东西,比如app/Resources/views/base.html.twig布局模板。当我们谈到核心模块时,我们可以摆脱它,因为它们仅仅是我们为其余模块设置的基础。
接下来,在下一章中,我们将构建一个目录模块。这将是我们的网上商店应用程序的基础。