- NodeJS REST API设计
 PDF电子书集合
Node.js 为生产准备 RESTful API详解
在前一章中,我们实现了一个完整的目录 RESTful API;但是,完全功能化的 API 和生产就绪的 API 之间存在差异。在本章中,我们将介绍如何对 API 进行完整的记录和测试。在投入生产之前,这些关键需求必须由任何软件完成。
综上所述,本章将涵盖以下主题:
到目前为止,我们部分介绍了 RESTfulWebServicesAPI 是如何由 wadl 描述的,以及如何由 swagger 规范记录的。现在是时候充分利用它们并在我们的目录应用中的 express.js routes 中公开它们的自描述性元数据了。这样一来,消费者和最终用户都将为元数据提供单独的 URL,以方便他们采用该服务。让我们从 wadl 定义开始。以下是 wadl 对操作的完整描述:
  <resources base="http://localhost:8080/catalog/">
        <resource path="/catalog/item/{itemId}">
            <method name="GET">
                <request>
                    <param name="category" type="xsd:string" style="template"/>
                </request>
                <response status="200">
                    <representation mediaType="application/json" />
                </response>
                <response status="404">
                    <representation mediaType="text/plain" />
                </response>
                <response status="500">
                    <representation mediaType="text/plain" />
                </response>
            </method>
            <method name="PUT">
                <request>
                    <param name="itemId" type="xsd:string" style="template"/>
                </request>
                <response status="200">
                    <representation mediaType="application/json" />
                </response>
                <response status="201">
                    <representation mediaType="application/json" />
                </response>
                <response status="404">
                    <representation mediaType="text/plain" />
                </response>
                <response status="500">
                    <representation mediaType="text/plain" />
                </response>
            </method>
            <method name="POST">
                <request>
                    <param name="itemId" type="xsd:string"
                     style="template"/>
                </request>
                <response status="200">
                    <representation mediaType="application/json" />
                </response>
                <response status="201">
                    <representation mediaType="application/json" />
                </response>
                <response status="404">
                    <representation mediaType="text/plain" />
                </response>
                <response status="500">
                    <representation mediaType="text/plain" />
                </response>
            </method>
            <method name="DELETE">
                <request>
                    <param name="itemId" type="xsd:string"
                     style="template"/>
                </request>
                <response status="200">
                    <representation mediaType="application/json" />
                </response>
                <response status="404">
                    <representation mediaType="text/plain" />
                </response>
                <response status="500">
                    <representation mediaType="text/plain" />
                </response>
            </method>
        </resource>
</resources>每条路线都详细描述了其公开的所有操作;这样,它们将被符合wadl规范的客户机索引和发现。描述完所有操作后,只需将wadl文件存储在express.js项目的static目录中,并从应用app.use('/catalog/static', express.static('static'));中公开它即可
在本地启动应用后,您的wadl文件将可以在http://localhost:3000/catalog/static/catalog.wadl为客户提供服务。
让我们尝试一下,并将其导入邮递员:
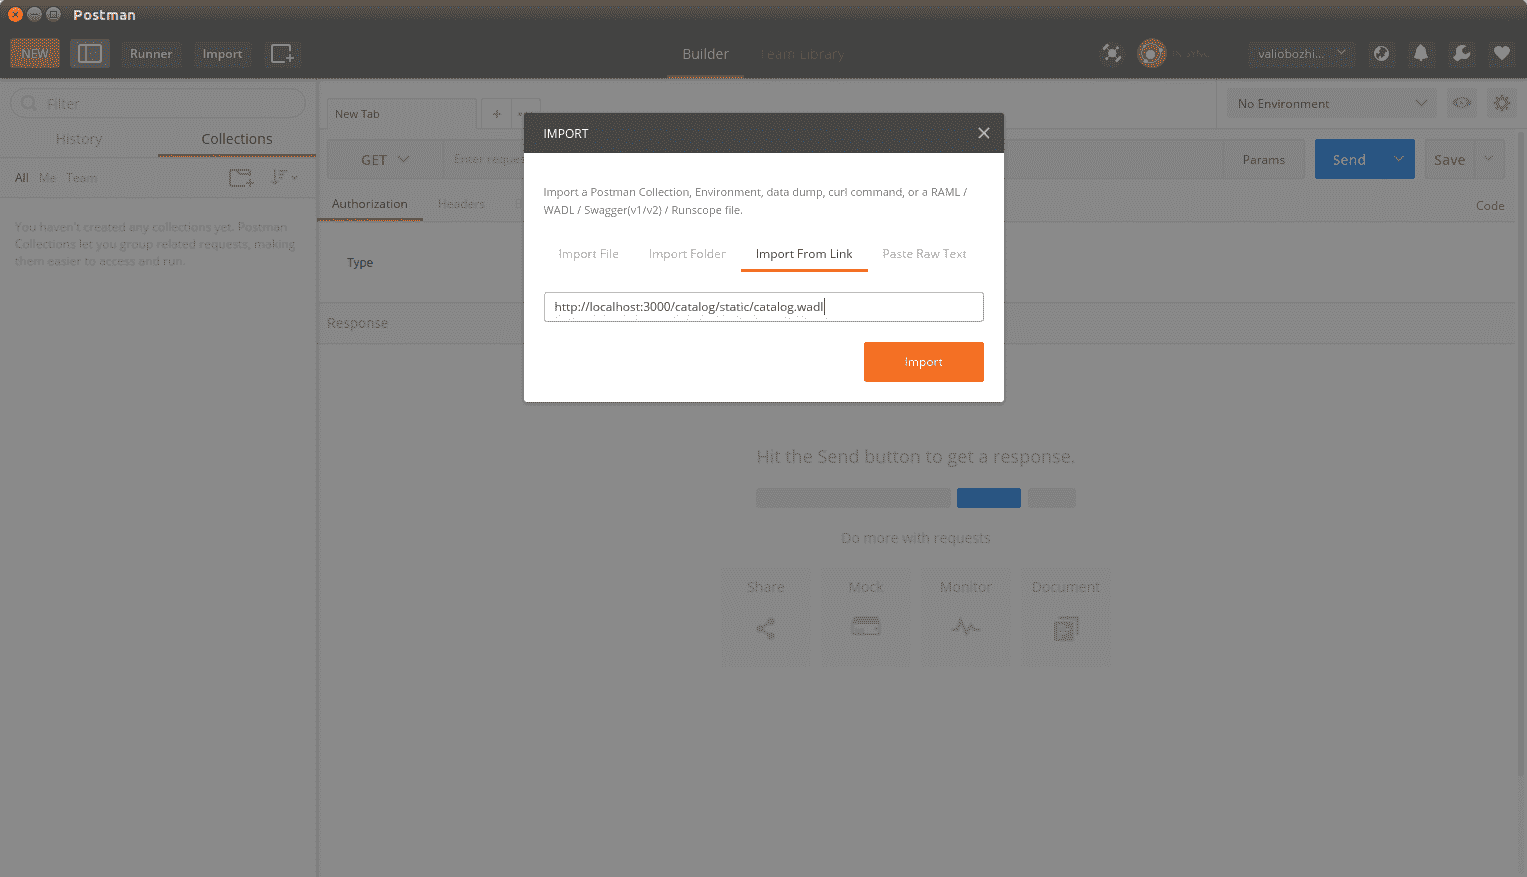
Importing wadl file into Postman. This is a screenshot for Postman. The individual settings are not important here. The purpose of the image is just to show how the window looks.
静态地提供wadl文件将有助于您的应用被搜索引擎索引;这进一步提高了 API 的采用率。
然而,缓慢但肯定的是,wadl正在失去对swagger的控制。JavaScript 支持 REST 的应用的发展导致了发现 REST 服务的非 XML 标准的需求。这就是swagger成为事实上的标准的原因,不仅用于记录 RESTful 服务,而且还用于广泛采用的发现格式。虽然支持 XML 的平台仍然依赖于wadl,但 JavaScript 和其他非 XML 本机平台严重依赖swagger规范,不仅用于描述,还用于发现和使用,而且其采用进展迅速。因此,您应该考虑在 API T5 中描述您的 API,以确保在任何平台上易于采用。以下是如何用swagger方言完整描述操作:
{
    "swagger": "2.0",
    "info": {
      "title": "Catalog API Documentation",
      "version": "v1"
    },
    "paths": {"/catalog/item/{itemId}": {
        "get": {
          "operationId": "getItemV2",
          "summary": "Get an existing item",
          "produces": ["application/json"],
          "responses": {
            "200": {
              "description": "200 OK",
              "examples": {
                "application/json": {
                    "_id": "5a4c004b0eed73835833cc9a",
                    "itemId": "1",
                    "itemName": "Sports Watch",
                    "price": 100,
                    "currency": "EUR",
                    "__v": 0,
                    "categories": [ "Watches", "Sports Watches"]
                  }
              }
            },
            "404": {"description": "404 Not Found"},
            "500": {"description": "500 Internal Server Error"}
          }
        },
        "post": {
          "404": {"description": "404 Not Found"},
          "500": {"description": "500 Internal Server Error"},
          "operationId": "postItemV2",
          "summary": "Creates new or updates existing item",
          "produces": ["application/json"],
          "responses": {
            "200": {
              "itemId": 19,
              "itemName": "Sports Watch 19",
              "price": 100,
              "currency": "USD",
              "__v": 0,
              "categories": [
                "Watches",
                "Sports Watches"
              ]
            },
            "201": {
              "itemId": 19,
              "itemName": "Sports Watch 19",
              "price": 100,
              "currency": "USD",
              "__v": 0,
              "categories": [ "Watches", "Sports Watches"]
            },
            "500": "text/html"
          }
        },
        "put": {
          "404": {"description": "404 Not Found"},
          "500": {"description": "500 Internal Server Error"},
          "operationId": "putItemV2",
          "summary": "Creates new or updates existing item",
          "produces": ["application/json"],
          "responses": {
            "200": {
              "itemId": 19,
              "itemName": "Sports Watch 19",
              "price": 100,
              "currency": "USD",
              "__v": 0,
              "categories": [ "Watches","Sports Watches"]
            },
            "201": {
              "itemId": 19,
              "itemName": "Sports Watch 19",
              "price": 100,
              "currency": "USD",
              "__v": 0,
              "categories": ["Watches", "Sports Watches"]
            },
            "500": "text/html"
          }
        },
        "delete": {
          "404": {"description": "404 Not Found"},
          "500": {"description": "500 Internal Server Error"},
          "operationId": "deleteItemV2",
          "summary": "Deletes an existing item",
          "produces": ["application/json"],
          "responses": {"200": {"deleted": true },
            "500": "text/html"}
        }
      }
   }
  consumes": ["application/json"]
  }
}最后,在swagger.json文件中描述了所有 API 的操作之后,它应该静态公开,类似于wadl文件。由于应用已经有了静态目录的路由,只需将swagger.json文件放在那里,它就可以为消费者服务并促进发现。Swagger主要是一个文档工具,但主要针对开发者;因此,它需要一个使文档易于阅读和理解的前端。有一个npm模块——swagger-ui,它为我们包装了默认的招摇过市前端。我们将在应用中采用它,因此让我们使用包管理器来安装它-npm install swagger-ui。一旦安装,只需一个模块实例和一个静态swagger.json文件实例,并在单独的路径中使用它们:
const swaggerUi = require('swagger-ui-express');
const swaggerDocument = require('./static/swagger.json');

app.use('/catalog/api-docs', swaggerUi.serve, swaggerUi.setup(swaggerDocument));启动应用并在浏览器中请求http://localhost:3000/catalog/api-docs/:
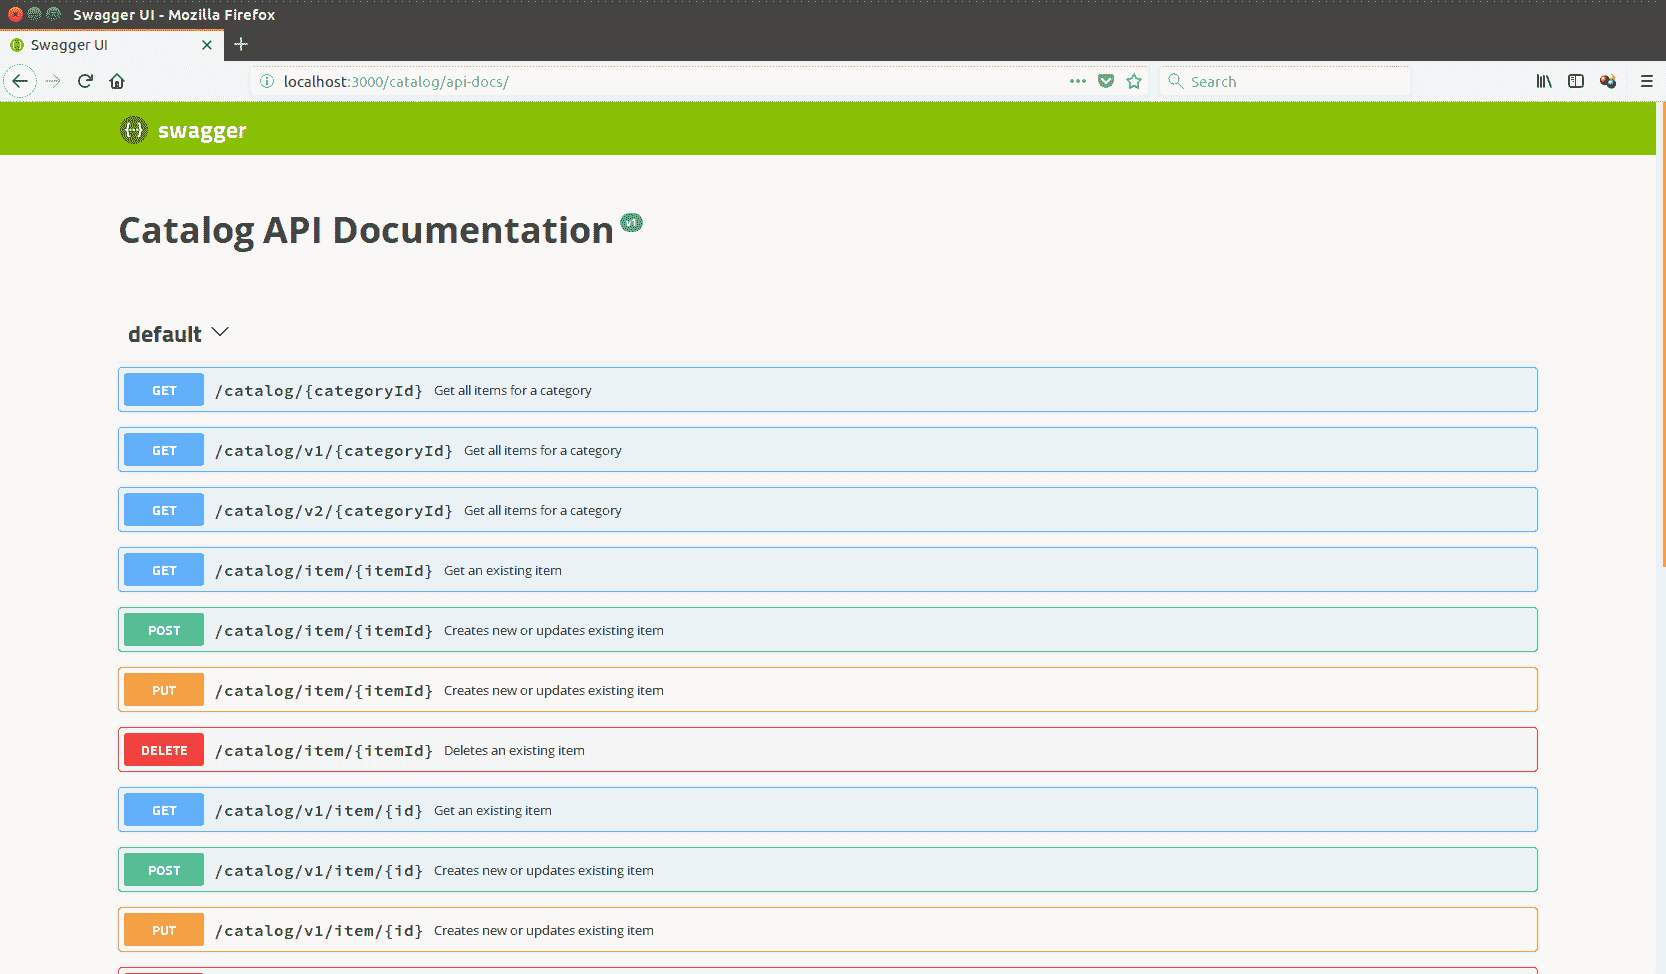
如您所见,swagger ui 模块为您提供了标准的 swagger 前端。
Keep in mind that, as a developer, keeping your API documentation in a shape and up to date is your responsibility.
您是否注意到使用express-generator创建的app.jsexpress 应用实际上是一个导出 express 实例的node.js模块?如果你有,你一定会问自己为什么需要这样做。好的,将 express 实例导出为模块可以使其进行单元测试。我们已经在第 4 章中使用了mocha框架,使用了 NoSQL 数据库,在那里我们为CatalogItem模块开发了一个单元测试。我们将再次使用mocha并围绕 API 公开的每个操作包装一个单元测试。要对 express 应用进行单元测试,我们需要执行以下操作:
- 需要一个带有路由的
express.js应用实例,利用其作为模块导出 - 在单元测试环境中启动
express.js实例 - 通过测试库调用其操作,并对结果进行断言
- 最后,执行
npm test命令触发单元测试
在继续和实现 mocha 测试之前,我们需要一个库,用于从单元测试发送 HTTP 请求;我们将使用chai模块。它提供了发送 HTTP 请求的方便功能,还绑定了should.js断言库来验证预期结果。要安装chai,只需执行npm install chai及其npm install chai-httpHTTP 插件,我们就可以开始单元测试了!
与任何其他摩卡测试一样,我们必须执行给定步骤:
- 描述每个测试用例
- 准备测试夹具;这次,我们将使用
chai-http调用 rest 操作 - 对返回的结果进行断言
包含创建、访问和删除资源操作的基本单元测试如下所示:
var expressApp = require('../../app');
var chai = require('chai');
var chaiHttp = require('chai-http');
var mongoose = require('mongoose');
var should = chai.should();

mongoose.createConnection('mongodb://localhost/catalog-test');

chai.use(chaiHttp);

describe('/get', function() {
  it('get test', function(done) {
    chai.request(expressApp)
      .get('/catalog/v2')
      .end(function(error, response) {
        should.equal(200  , response.status);
        done();
      });
    });
  });

describe('/post', function() {
     it('post test', function(done) {
       var item ={
          "itemId":19,
          "itemName": "Sports Watch 10",
          "price": 100,
          "currency": "USD",
          "__v": 0,
          "categories": [
              "Watches",
              "Sports Watches"
          ]
      };
     chai.request(expressApp)
           .post('/catalog/v2')
           .send(item )
           .end(function(err, response){
               should.equal(201, response.status)
             done();
           });
     });
   });

   describe('/delete', function() {
        it('delete test', function(done) {
          var item ={
             "itemId":19,
             "itemName": "Sports Watch 10",
             "price": 100,
             "currency": "USD",
             "__v"cd .: 0,
             "categories": [
                 "Watches",
                 "Sports Watches"
             ]
         };
        chai.request(expressApp)
              .delete('/catalog/v2/item/19')
              .send(item )
              .end(function(err, response){
                  should.equal(200, response.status)
                done();
              });
        });
});将此文件存储在项目的测试目录中;该目录默认定义为package.json中的测试目录,因此要运行单元测试,只需执行npm test:
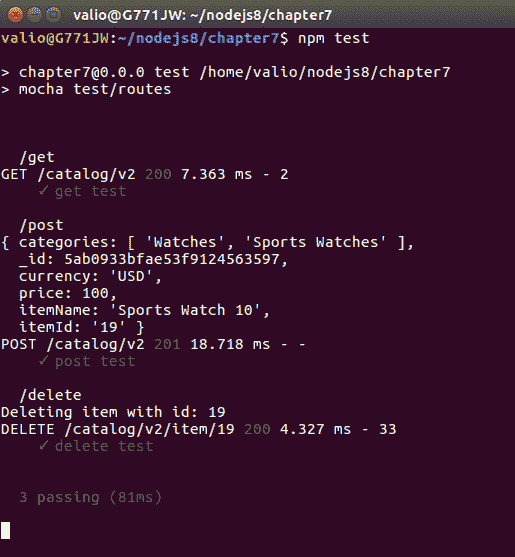
祝贺现在,单元测试已经覆盖了您的 API,请注意,测试并没有模仿任何东西!他们正在运行 express 应用;完全相同的方式,应用将在生产时运行,确保稳定性和向后兼容性!目前,单元测试仅针对状态代码进行断言。花点时间研究它,并进一步扩展它们,以反对响应体。这将是一个很好的练习。
不久前,RESTfulAPI 开始疯狂,几乎所有人都认为 RESTfulAPI 是正确的选择,是吗?有了Linux容器,切换到 REST 方法只是成功的一半。目前,每个人都从集装箱中受益。它们提供了更好、更快、更便宜的开发和运营模式,但微服务只是 RESTful 服务的又一个热门术语吗?嗯,不,一点也不;REST 服务只是微服务的基础。
微服务是小型的、独立的过程,它公开了一个简单的接口,允许与它们通信并构建复杂的应用,而不依赖于库人工制品。这些服务类似于小型构建块,高度解耦,专注于完成一项小型任务,促进了系统构建的模块化方法。
REST 强调资源及其自然处理,而微服务体系结构则强调简单性、故障安全性和隔离性。RESTful API 在每个操作中没有单独的状态;要么整个 API 可用,要么完全关闭。微服务试图解决这个问题,提供在单独的容器或容器子集上承载每个操作的方法,确保最大的容错性和灵活性。
微服务只需提供一个简单的操作,仅此而已。这使开发人员能够按照他们想要的方式对它们进行分组和使用。在处理微服务时,策略处理、治理、安全性和监视通常超出范围,主要是因为它们需要某种上下文。一般来说,将上下文绑定到服务会增加其依赖性并降低其可重用性;这就是为什么微服务将上下文留给 API 管理网关的原因,API 管理网关允许您创建微服务的组合,然后将策略绑定到它并监视网关上的每个活动。这种分布开发模型使程序员能够快速增长微服务集合,而不必考虑治理和安全等复杂主题。
微服务世界是一个游戏规则改变者,受益于 Linux 容器。目前,所有类似于 AWS 和 Azure 的基于云的产品都提供微服务托管。
在本章中,我们稍微避开了Express.js相关主题。相反,我们专注于如何通过提供最新的 API 文档以及 API 本身来实现代码库的产品化。我们让我们的应用投资于预防措施,通过实现更复杂的单元测试来确保向后兼容性,这些单元测试的目标实际上接近于实际实现。最后,我们决定展望未来,这一切都与微服务有关。确保你把这个热门话题放在你的技能清单上;它将不可避免地在不久的将来演变,你对它了解得越多越好!