- Objective-C入门教程
- iOS入门教程
- UI控制器
- 容器视图
- 内容视图
- 视图控制器
- Tab Bar接口
- 导航栏
- 安装库
- 请求与解析
- 数据保存
- 多线程
 《iOS入门教程》
Swift - CollectionView

CollectionView是一个对象,该对象以可自定义的布局显示数据项的有序集合。它以网格布局的形式显示数据。 Collectionview是UICollectionView类的实例,该类继承了UIScrollView,本教程稍后将对此进行介绍。
class UICollectionView : UIScrollView
当无涯教程将collectionview添加到应用程序界面时,iOS应用程序负责管理与collectionview相关联的数据。 CollectionView对象的工作原理类似于tableview,因为它从DataSource对象获取数据。
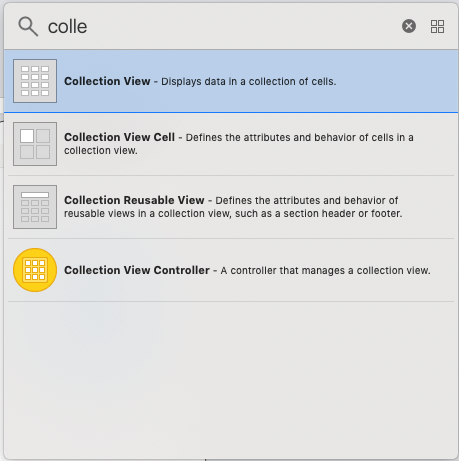
将CollectionView添加到界面构建器
1.在对象库中搜索CollectionView并将结果拖动到Storyboard。
2.在ViewController中创建CollectionView的连接。
3.在ViewController中实现UICollectionViewDataSource和UICollectionViewDelegate,并将委托和数据源对象分配给self。
collectionView.delegate = self
collectionView.dataSource = self
4.定义Collection View的委托和数据源方法以绘制Collection View布局。
UICollectionViewCell
它类似于tableview中的UITableViewCell。 CollectionView使用单元格显示该项目。数据源方法使用可重用的标识符配置UICollectionView单元。如下所示,使用CollectionViewCell配置一个单元。
func collectionView(_ collectionView: UICollectionView, cellForItemAt indexPath: IndexPath) -> UICollectionViewCell {
        let cell = collectionView.dequeueReusableCell(withReuseIdentifier: "cell", for: indexPath) as! MyCollectionviewCell
        cell.myView.backgroundColor = itemArr[indexPath.row]
        return cell
    }
CollectionView也可以使用视图来呈现数据。视图是使用UICollectionViewDelegate方法配置的页头和页脚。
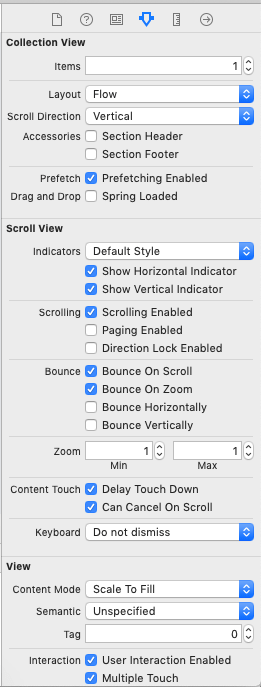
给CollectionView单元格的属性显示在以下图像中。
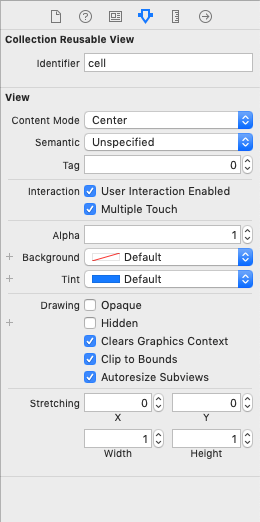
给出的属性在以下图像中显示。
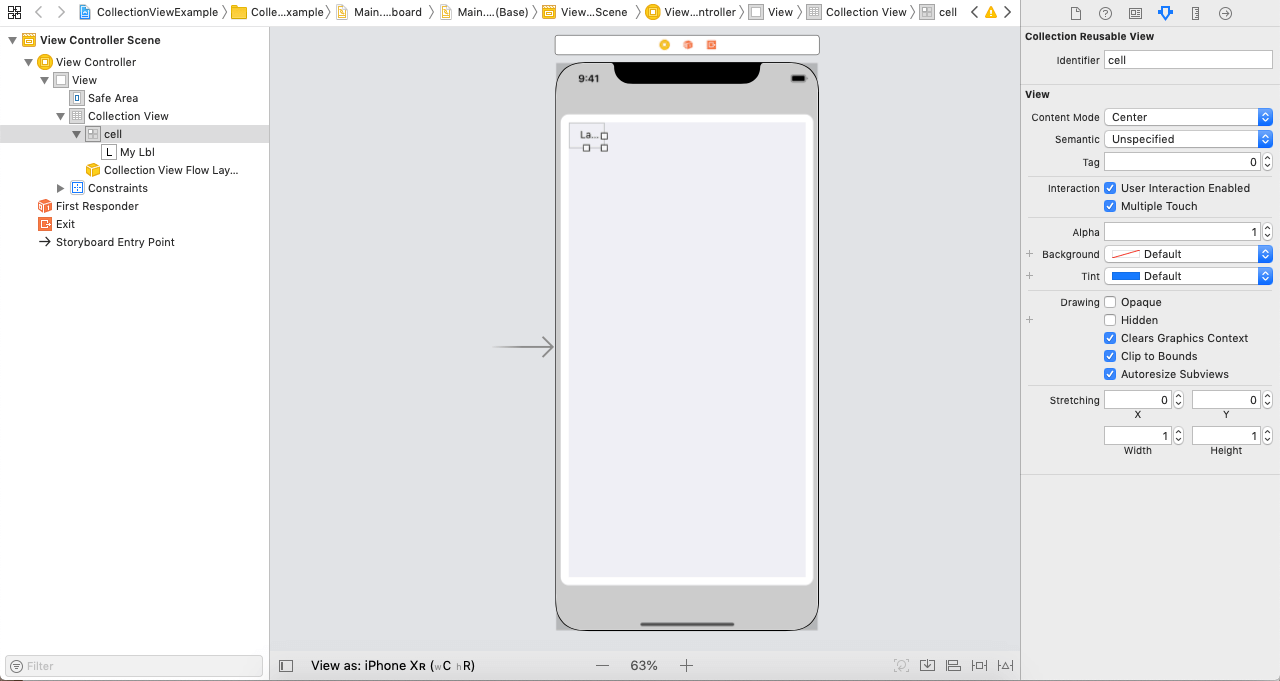
为项目创建的接口构建器如下所示。
ViewController.swift
import UIKit class ViewController: UIViewController { @IBOutlet weak var collectionView: UICollectionView! var itemArr = Array <string>() override func viewDidLoad() { super.viewDidLoad() //Do any additional setup after loading the view. collectionView.delegate = self collectionView.dataSource = self for i in 1...60{ itemArr.append(i.description) } } } extension ViewController : UICollectionViewDelegate{ } extension ViewController : UICollectionViewDataSource{ func collectionView(_ collectionView: UICollectionView, numberOfItemsInSection section: Int) -> Int { return itemArr.count } func collectionView(_ collectionView: UICollectionView, cellForItemAt indexPath: IndexPath) -> UICollectionViewCell { let cell = collectionView.dequeueReusableCell(withReuseIdentifier: "cell", for: indexPath) as! MyCollectionViewCell cell.myLbl.text = itemArr[indexPath.item] cell.myLbl.layer.borderColor = UIColor.blue.cgColor cell.myLbl.textAlignment = .center cell.myLbl.layer.cornerRadius = 10 cell.myLbl.layer.borderWidth = 2 return cell } } </string>
mycollectionviewcell.swift
import UIKit


class MyCollectionViewCell: UICollectionViewCell {

    @IBOutlet weak var myLbl: UILabel!

}
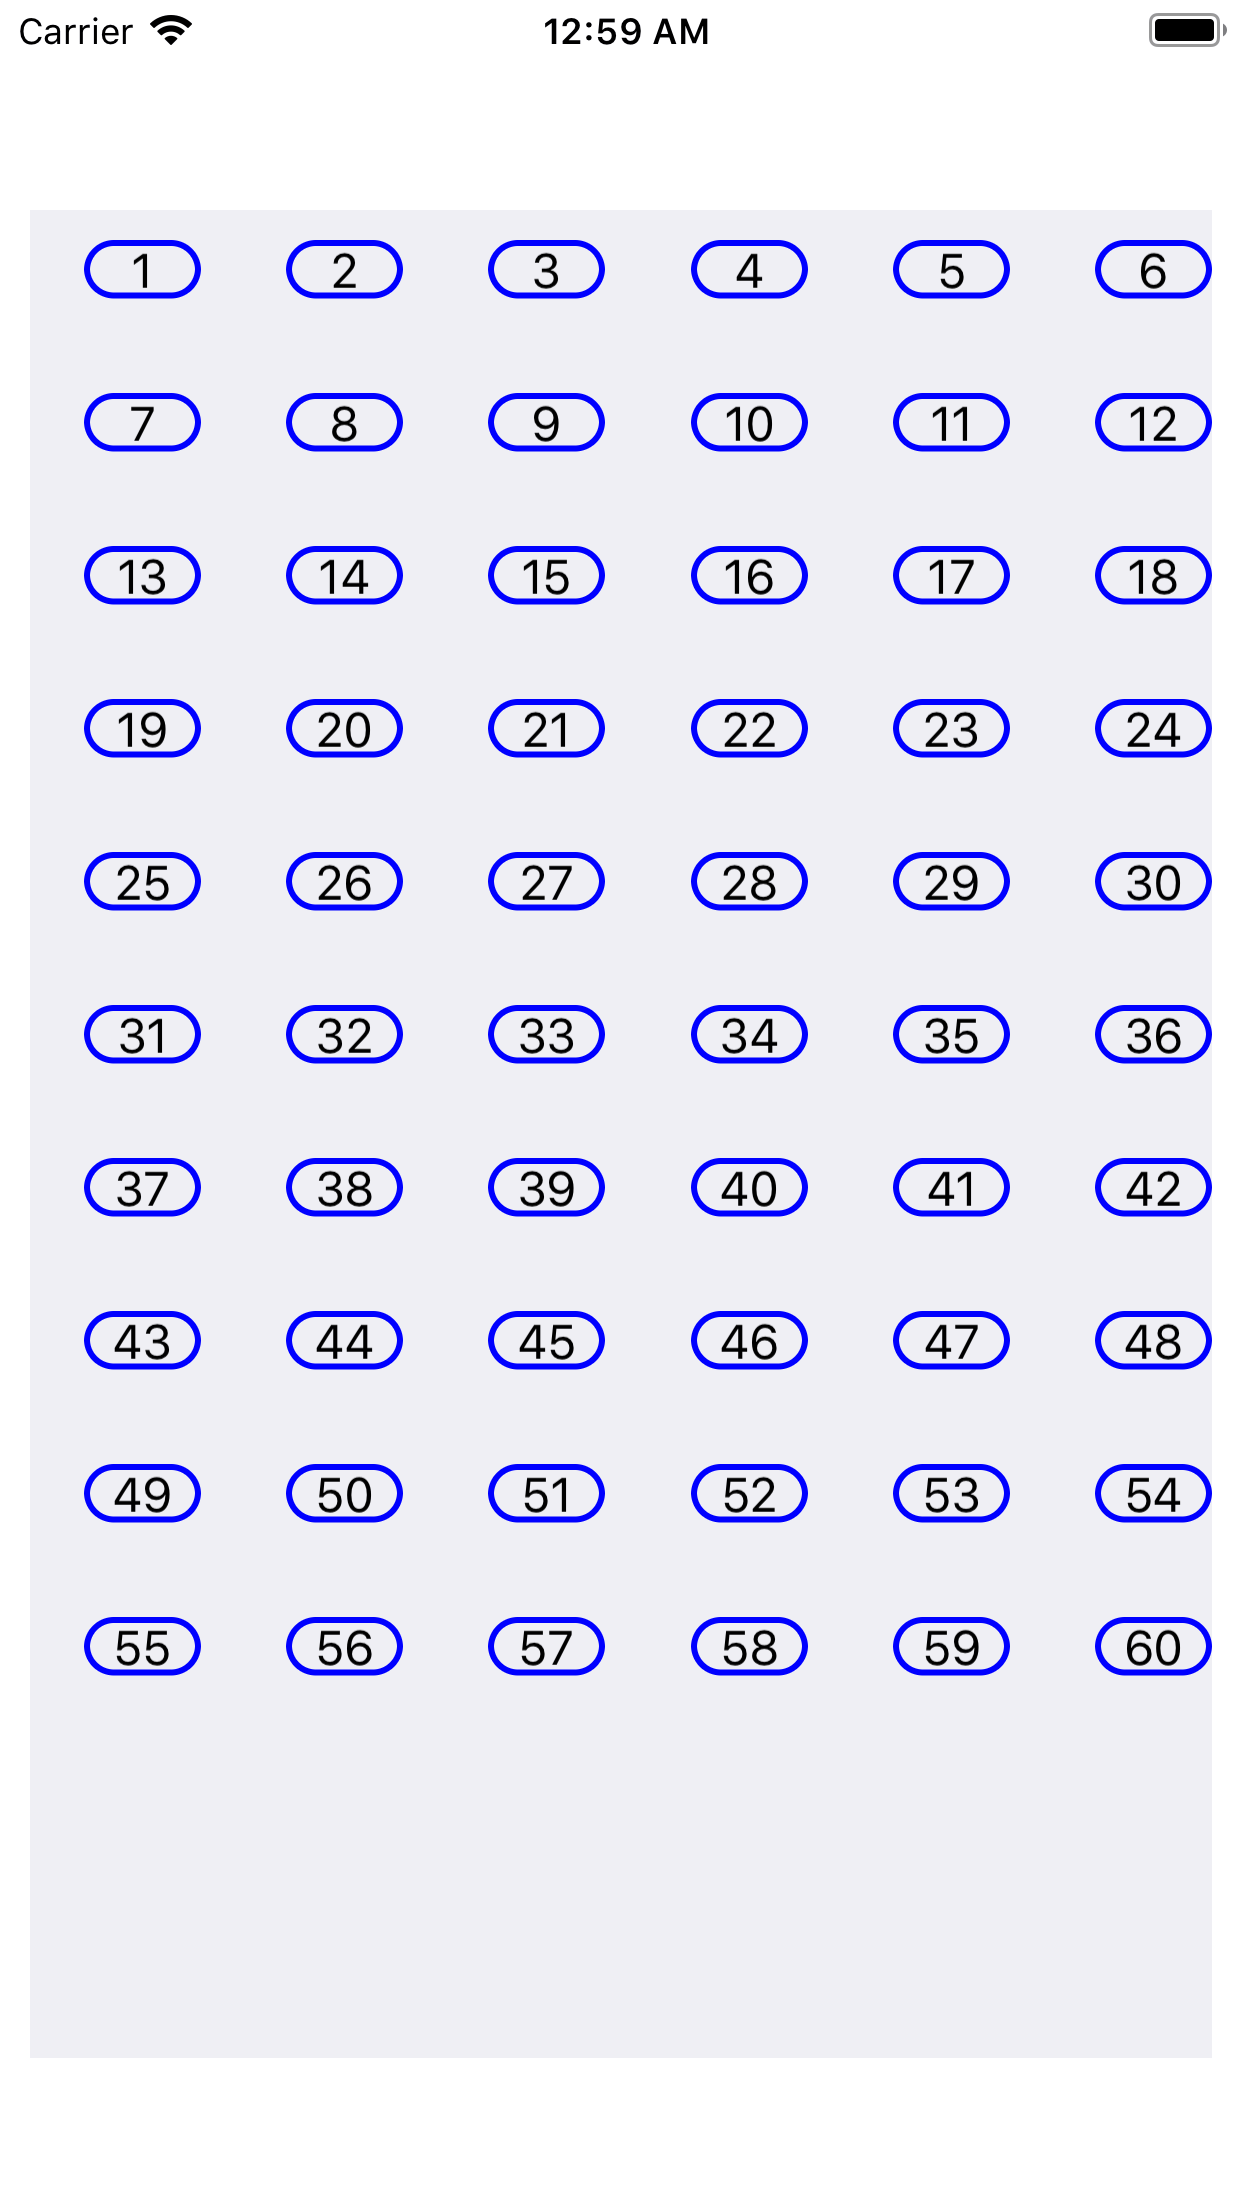
输出:
配置单元格
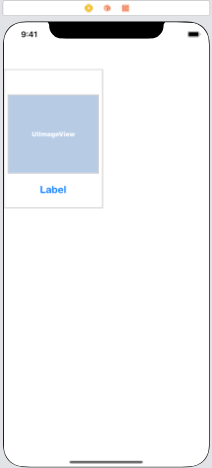
现在,无涯教程需要配置将显示屏幕上实际项目的原型单元格。原型单元格将包含图像视图以显示产品图像和标签以显示图像的名称。
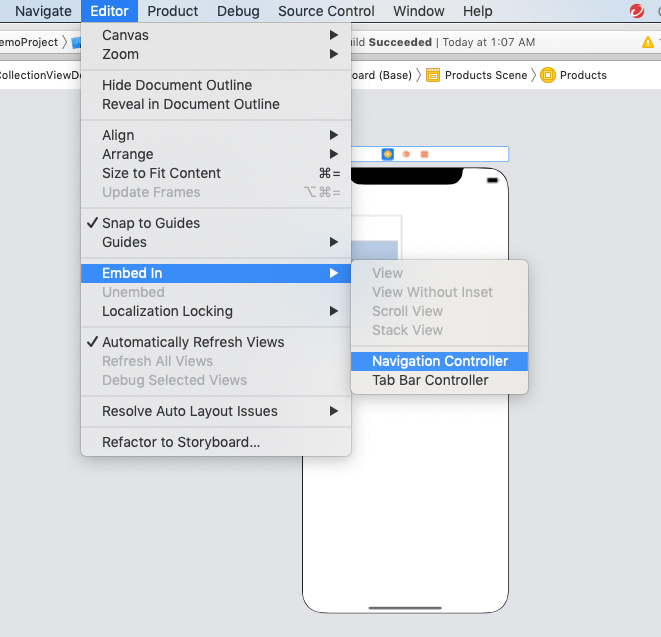
要将ViewController嵌入导航控制器,无涯教程将选择"Navigation Controller",然后单击"Editor",然后选择"Embed In",如下图所示。
链接:https://www.learnfk.comhttps://www.learnfk.com/ios/ios-collectionview.html
来源:LearnFk无涯教程网
当无涯教程将视图控制器嵌入导航控制器时,默认情况下,有一个导航栏将在所有视图控制器上显示。无涯教程可以设置导航栏的标题。
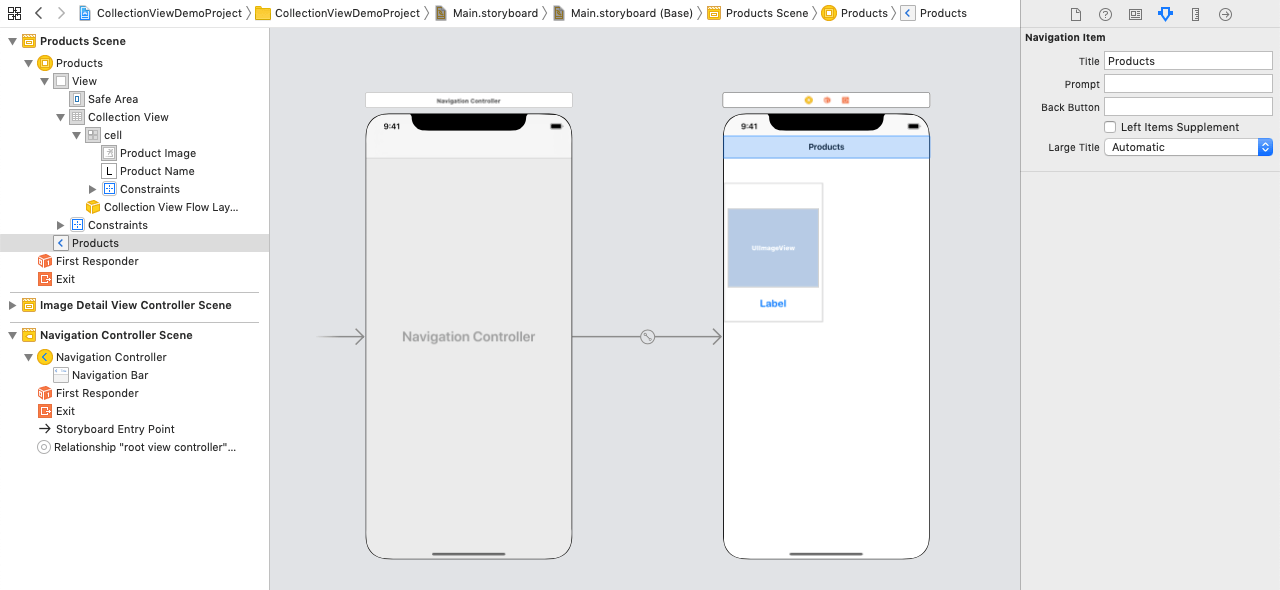
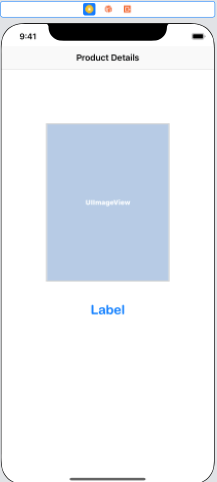
对于界面Builder,无涯教程需要一个ViewController,它可以显示有关产品的详细信息。为此,无涯教程将ViewController添加到接口构建器中,并将类ImageDetailViewController分配给该ViewController。
对于imageDetailViewController,无涯教程将ImageView和标签添加到ViewController。无涯教程还将这个视图控制器嵌入到无涯教程的导航控制器中,并将导航栏标题设置为Product Details。
当在CollectionView中选择一个项目时,将显示ImageDetailViewController。无涯教程将在collectionview的数据源方法中编写以下代码
let imageDetailVC = self.storyboard?.instantiateViewController(withIdentifier: "ImageDetailViewController") as! ImageDetailViewController

        imageDetailVC.img = imgArr[indexPath.row]
        imageDetailVC.name = lblArr[indexPath.row]
        self.navigationController?.pushViewController(imageDetailVC, animated: true)
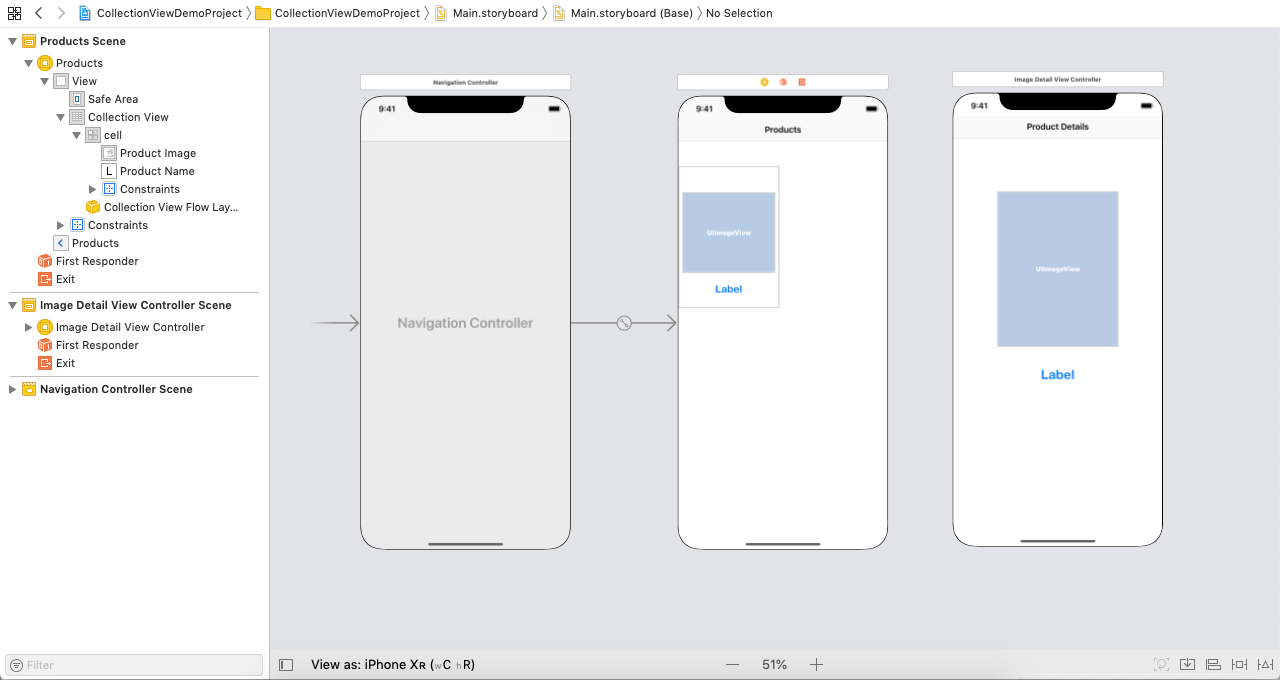
在演示项目中构建器显示在以下图像中。
ViewController.swift
import UIKit class ViewController: UIViewController { var imgArr = Array<uiimage>() var lblArr = Array<string>() @IBOutlet weak var collectionView: UICollectionView! override func viewDidLoad() { super.viewDidLoad() //加载视图后进行任何其他设置。 collectionView.delegate = self collectionView.dataSource = self for i in 1...10{ lblArr.append("Watch"+i.description) } imgArr = [ imageLiteral(resourceName: "watch1"), imageLiteral(resourceName: "watch1"), imageLiteral(resourceName: "watch1"), imageLiteral(resourceName: "watch1"), imageLiteral(resourceName: "watch1"), imageLiteral(resourceName: "watch1"), imageLiteral(resourceName: "watch1"), imageLiteral(resourceName: "watch1"), imageLiteral(resourceName: "watch1"), imageLiteral(resourceName: "watch1")] } } extension ViewController:UICollectionViewDataSource{ func collectionView(_ collectionView: UICollectionView, numberOfItemsInSection section: Int) -> Int { return lblArr.count } func collectionView(_ collectionView: UICollectionView, cellForItemAt indexPath: IndexPath) -> UICollectionViewCell { let cell = collectionView.dequeueReusableCell(withReuseIdentifier: "cell", for: indexPath) as! DemoCollectionViewCell cell.productImage.image = imgArr[indexPath.row] cell.productName.text = lblArr[indexPath.row] return cell } func collectionView(_ collectionView: UICollectionView, didSelectItemAt indexPath: IndexPath) { let imageDetailVC = self.storyboard?.instantiateViewController(withIdentifier: "ImageDetailViewController") as! ImageDetailViewController imageDetailVC.img = imgArr[indexPath.row] imageDetailVC.name = lblArr[indexPath.row] self.navigationController?.pushViewController(imageDetailVC, animated: true) } } extension ViewController:UICollectionViewDelegate{ }
ImageDetailViewController
import UIKit


class ImageDetailViewController: UIViewController {

    @IBOutlet weak var productImage: UIImageView!

    @IBOutlet weak var productName: UILabel!

    var img:UIImage!
    var name:String!

    override func viewDidLoad() {
        super.viewDidLoad()

       //Do any additional setup after loading the view.
        productName.text = name
        productImage.image = img
    }
}
DemoCollectionViewCell.swift
import UIKit


class DemoCollectionViewCell: UICollectionViewCell {

    @IBOutlet weak var productImage: UIImageView!

    @IBOutlet weak var productName: UILabel!
}
输出:
祝学习愉快!(内容编辑有误?请选中要编辑内容 -> 右键 -> 修改 -> 提交!)