- 入门教程
 《GraphQL入门教程》
GraphQL - 应用示例

在本章中,无涯教程将创建一个简单的API,该API返回问候消息HelloWorld,并使用GraphiQL访问它。
本示例基于NodeJS,Express和Apollo服务器。将学习将所有概念与以下步骤放在一起-
步骤1 - 设置Express
ExpressJS是一个Web应用程序框架,可帮助构建网站和Web应用程序。在此示例中,将在Express框架之上构建GraphQL API。
下一步是创建一个文件夹 hello-world-server 并从终端导航到相同的文件夹,添加package.json,并为包命名。由于此包仅在内部使用,因此可以将其声明为私有。
{
   "name":"hello-world-server",
   "private":true
}
安装Express服务器的依赖项,如下所示-
C:\Users\Admin\hello-world-server>npm install express body-parser cors
body-parser 是一个中间件程序包,可帮助Express有效地处理HTTP Post请求。 cors 是另一个处理跨域资源共享的中间件软件包。
在项目文件夹中创建一个 server.js 文件,并在其中输入以下内容-
const bodyParser=require('body-parser')
   const cors=require('cors')
   const express=require('express')
   const port=process.env.PORT|| 9000
   const app=express()

   //Mohtashim
   app.use(bodyParser.json() , cors())
   app.listen(port, () =>  console.log(`server is up and running at ${port}`)
要验证Express服务器是否已启动并正在运行,请在终端窗口中执行以下代码-
C:\Users\Admin\hello-world-server>node server.js
在服务器控制台中显示以下输出。这表明快递服务器正在端口9000上运行。
server is up and running at 9000
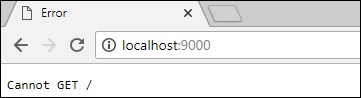
如果打开浏览器并键入 http://localhost:9000 ,将显示以下屏幕-
要停止服务器,请按 Ctrl + C 。
步骤2 - 安装服务器
现在已经配置了Express,下一步是下载以下GraphQL依赖项-
- graphql
- graphql-tool
- apollo-server-express@1
将使用Apollo server v1.0,因为它是一个稳定的版本。键入以下命令以安装这些依赖项-
C:\Users\Admin\hello-world-server>npm install graphql graphql-tools apollo-server-express@1
无涯教程可以通过检查之前创建的 package.json 文件来验证这些依赖项是否已成功安装。
{
   "name": "hello-world-server",
   "private": true,

   "dependencies": {
      "apollo-server-express": "^1.4.0",
      "body-parser": "^1.18.3",
      "cors": "^2.8.4",
      "express": "^4.16.3",
      "graphql": "^0.13.2",
      "graphql-tools": "^3.1.1"
   }
}
步骤3 - 定义Schema
GraphQL模式定义可以从服务中获取哪种对象 以及其具有的字段。可以使用 GraphQL模式定义语言定义模式。在 server.js 文件中添加以下代码片段-
//添加类型定义
const typeDefinition=`
   type Query  {
      greeting: String
   }
在此,查询包含一个 greeting 属性,该属性返回一个 string 值。
步骤4 - 创建一个解析器
创建解析器的第一步是添加一些代码来处理问候请求字段。这是在解析器中指定的。解析程序函数的结构必须与架构匹配。在 server.js 文件中添加以下代码段。
//添加解析器
const  resolverObject={
   Query : {
      greeting: () => 'Hello GraphQL  From LearnFk !!'
   }
}
第二步是使用 makeExecutableSchema 绑定Schema和解析器。此函数在graphql-tools模块中预定义。在 server.js 文件中添加以下代码段。
const {makeExecutableSchema}=require('graphql-tools')
const schema=makeExecutableSchema({typeDefs:typeDefinition, resolvers:resolverObject})
步骤5 - 定义路由
在 server.js 文件中添加以下代码片段-
const {graphqlExpress, graphiqlExpress}=require('apollo-server-express')

   //为 graphql 和 graphiql 创建路由
   app.use('/graphql',graphqlExpress({schema}))

   app.use('/graphiql',graphiqlExpress({endpointURL:'/graphql'}))
graphqlExpress 函数有助于注册路由 http://localhost:9000/graphql , ReactJS应用程序可以使用该端点来查询数据,同样, graphqliExpress 函数有助于注册路由 http://localhost:9000/graphiql , GraphiQL浏览器客户端将使用它来测试API。
完整的server.js代码如下所示-
const bodyParser=require('body-parser')
const cors=require('cors')
const express=require('express')
const port=process.env.PORT||9000
const app=express()

app.use(bodyParser.json() , cors())
const typeDefinition=`
type Query  {
   greeting: String
}`
const  resolverObject={
   Query : {
      greeting: () => 'Hello GraphQL  From LearnFk !!'
   }
}
const {makeExecutableSchema}=require('graphql-tools')

const schema=makeExecutableSchema({typeDefs:typeDefinition, resolvers:resolverObject})

const {graphqlExpress,graphiqlExpress}=require('apollo-server-express')

app.use('/graphql',graphqlExpress({schema}))
app.use('/graphiql',graphiqlExpress({endpointURL:'/graphql'}))
app.listen(port, () =>  console.log(`server is up and running ${port}`))
步骤6 - 启动应用程序
使用Node.js执行 server.js ,如下所示-
C:\Users\Admin\hello-world-server>node server.js
步骤7 - 测试GraphQL API
打开浏览器,然后输入 http://localhost:9000/graphiql 。在GraphiQL的查询标签中,输入以下内容-
{
   greeting
}
来自服务器的响应如下-
{
   "data": {
      "greeting": "Hello GraphQL From LearnFk !!"
   }
}
下图说明了响应-
链接:https://www.learnfk.comhttps://www.learnfk.com/graphql/graphql-example.html
来源:LearnFk无涯教程网

注意-请确保使用Apollo Server 1.0版。
祝学习愉快!(内容编辑有误?请选中要编辑内容 -> 右键 -> 修改 -> 提交!)
Spring Boot与Kubernetes云原生微服务实践 -〔杨波〕